

Importing media files
Let’s have a look at how we can import image sequences, video files, and other types of files. This importing activity can be done in a variety of ways:
- Go to File | Import. You can import a single file, multiple files, or an existing Adobe After Effects project.
- The alternative option is to just double-click in the Project tab group area to open the Import panel.
- Drag-and-drop files in the Project panel to import the media files.
- You can use the Cmd + I (Mac) or Ctrl + I (Windows) shortcut.
Now open the Import window to import an image sequence:
- In the Project panel, which is usually located in the upper-left corner of the interface, right-click anywhere and choose Import | File from the drop-down menu.
- Locate the fire image sequence: Go to the
Image Sequencefolder in the (footage) folder ofLesson_01and select the first image in the sequence, which should be named fire_00000.jpg. Make sure the Image Sequence option is checked.
We’re importing the provided fire image sequence, which has 24 frames per second (FPS). However, Adobe After Effects imports this sequence using the default FPS value set in your preferences. In the Project window, at the top, you can find the information about the imported file’s frame rate.
What is FPS?
FPS in After Effects refers to the number of individual frames or images displayed per second in a composition. It determines how smooth the motion appears in your animation or video project.
When you create a composition in After Effects, you can set the frame rate to a specific value. Common frame rates used in video production include 24, 30, and 60 FPS. The frame rate you choose depends on the standard you’re working with (such as film or television standards) and the desired look and feel of your project.
A higher frame rate, such as 60 FPS, results in smoother motion but can require more computational resources. A lower frame rate, such as 24 FPS, is often used for a cinematic look and is a standard frame rate for film.
As you can see in the following figure, the image sequence has been imported as 30 FPS because that’s the default frame rate in After Effects:
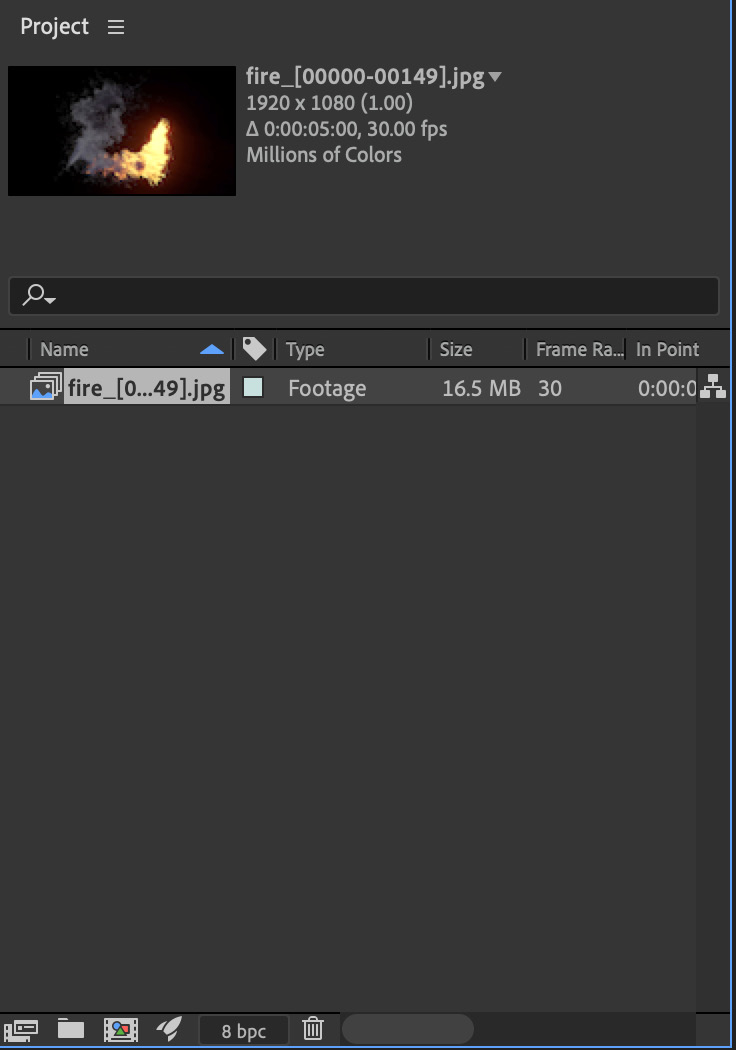
Figure 1.6: The Project panel with the imported fire image sequence
Now, we have two options for setting the frame rate of the imported sequence: one is to utilize the Interpret Footage option, and the other is to customize Preferences. The alternative approach can be used to select the preferred import settings, which includes the default frame rate for importing files.
Here’s the first method:
- Right-click on the file or sequence you want to interpret.
- Select Interpret Footage | Main.
- Here, by altering the input value of Assume the frame rate option to your preferred FPS, you can change the image sequence’s frame rate.
- Click OK, and you’ll notice that the file’s frame rate has changed.
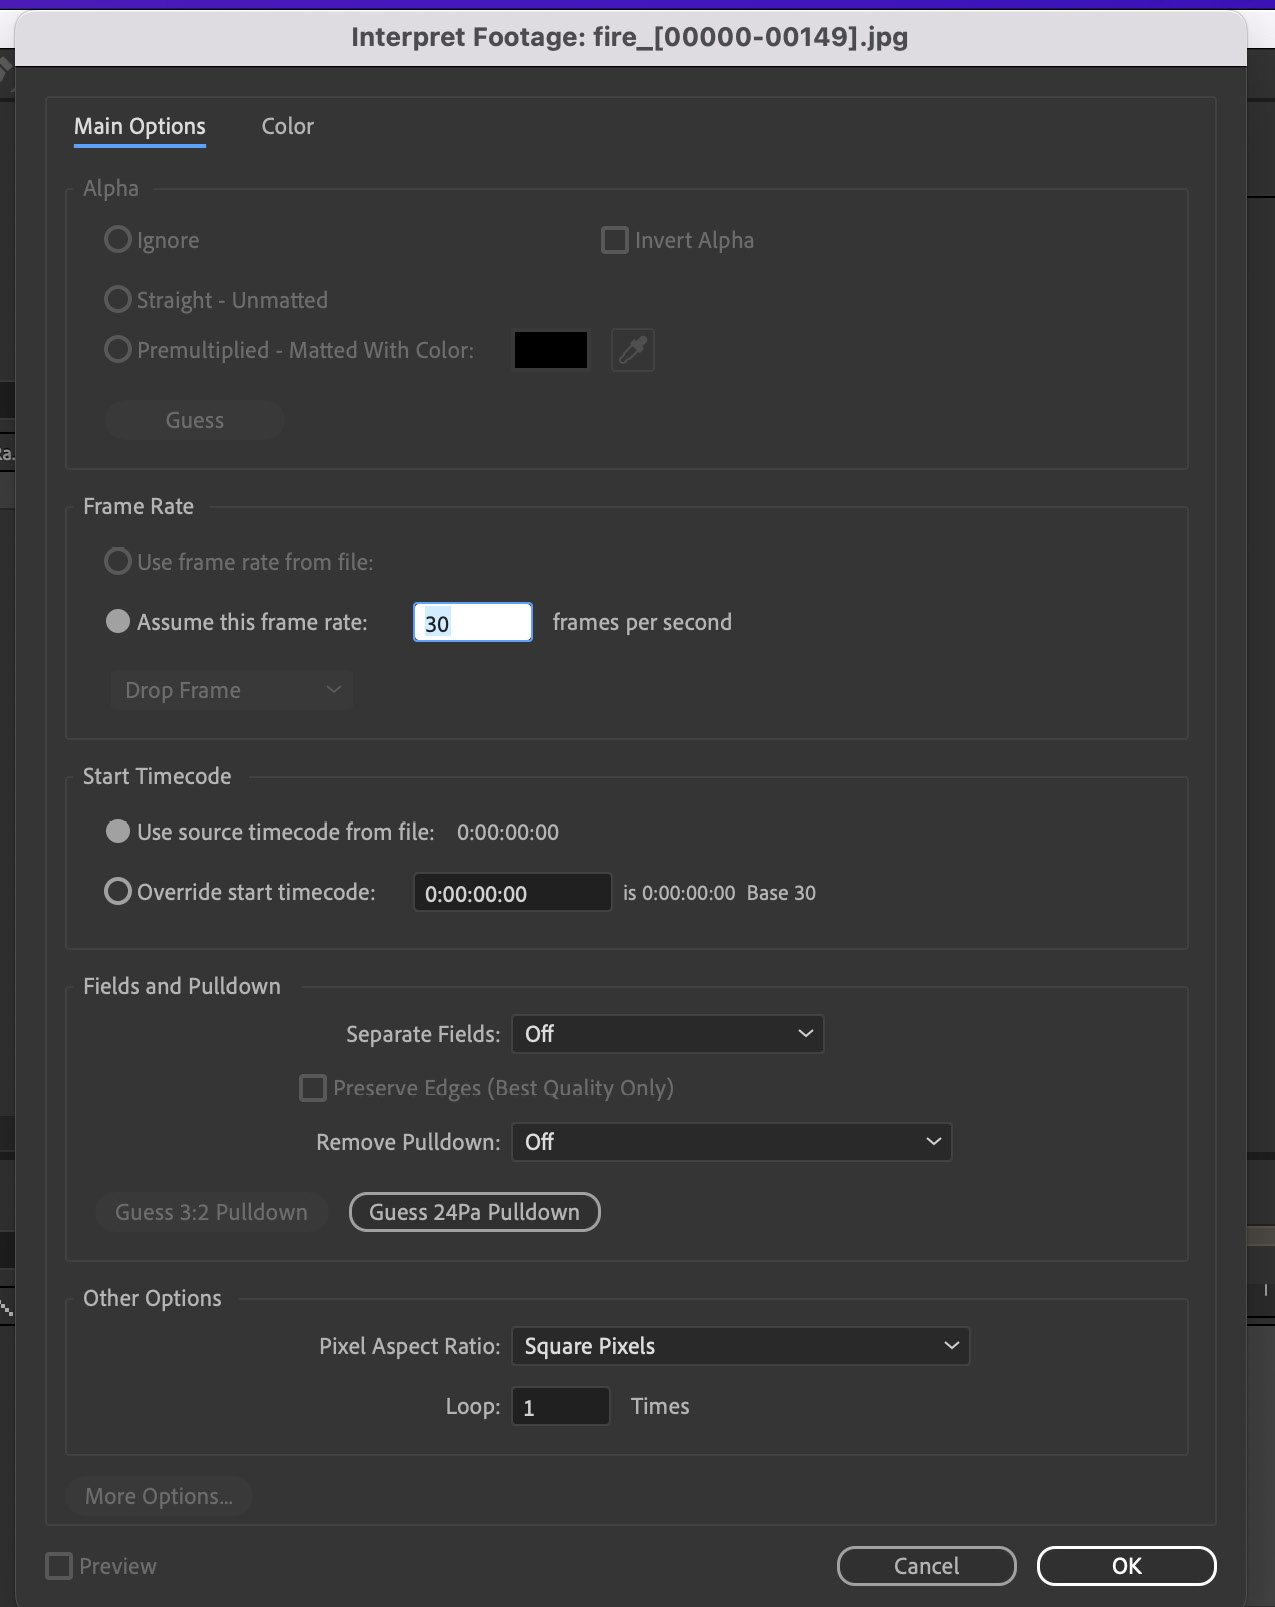
Figure 1.7: The Interpret Footage dialog box of the Fire image sequence
The second technique to accomplish the same task is to use Preferences. This method is particularly useful if you want to import files at a specific frame rate on a regular basis:
- Go to Preferences | Import | Sequence Footage.
- You can set the chosen frame rate for your importing option to any value that you require. This ensures that every file sequence you import is imported at the frame rate that the user specifies for future imports.
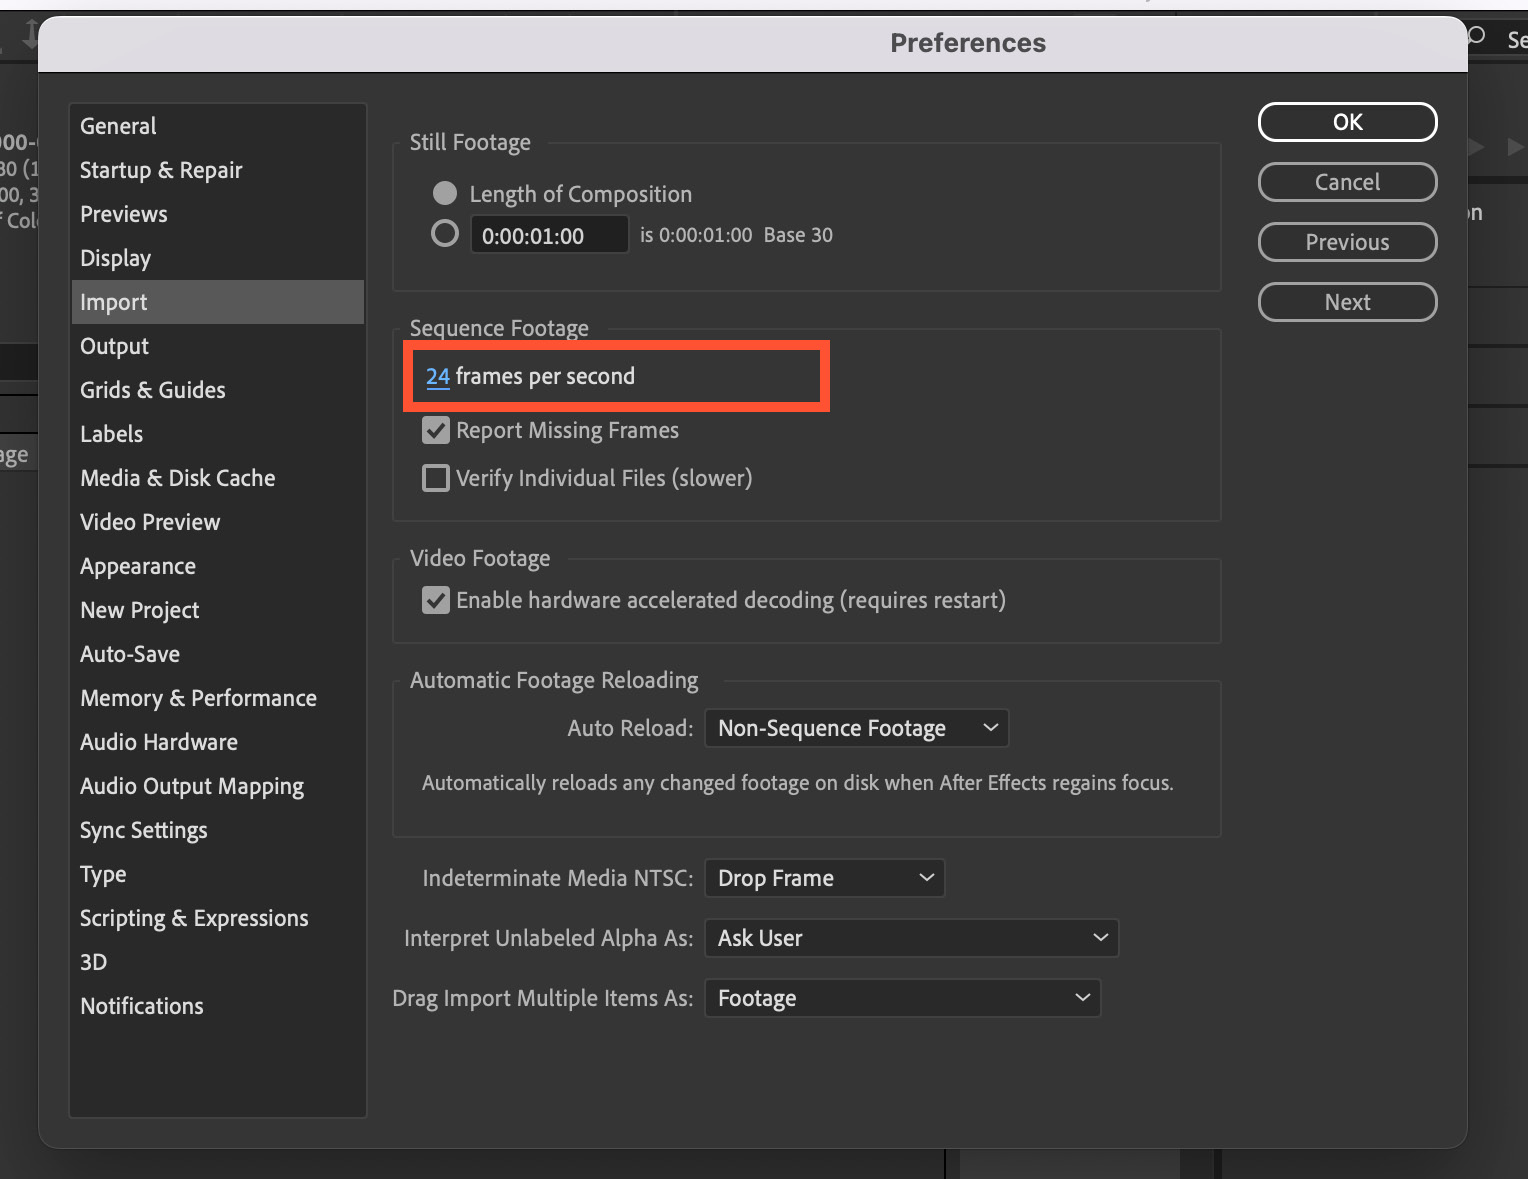
Figure 1.8: The Preferences window, specifically the Import settings
Now delete the previously imported fire image sequence and re-import the fire image sequence again in After Effects. Now, it should import the image sequence at 24 FPS instead of 30 FPS.
Before we jump into the next section, import earth.mp4 from the (footage) folder given in Lesson_01.
In the next section, we will cover working with compositions and how to add keyframes in the timeline.