Let's take a look at how we can view CPU, RAM, and swap info on a Linux system.
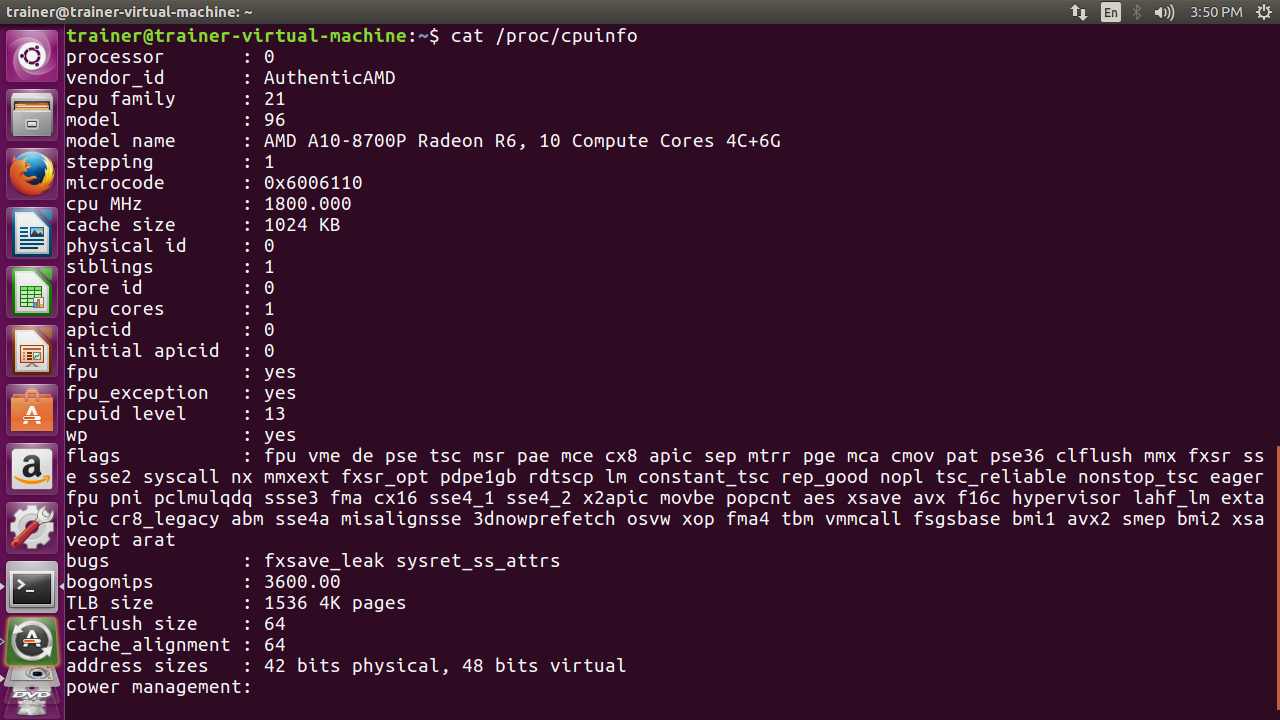
First, we will focus our attention on gaining information on a CPU, so we will look at the /proc/cpuinfo file. We can garner detailed information about the CPU, ranging from the vendor ID, the CPU family, the model name, the CPU rate in MHZ, its cache size, and the number of cores, to name a few. Here is an excerpt from running the cat command alongside /proc/cpuinfo:
Some more information is given here about the CPU:
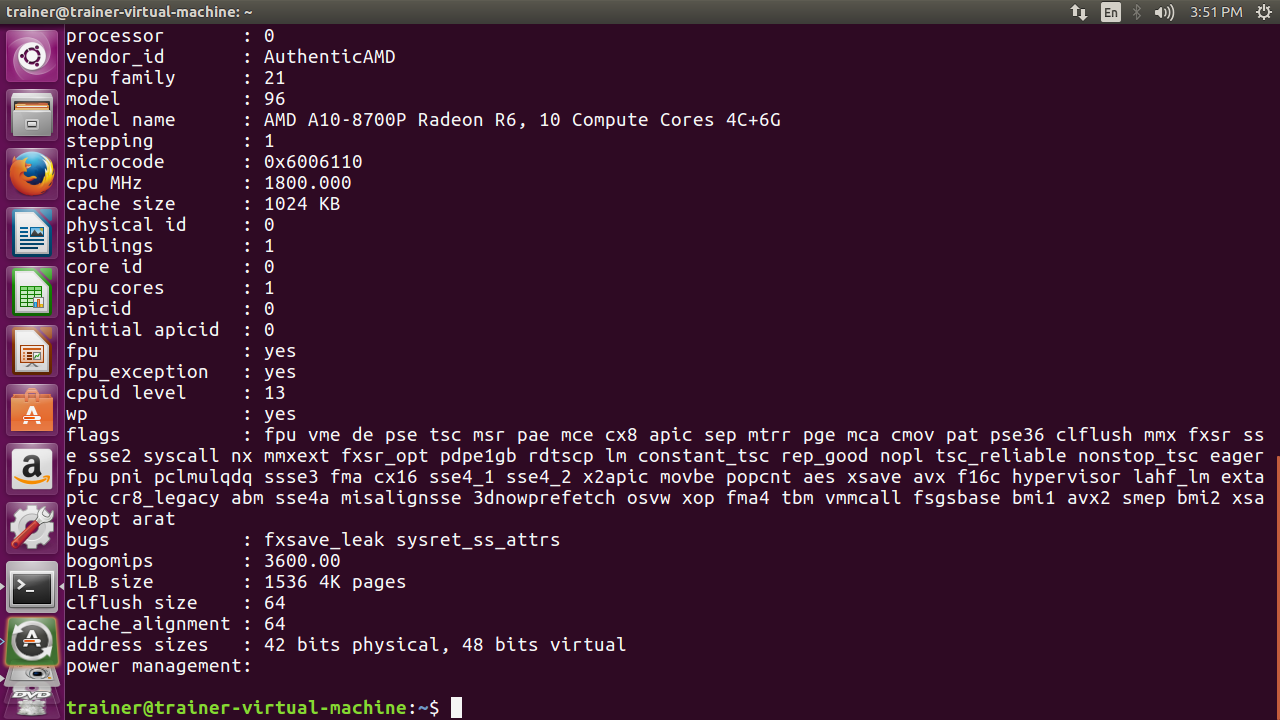
From the preceding output, we can see detailed information pertaining to the CPU that we ran the cat /proc/cpuinfo command against.
Next, let's take a look at how we can gather information on the amount of physical memory, the Random Access Memory (RAM), installed in a system. We will focus on two commands: the cat /proc/meminfo and the free commands.
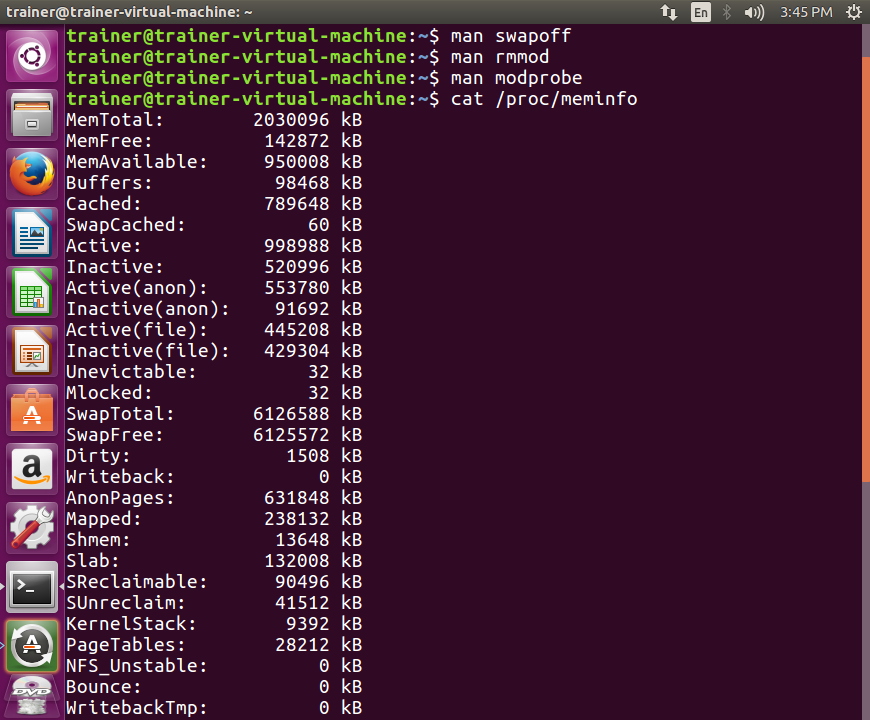
Using the Linux system for demonstration once again, we will look at the output of the cat /proc/meminfo command:
Some more memory usage information is shown in the following screenshot:
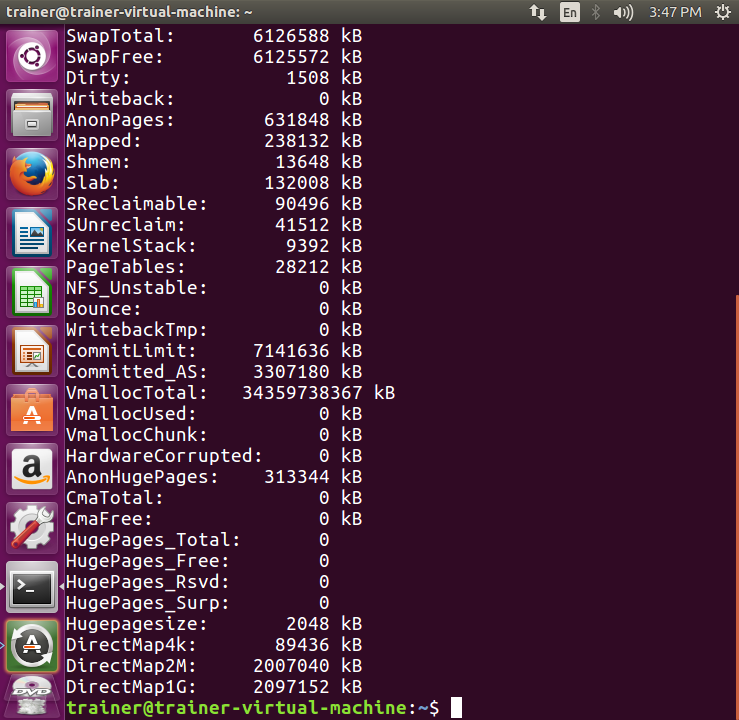
From the preceding output, we can see some important fields, namely the first three fields (MemTotal, MemFree, and MemAvailable), which reflect the current status of our physical memory (RAM).
Now let's look at another command, the free command. This command will give us the memory information in a more human-readable format. Using our test Linux system, we will run the free command:
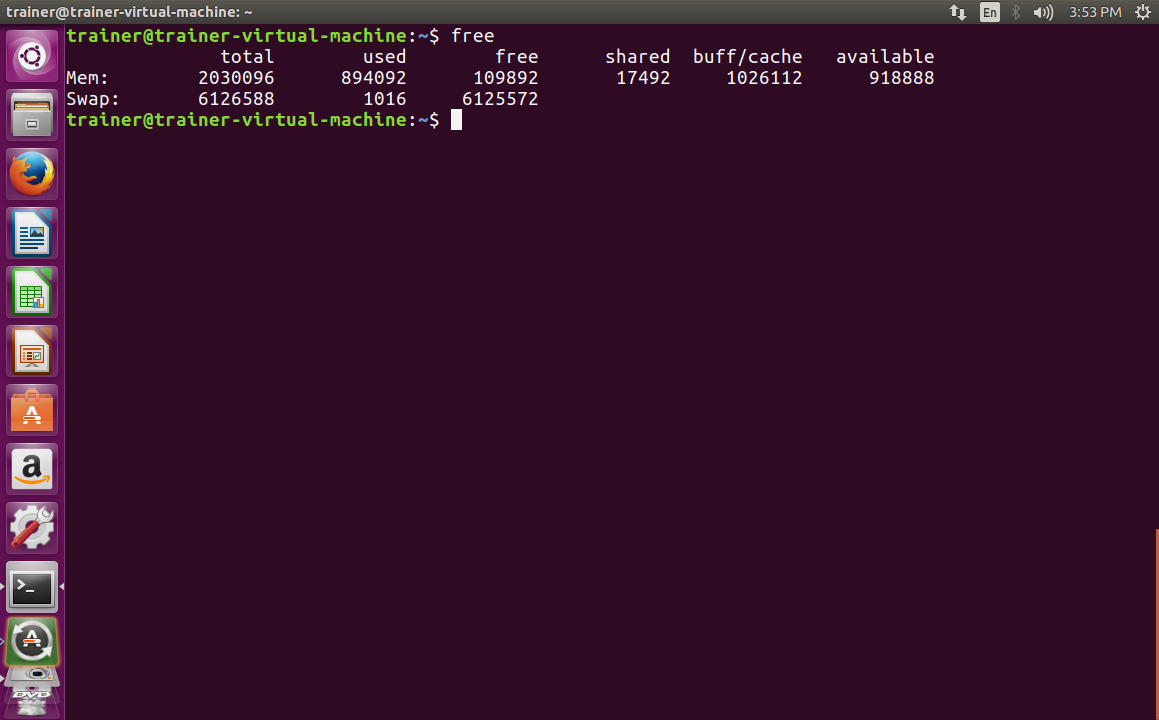
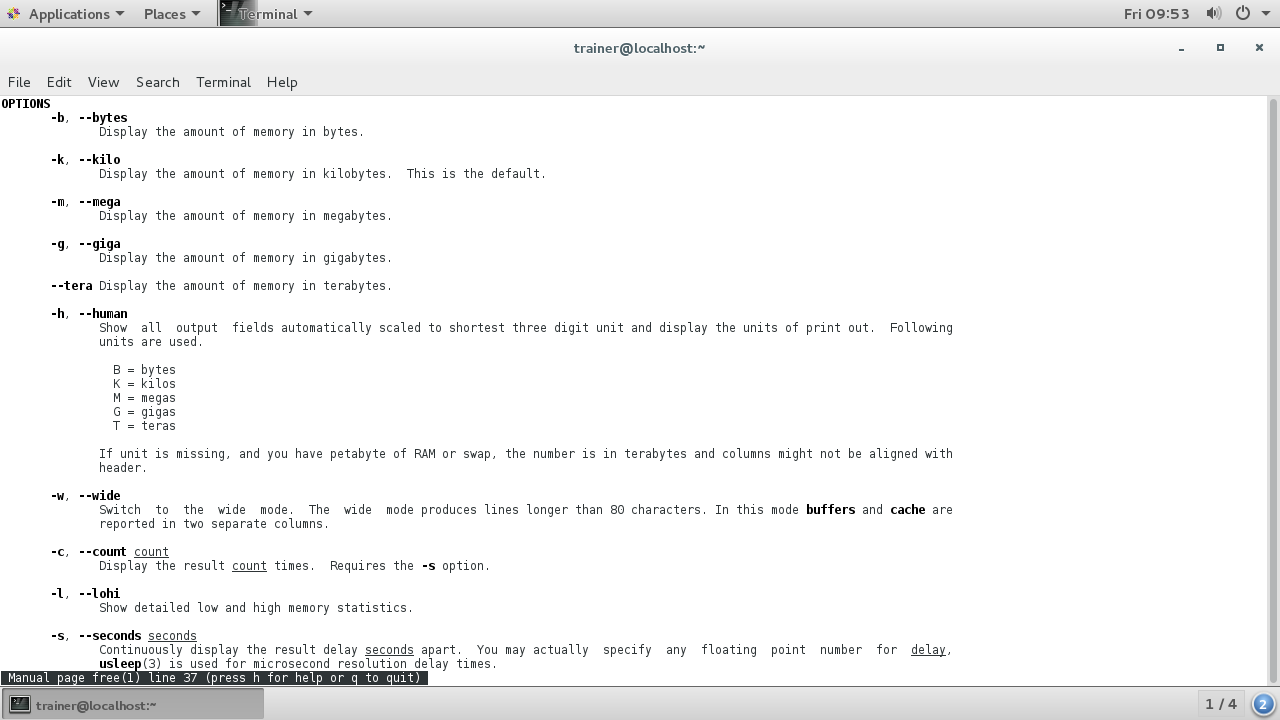
Running the free command on its own yields the preceding results in kilobytes. We can tag some options onto the free command to be even more explicit. Here is a list of options that we can use with the free command, using an Ubuntu distro:
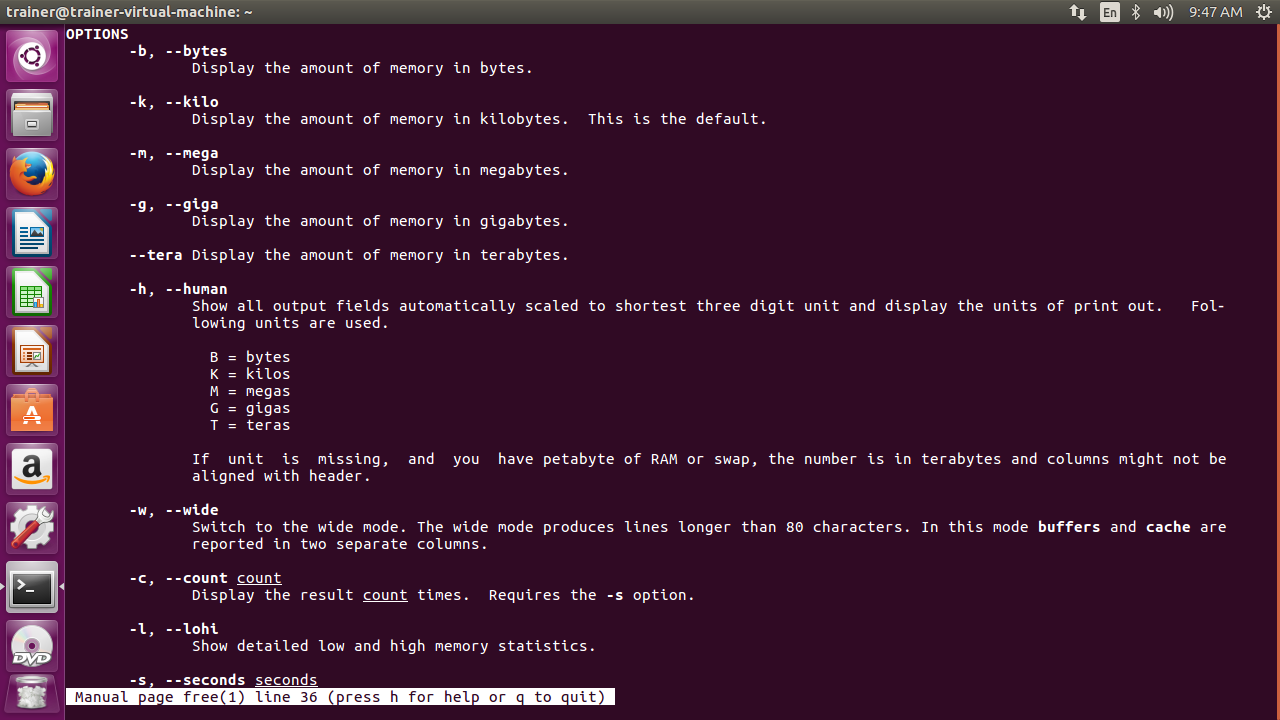
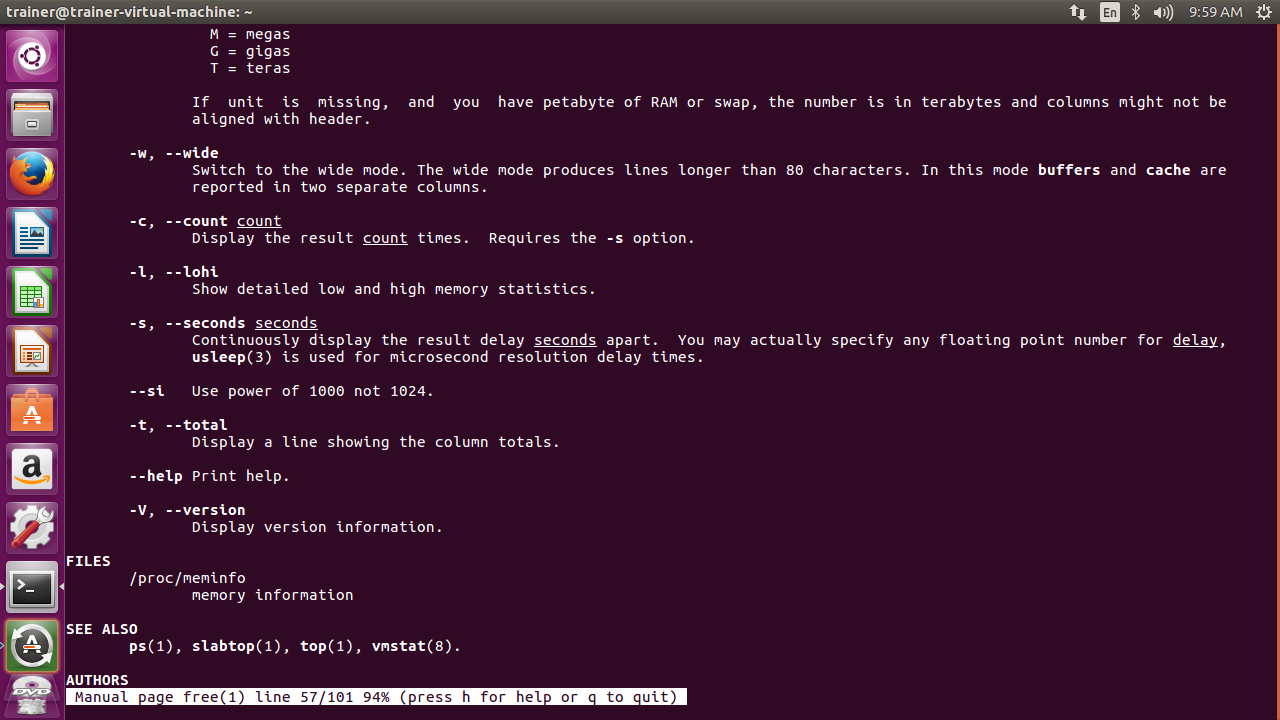
These are some more options that we can pass with the free command on an Ubuntu distro:
Similarly, if we take a look at the main page of the free command on a CentOS 7 distribution, we can see similar options:
Some more options that we can pass with the free command on a CentOS 7 distro are shown in the following screenshot:

Let's try a few of the options with the free command:
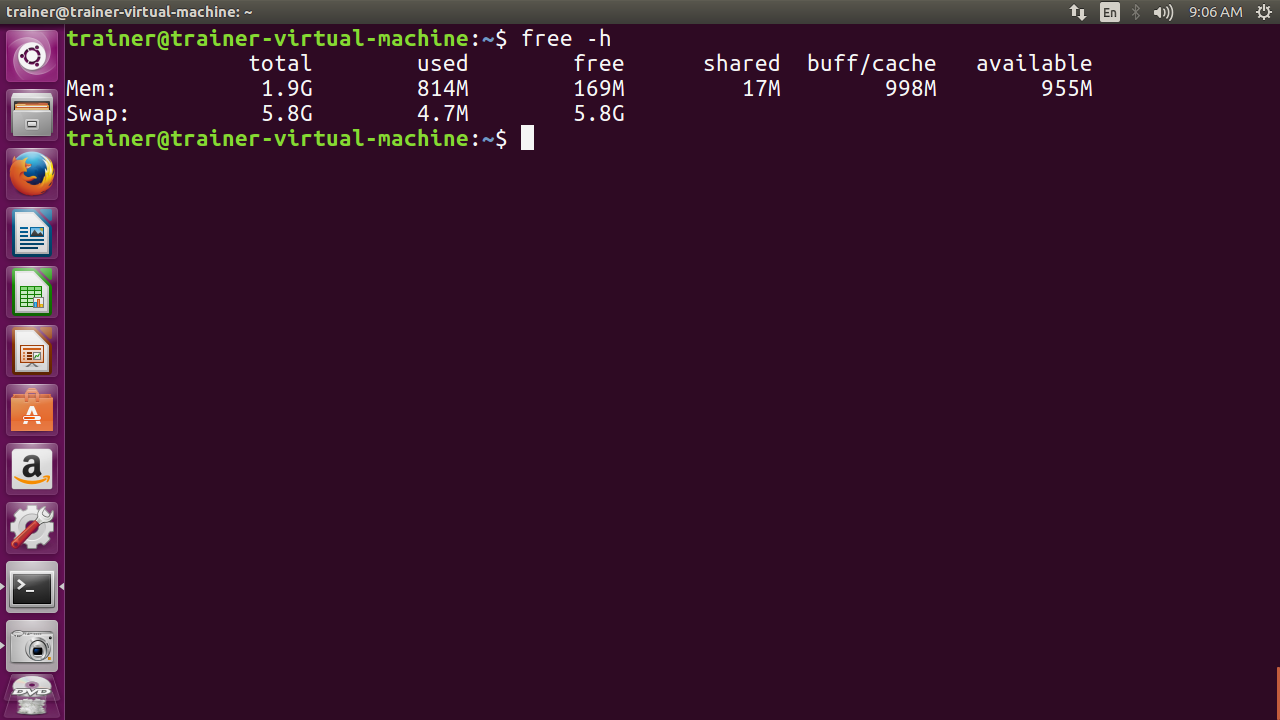
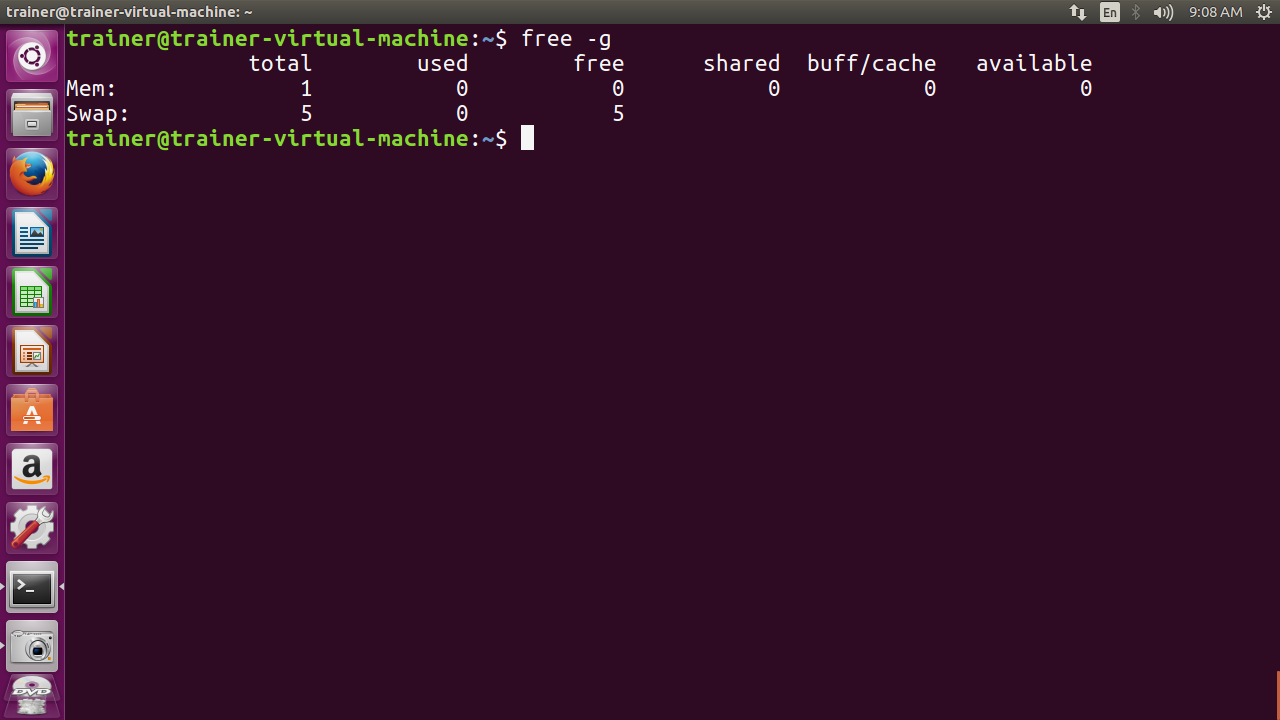
The preceding output is by far one of the most commonly used options (-h) with the free command. We can even take it a step further by tagging on the (-g) option to display the total amount of physical memory in gigabytes:
We can even see the low and high memory statistics by using yet another fantastic option, the (-l) option:
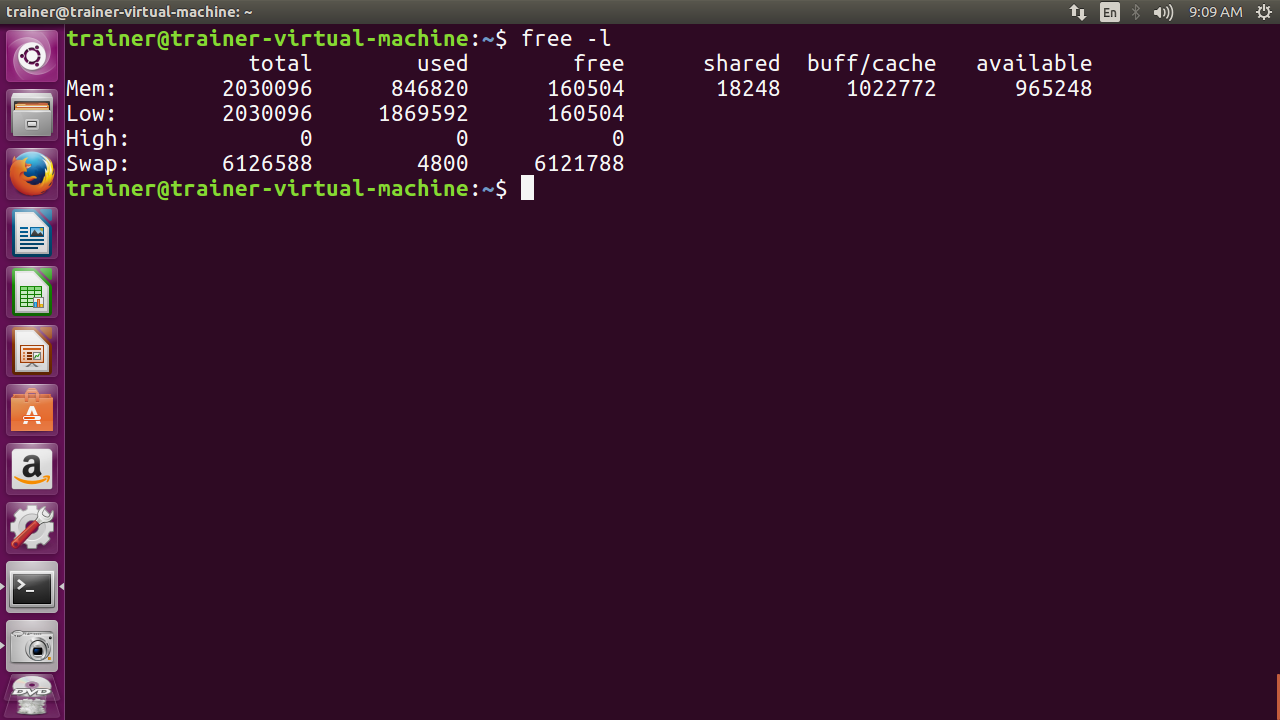
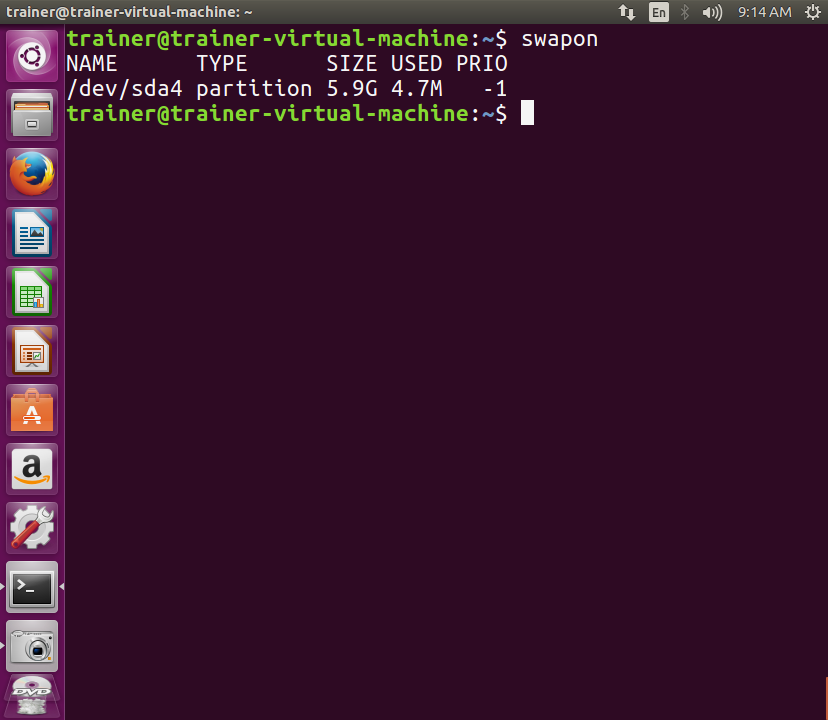
In the preceding screenshot, we are not just shown the RAM information, but also our swap memory. This is displayed in the last row. We can use another command if we prefer to see only the swap memory. Here, we can use the swapon command:
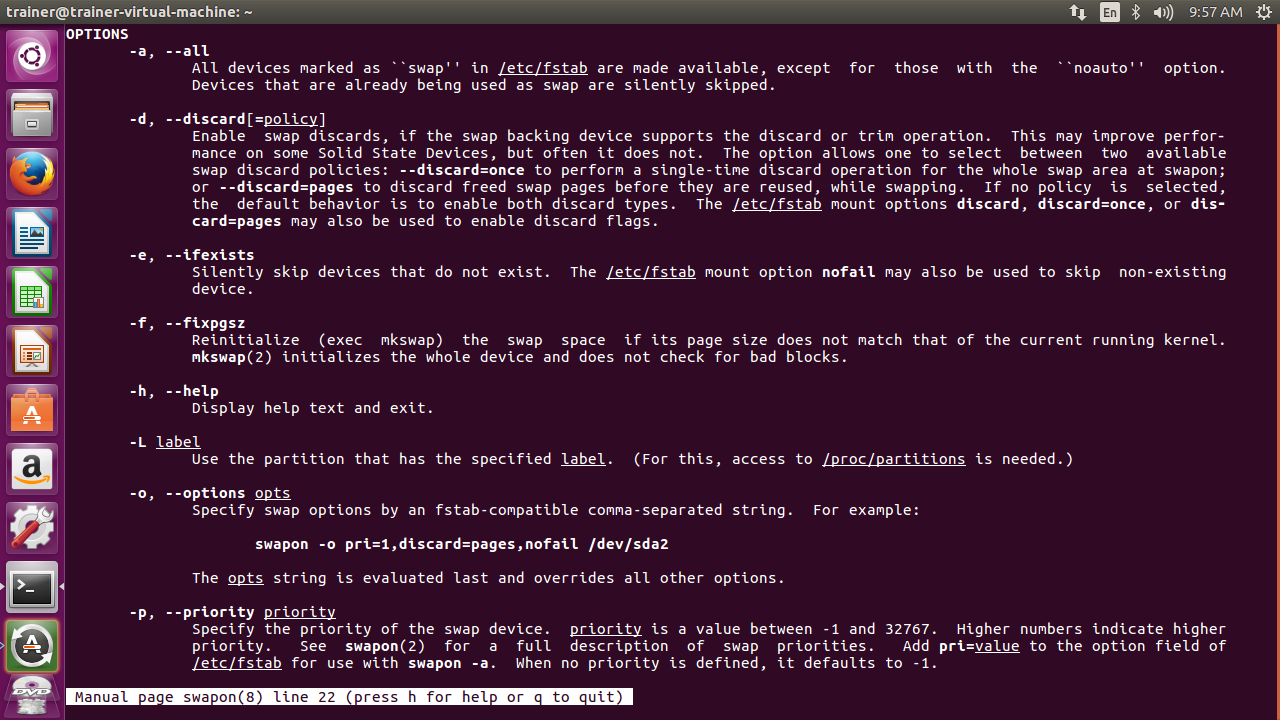
Here are some options that can be used with the swapon command from the main page of swapon on an Ubuntu distro:
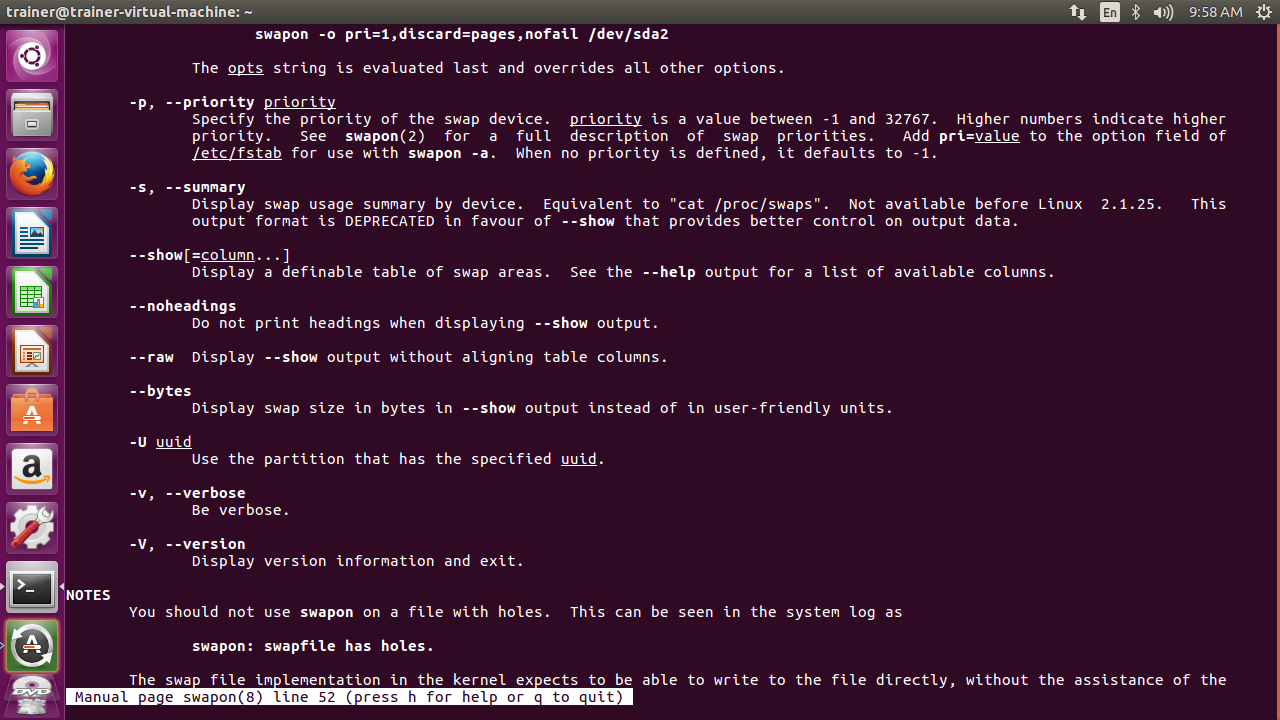
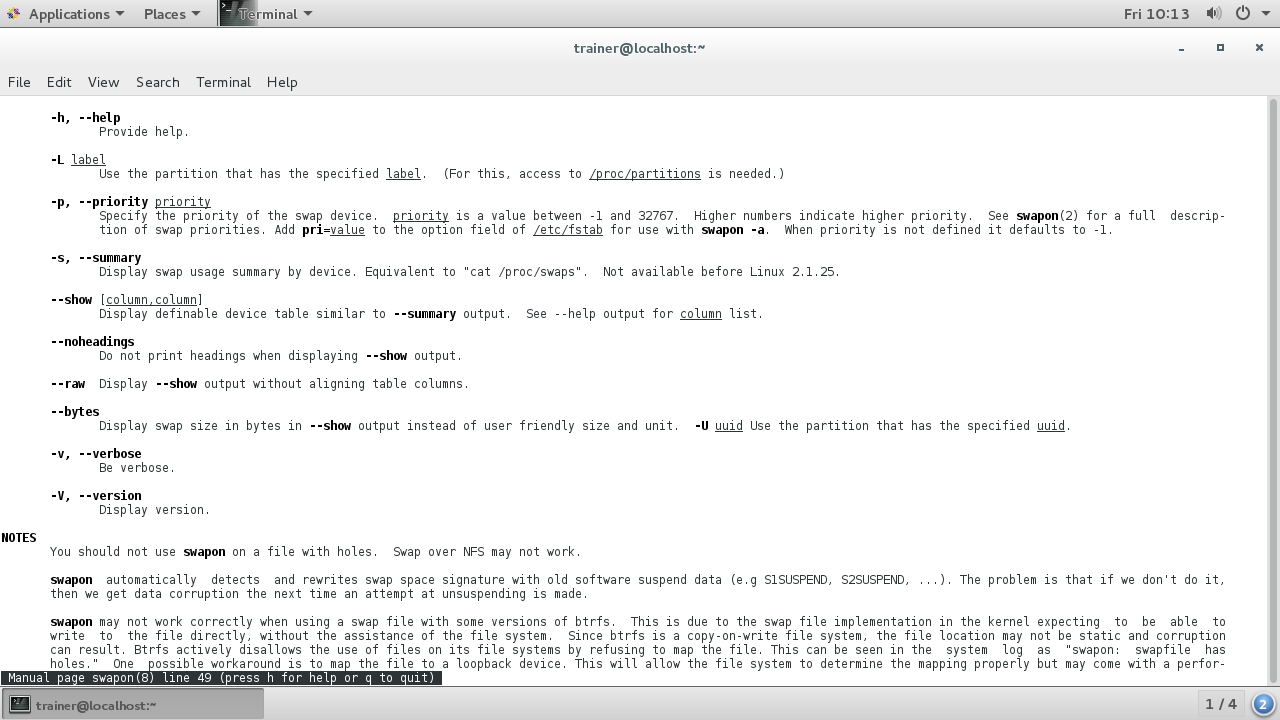
Some more options that can be passed with the swapon command on an Ubuntu distro are shown in the following screenshot:
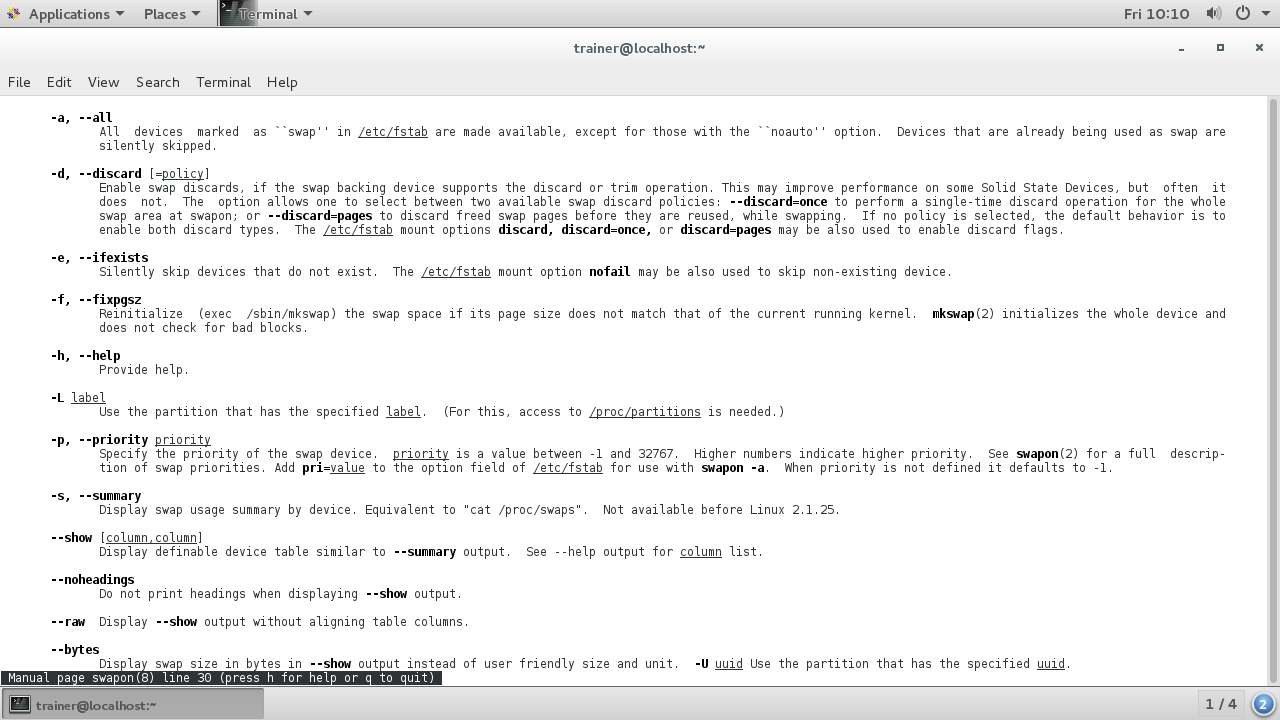
Here are some options that can be used with the swapon command from the main page of swapon on a CentOS 7 distro:
Some more options that can be passed with the swapon command on a CentOS 7 distro are shown in the following screenshot:
We can also see swap information from within the /proc directory, specifically in /proc/swaps:
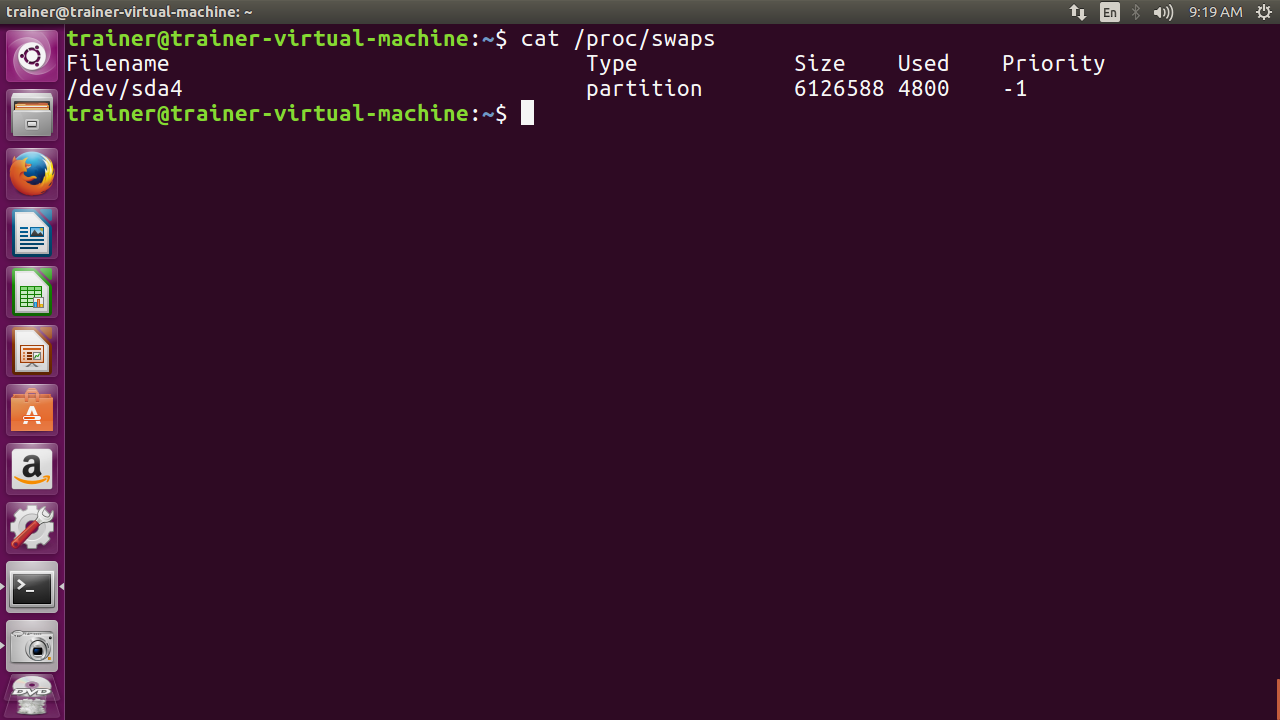
From the preceding output, we can see that the swap space is using the /dev/sda4 partition. Now, if for some reason we run out of physical memory and we have maxed out our swap space, then we can either add more physical memory or add more swap space. So, let's focus on the steps to add more swap space.
We will need to create a blank file using the dd command. Note that you need root access to run this command at the shell:
trainer@trainer-virtual-machine:~$ dd if=/dev/zero of=/root/myswapfile bs=1M count=1024
dd: failed to open '/root/myswapfile': Permission denied
trainer@trainer-virtual-machine:~$
From the preceding output, we can see that we got a Permission denied message, so let's switch to the root and try to rerun that command:
root@trainer-virtual-machine:/home/trainer# dd if=/dev/zero of=/root/myswapfile bs=1M count=1024
1024+0 records in
1024+0 records out
1073741824 bytes (1.1 GB, 1.0 GiB) copied, 17.0137 s, 63.1 MB/s
root@trainer-virtual-machine:/home/trainer#
There we go; we've just created a swap file using the name myswapfile. Now we need to run the mkswap command and call the swap file that we just created at the shell:
root@trainer-virtual-machine:~# mkswap myswapfile
Setting up swapspace version 1, size = 1024 MiB (1073737728 bytes)
no label, UUID=e3b8cc8f-ad94-4df9-8608-c9679e6946bb
root@trainer-virtual-machine:~#
Now, the last step is to turn on the swap file so that the system uses it as needed:
root@trainer-virtual-machine:~# swapon myswapfile
swapon: /root/myswapfile: insecure permissions 0644, 0600 suggested.
root@trainer-virtual-machine:~#
We've got that warning message telling us about insecure permissions. We will discuss permissions in a later chapter. For now, we will continue to use the existing permissions. The last step is to verify that the swap file is indeed available to our system:
root@trainer-virtual-machine:~# swapon
NAME                TYPE       SIZE   USED    PRIO
/dev/sda4           partition  5.9G   960K    -1
/root/myswapfile    file       1024M   0B     -2
root@trainer-virtual-machine:~#
And, voila, we now have the newly created swap file at our system's disposal. We can also run the free command, and we will now find that the swap memory has increased by one gigabyte:
root@trainer-virtual-machine:~# free -h
      total   used   free  shared  buff/cache   available
Mem:  1.9G    848M    72M   13M    1.0G        924M
Swap: 6.8G    960K    6.8G
root@trainer-virtual-machine:~#
Should we no longer want to use a swap file, we can use the swapoff command to remove myswapfile from the swap memory. Here is how we would accomplish this at the shell:
root@trainer-virtual-machine:~# swapoff myswapfile
root@trainer-virtual-machine:~#
Now let's rerun the swapon command followed by the free command to verify that myswapfile is indeed removed from swap usage:
root@trainer-virtual-machine:~# swapon
NAME       TYPE      SIZE   USED   PRIO
/dev/sda4 partition  5.9G   1.6M   -1
root@trainer-virtual-machine:~# free -h
       total   used    free   shared  buff/cache available
Mem:   1.9G    931M    133M   17M     917M        845M
Swap:  5.8G    1.6M    5.8G
root@trainer-virtual-machine:~#
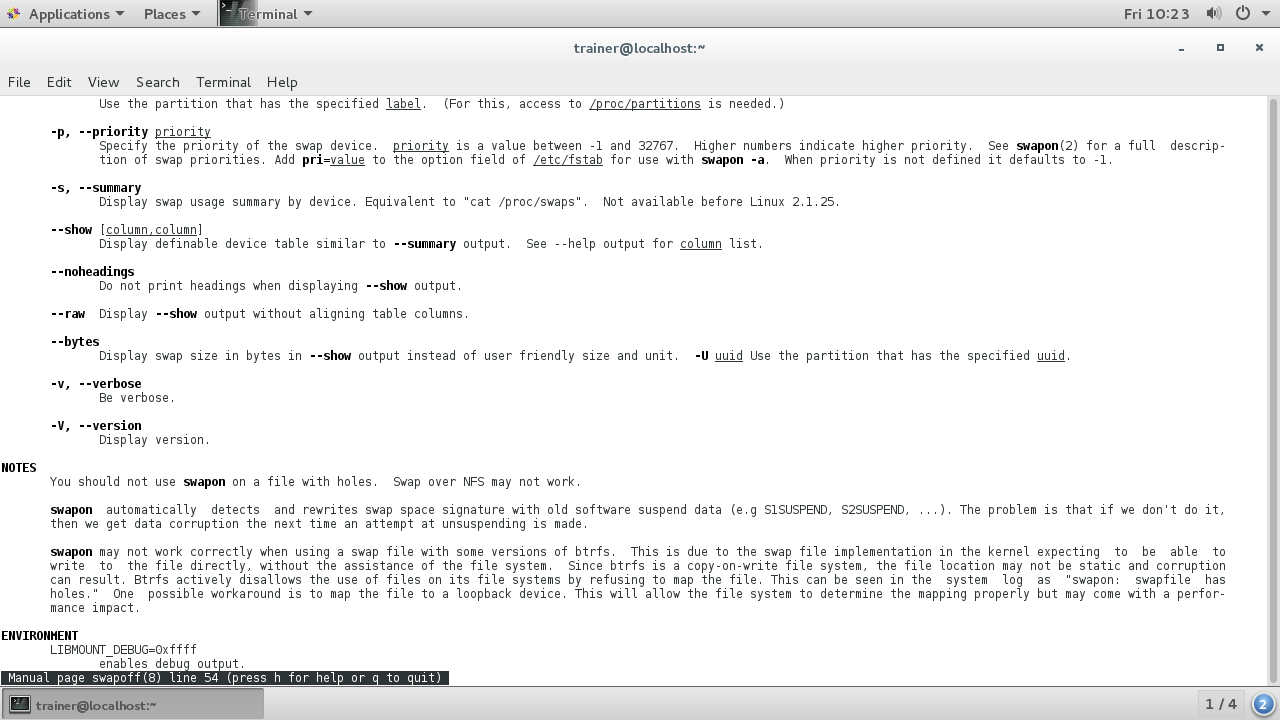
As we can see, myswapfile is no longer available for use as swap memory. Here are the options we can use with the swapoff command on an Ubuntu distro:
Some more options that can be passed with the swapoff command are shown in the following screenshot:
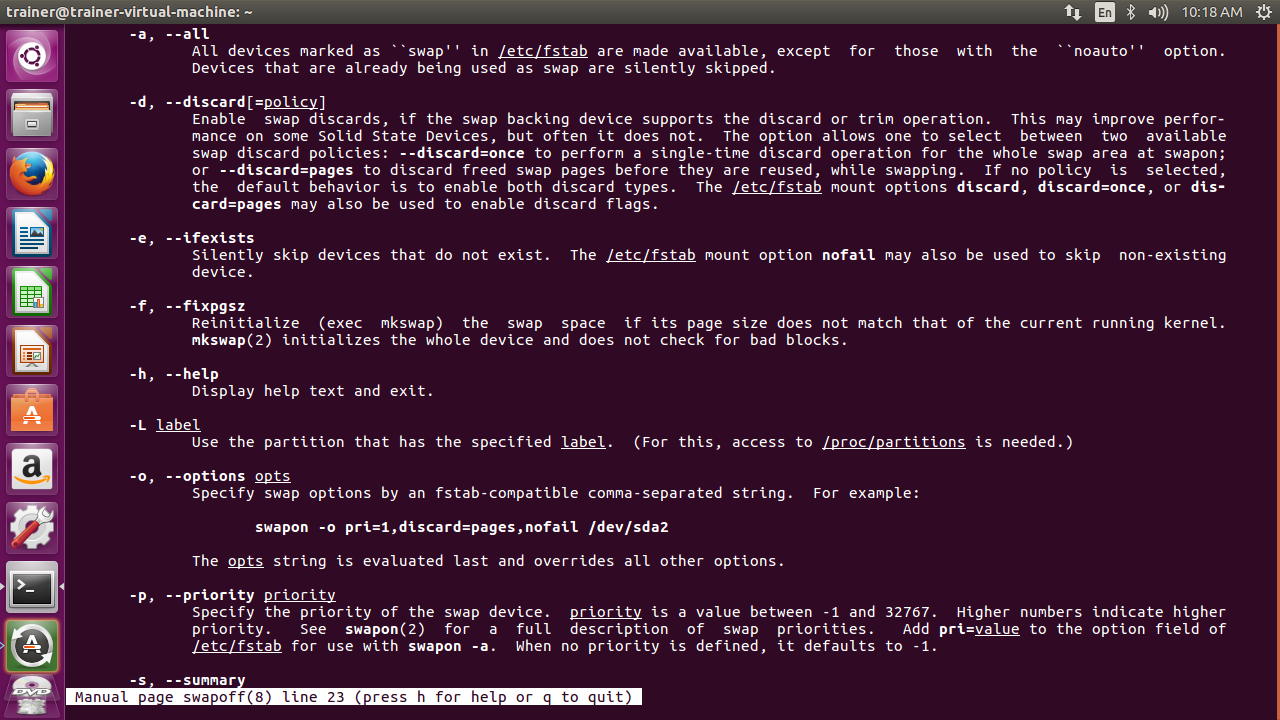
Here are the options we can use with the swapoff command on a CentOS 7 distro:
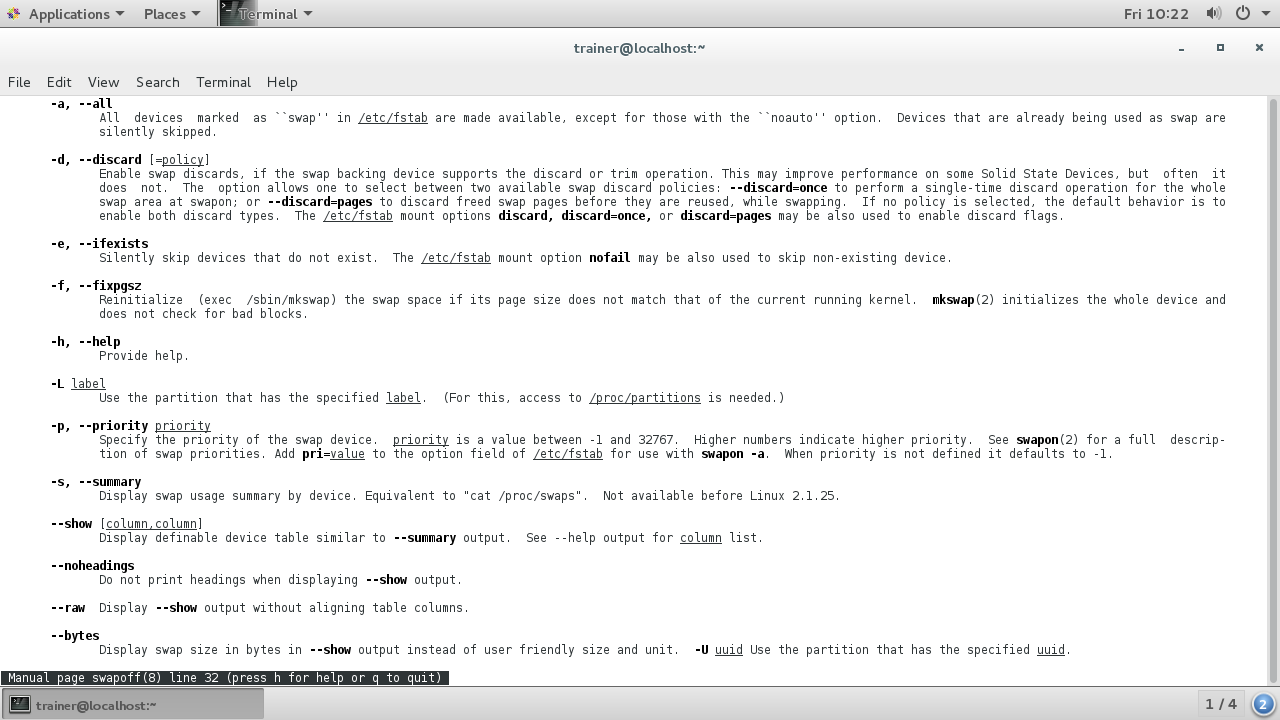
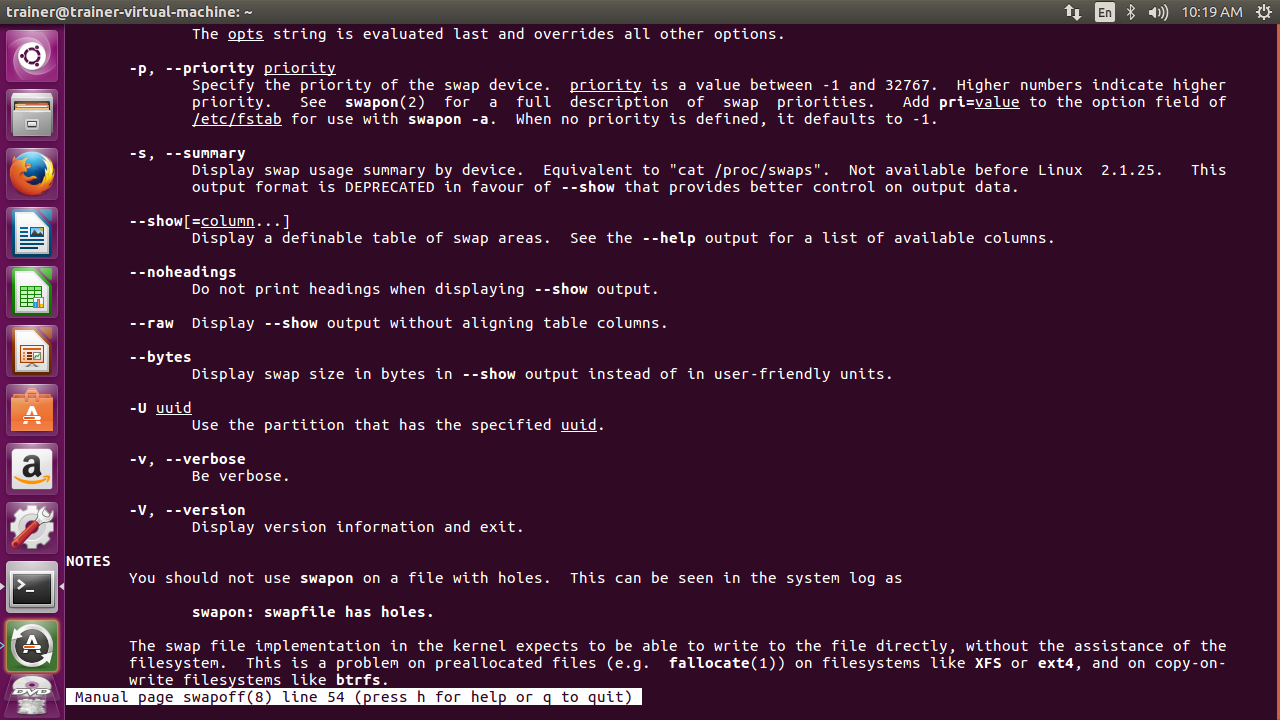
Some more options that can be passed with the swapoff command are shown in the following screenshot: