Book Image

CompTIA Linux+ Certification Guide

By : Philip Inshanally
Book Image

CompTIA Linux+ Certification Guide

By: Philip Inshanally

Overview of this book

The Linux+ certification provides a broad awareness of Linux operating systems, while giving professionals an upper hand in the IT industry. With this certification, you’ll be equipped with the all-important knowledge of installation, operation, administration, and troubleshooting services. This CompTIA Linux+ Certification Guide will give you an overview of the system architecture. You’ll understand how to install and uninstall Linux distributions, followed by working with various package managers. You’ll then move on to manipulating files and processes at the command-line interface (CLI) and creating, monitoring, killing, restarting, and modifying processes. As you progress, you’ll be equipped to work with display managers and learn how you can create, modify, and remove user accounts and groups, as well as understand how to automate tasks. The last set of chapters will help you configure dates and set up local and remote system logging. In addition to this, you’ll explore different internet protocols, and delve into network configuration, security administration, Shell scripting, and SQL management. By the end of this book, you’ll not only have got to grips with all the modules you need to study for the LX0-103 and LX0-104 certification exams, but you’ll also be able to test your understanding with practice questions and mock exams.
Table of Contents (23 chapters)
19
Mock Exam - 1
20
Mock Exam - 2

IPv4 configuration

There are various ways of configuring an IPv4 address within a Linux system. First, we can use a GUI utility to perform IPv4 configuration. Let's look at our Ubuntu 18 system.

We can select the network icon, then select the drop-down arrow and select Wired Settings, as shown in the following screenshot:

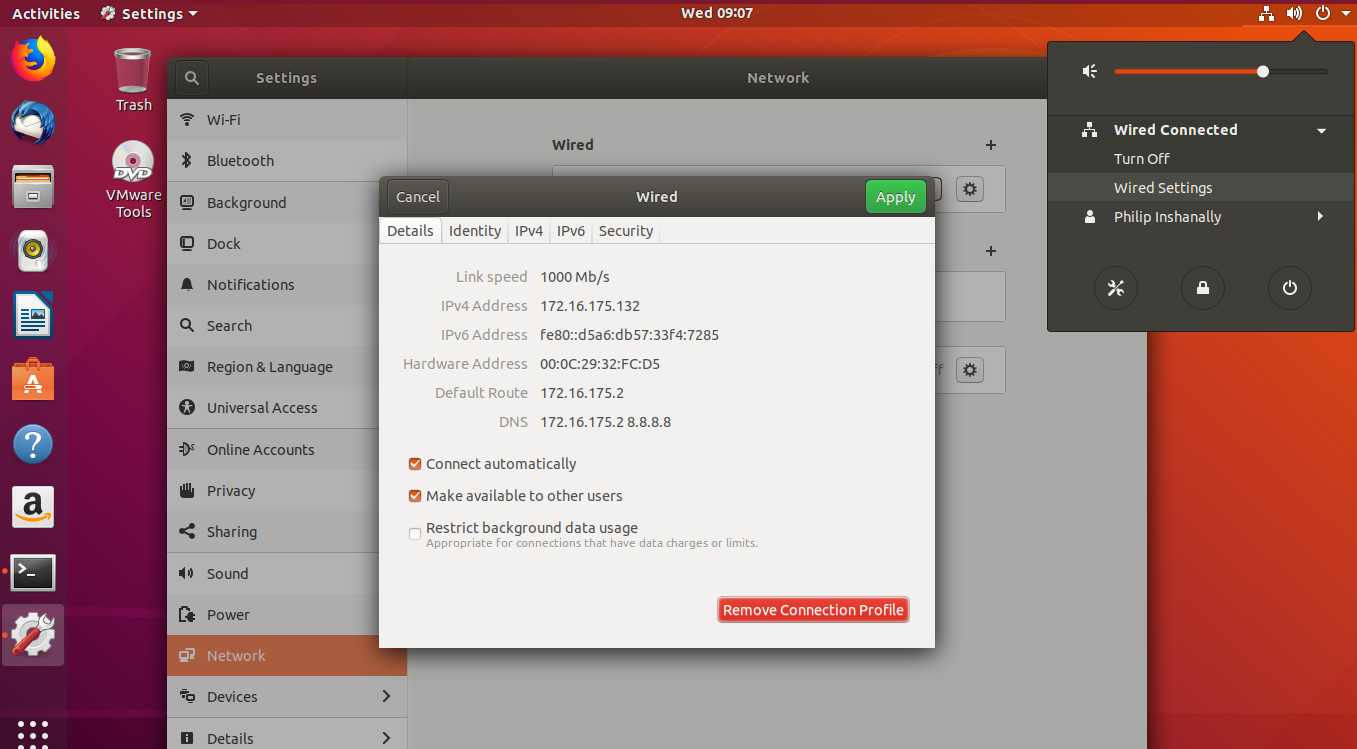
Awesome! Based on what we can see in the previous example, when we select Wired Settings, it will open up the Settings dialog box; after this, we should select the gear icon. This would then open network settings. In order to configure the IPv4 settings, we would select the IPv4 tab, as shown in the following screenshot:

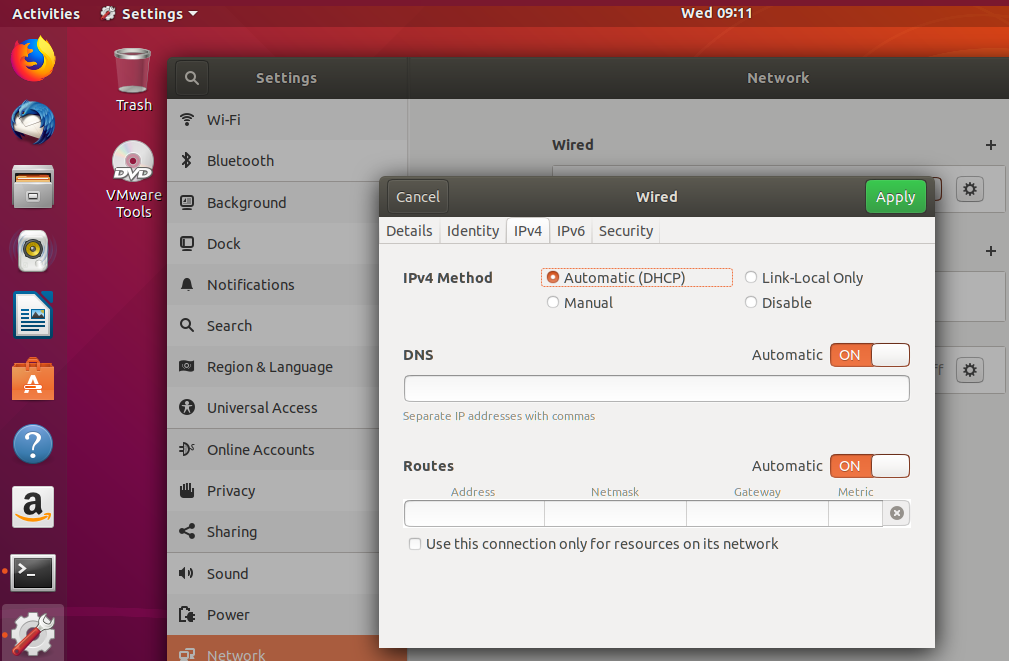
Based on the previous example, we can see that the default method for the IPv4 addressing is Automatic (DHCP); this means that the system is going to acquire its IPv4 addressing information via a server on the network that is configured...