

Unity uses an external editor to edit its C# scripts. Even though it can create a basic starter C# script for us, we still have to edit the script using the MonoDevelop code editor that's included with Unity.
Since Unity and MonoDevelop are separate applications, Unity will keep MonoDevelop synchronized with itself. This means that if you add, delete, or change a script file in one application, the other application will reflect the changes automatically.
It is possible to also choose another code editor if we want to. For example, web developers can keep using their favorite editor if they choose to do so. If you feel more comfortable using another code editor, you can do it by following these steps:
- Go to the
Preferencesmenu that can be found under theUnitytab on Mac, or theEdittab on Windows - Select
External Tools:
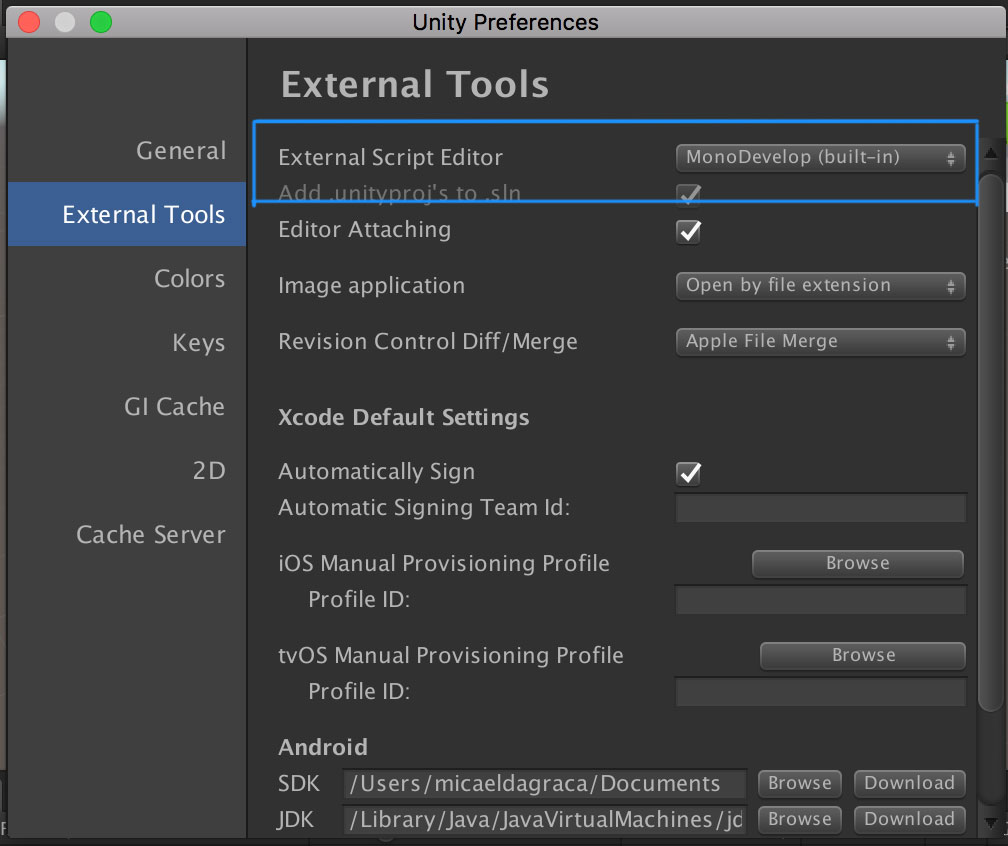
- Under the
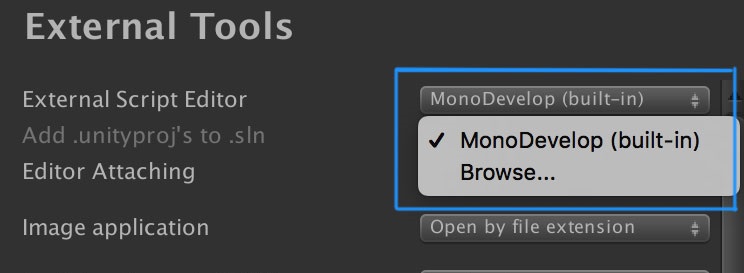
External Script Editoroption, you can browse for the application that you want to use as the code editor:
Unity will synchronize with MonoDevelop the first time you tell it to open a file for editing. The simplest way to do this is by double-clicking on LearningScript in the Scripts folder (provided in the example project). If your project is empty, don't worry, you can create a new C# script that will contain the exact same information. To do it, you just need to right-click inside the Assets tab and select Create | C#Script. It might take a few seconds for MonoDevelop to open and sync.
Our window should look like this:
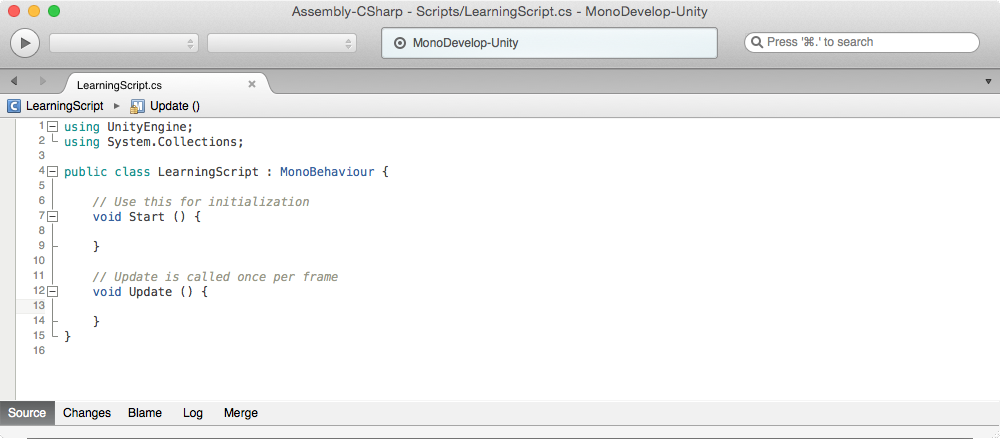
MonoDevelop launched with LearningScript open and ready to edit.
What we see now is a default C# script structure that Unity creates. It contains information on what namespaces are used in the script, the class definition, and two methods that Unity adds by default, as shown here:
The namespace is simply an organizational construct. It helps organize parts of code. Don't worry too much about it now. We won't need to create them anytime soon. All we will need to know for now is how many namespaces we are using in our script.
In our script, we can see these two lines:
using UnityEngine;
using System.Collections;
The preceding two lines simply mean that our script will be using the UnityEngine and System.Collections namespaces, and we will have access to all parts of these libraries. These two namespaces are added to any new C# script by default, and we will use them in most of our cases.
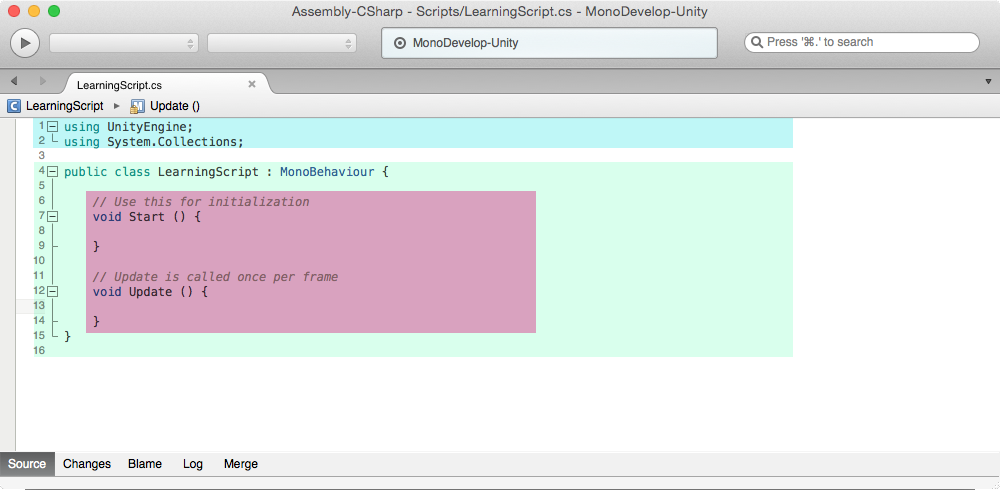
Notice line4 in the following screenshot:
public class LearningScript : MonoBehaviour
The class name LearningScript is the same as the filename LearningScript.cs. This is a requirement. You probably don't know what a class is yet, but that's okay. Just remember that the filename and the class name must be the same.
When you create a C# script file in Unity, the filename in the Project tab is in Edit mode, ready to be changed. Please rename it right then and there. If you rename the script later, the filename and the class name won't match. The filename would change, but line 4 will be this:
public class NewBehaviourScript : MonoBehaviour
This can easily be fixed in MonoDevelop by changing NewBehaviourScript in line 4 to the same name as the filename, but it's much simpler to do the renaming in Unity immediately.
What happens when Murphy's Law strikes and syncing just doesn't seem to be working correctly? Should the two apps somehow get out of sync as you switch back and forth between them for whatever reason, do this. Right–click on Unity's Project window and select Sync MonoDevelop Project. MonoDevelop will resync with Unity.
We have created the LearningScript class. Its code is saved in the file in the Project/Scripts folder. To include an instance of this class in our project, we will add it as a component to an empty GameObject.
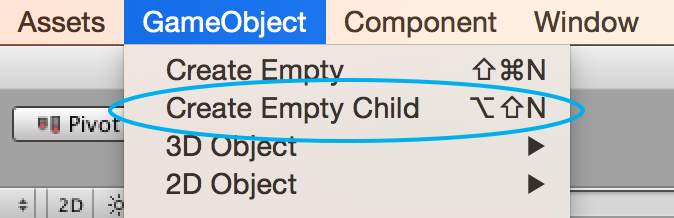
Let's create a new GameObject. In the menu, navigate to GameObject | Create Empty Child, as shown here:
There are a number of ways of adding our LearningScript component to the GameObject. Let's talk about the simplest one:
- Select your newly created
GameObject:
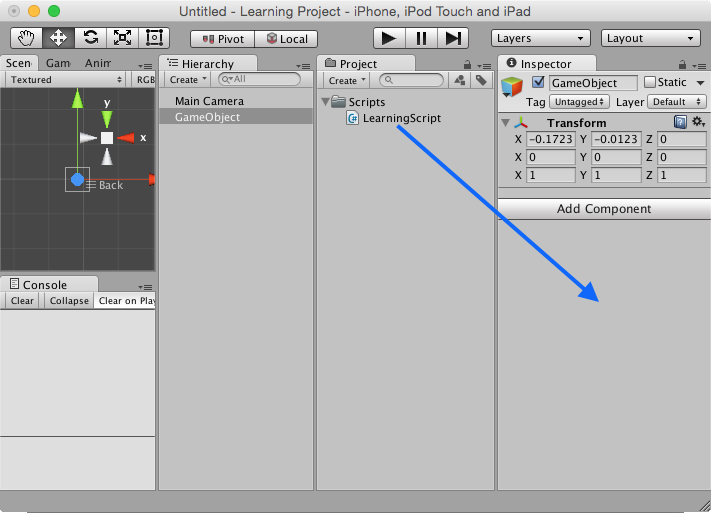
- Drag and drop the
Scriptfile from theProjecttab to the empty space underneath theTransformcomponent:
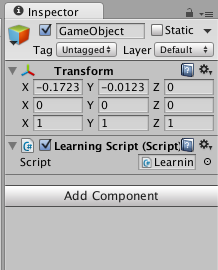
We can now see that our LearningScript file has been added as a component to the GameObject. This means that an instance of LearningScript is active and ready to execute code.
As our Unity project progresses, we will have lots of different types of files in the Project view. It's highly recommended that you keep a clean and simple folder structure in your project.
Let's keep our scripts in the Scripts folder, textures in Textures, and so on, so that it looks something like this:
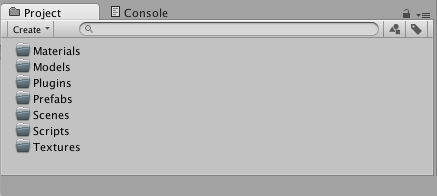
From now on, let's not keep any loose files in the Assets folder.
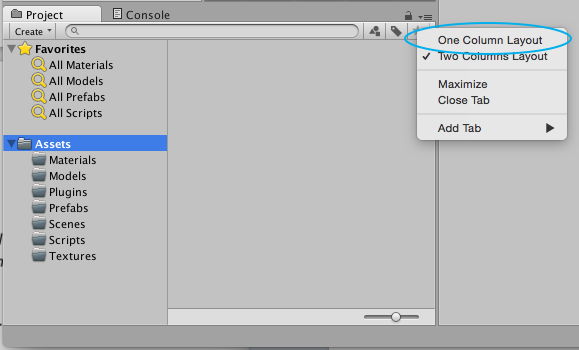
Unity allows us to customize the user interface. Everyone has their own favorite. I prefer a one–column layout Project tab instead of Unity's default two–column layout. To change this, open the context menu in the top-right corner of the Project tab, as shown in this screenshot:
When working in a team, you will notice that every team member has their own layout preference. A level designer may like to use a big Scene tab. An animator will probably use the Animation and Animator tabs. For a programmer like you, all tabs are fairly important. However, the Console tab is the one that you will use a lot while testing your code. I mostly prefer a layout divided into four columns from left to right, Scene, and Console, then Hierarchy, then Project, and finally Inspector.
It looks like what is shown in the following screenshot:

Note
If you have trouble with moving tabs around, refer to the Customizing Your Workspace chapter in the Unity Manual.
Feel free to change the interface however you want. But try to keep the Console tab visible all the time. We will use it a lot throughout the book. You can also save your custom layouts in the Layout menu.