

The next thing we will do is give our player the ability to shoot:
Open up the
PlayerBehaviourscript. In the top section where the other variables are present, we need to add some additional ones that we'll use:// The laser we will be shooting public Transform laser; // How far from the center of the ship should the laser be public float laserDistance = .2f; // How much time (in seconds) we should wait before // we can fire again public float timeBetweenFires = .3f; // If value is less than or equal 0, we can fire private float timeTilNextFire = 0.0f; // The buttons that we can use to shoot lasers public List<KeyCode> shootButton;
One thing you may have noticed is that we have a
laservariable that is of the typeTransform. This is the laser we'll fire, which we will create shortly.Inside our
Updatefunction, we will need to add some additional code, which is as follows:// a foreach loop will go through each item inside of // shootButton and do whatever we placed in {}s using the // element variable to hold the item foreach (KeyCode element in shootButton) { if(Input.GetKey(element) && timeTilNextFire < 0) { timeTilNextFire = timeBetweenFires; ShootLaser(); break; } } timeTilNextFire -= Time.deltaTime;In a manner very similar to what we did before with the player movement, we check each of the keys we allow the player to shoot with (such as the spacebar and Enter keys). If they press any of these keys and can fire again, then we will reset our timer and shoot a laser. However, we haven't made the
ShootLaserfunction. Let's do that now.Underneath the functions, add the following function:
// Creates a laser and gives it an initial position in front
// of the ship.
void ShootLaser()
{
  // calculate the position right in front of the ship's
  // position lazerDistance units away
  float posX = this.transform.position.x +
               (Mathf.Cos((transform.localEulerAngles.z - 90) * Mathf.Deg2Rad) * -laserDistance);
  float posY = this.transform.position.y + (Mathf.Sin((transform.localEulerAngles.z - 90) * Mathf.Deg2Rad) * -laserDistance);

  Instantiate(laser, new Vector3 (posX, posY, 0), this.transform.rotation);
}
Save your file, and go back into Unity. You'll now see a number of additional variables that we can now set. Be sure to set the Shoot Button variable in the same manner that we did the movement buttons, changing the Size to
2and setting Element 0 to Mouse0 and Element 1 to Space.Next, we will need to create our laser. Go back into our
Assetsfolder from the example code, and move thelaser.pngfile into our Project tab'sSpritesfolder.Following that, drag-and-drop it into your scene from the Scene tab to place it in the level.
Right-click the
Scriptsfolder you created earlier, click on Create, and select the C# Script label. Call this new scriptLaserBehaviour. Go intoMonoDevelop, and use the following code:using UnityEngine; using System.Collections; public class LaserBehaviour : MonoBehaviour { // How long the laser will live public float lifetime = 2.0f; // How fast will the laser move public float speed = 5.0f; // How much damage will this laser do if we hit an enemy public int damage = 1; // Use this for initialization void Start () { // The game object that contains this component will be // destroyed after lifetime seconds have passed Destroy(gameObject, lifetime); } // Update is called once per frame void Update () { transform.Translate(Vector3.up * Time.deltaTime * speed); } }Attach
LaserBehaviourto the laser object. Finally, add a Box Collider component by first selecting the laser object and then going to Component | Physics 2D | Box Collider 2D. The collision box, by default, will be the size of the image, but I want to shrink it to fit what is visually seen of it. To do that, we will change the Size attribute's X property to.06and Y to.5.Now, the laser will move in the direction that it's facing and die after a period of 2 seconds! Next, let's make it so that the player can shoot them.
In the Project tab, go to the Assets | Prefabs folder, and drag-and-drop the laser object from our Hierarchy tab into it. You'll notice that the object Hierarchy will turn blue to show that it is a prefab.
Note
Prefabs or prefabricated objects are the objects that we set aside to make copies during runtime, such as our bullets and eventually enemies that we'll spawn into the world, and we can create as many as we want. When you add a prefab to a scene, you create an instance of it. All of these instances are clones of the object located in our
Assets. Whenever you change something in the prefab located in ourPrefabfolder, those changes are applied to all the objects that are already inside of your scene. For example, if you add a new component toPrefab, all the other objects we have in the scene will instantly contain the component as well. We can also apply any of the ones in our scene to be the blueprint for the others as well, which we will do later on. However, it is also possible to change the properties of a single instance while keeping the link intact. Simply change any property of a prefab instance inside your scene, and that particular value will become bolded to show that the value is overridden, and they will not be affected by changes in the source prefab. This allows you to modify prefab instances to make them different (unique) from their source prefabs without breaking the prefab link.Have a look at the following screenshot:

Now, delete the
laserobject from our scene, and then go to theplayerShipobject. Drag-and-drop thelaserprefab into the Laser property of thePlayerBehaviorcomponent.Finally, add a circle collider to our ship by going to Component | Physics 2D | Circle Collider 2D. Change the Radius property to
.3.
Generally, in games, we want to be as efficient as possible toward calculations. Polygon collision is the most accurate collision, but it is much slower than using a box or a circle. In this case, I wanted to use a circle, because not only is it more efficient but it also allows the player some leeway in how close they can get to enemies without being hurt. Players will always think it's their skill if they get away, but if the collider is too big they will think the game is broken, which we want to avoid.
Have a look at the following screenshot:
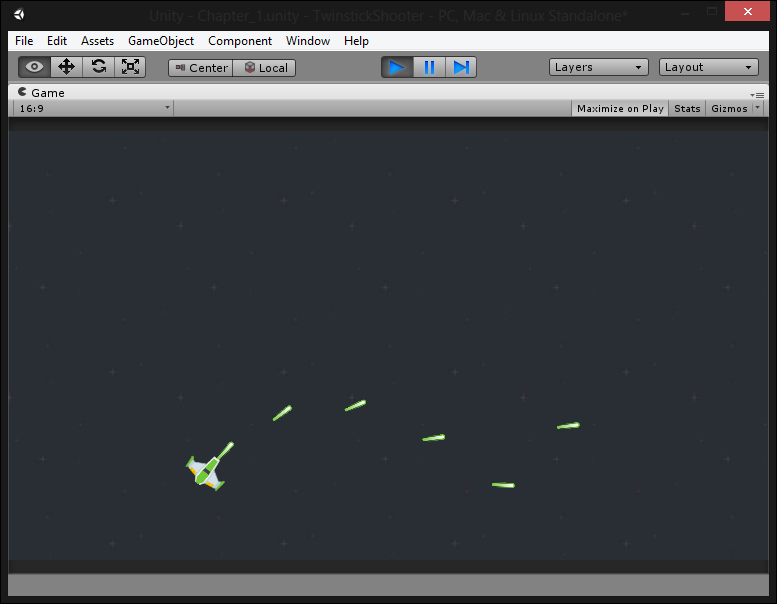
Now, our ship can shoot in the direction that the mouse is currently facing.