

Shapes in Affinity Photo
In the first part of the book, we alluded to the use of shapes in some of our various activities and projects; however, in this section, we will explore the subject formally to give you an idea of how these things are actually used in photo editing and discuss how to edit them to get you the desired shape.
Creating shapes
Shapes are created utilizing the tool highlighted in the following screenshot:
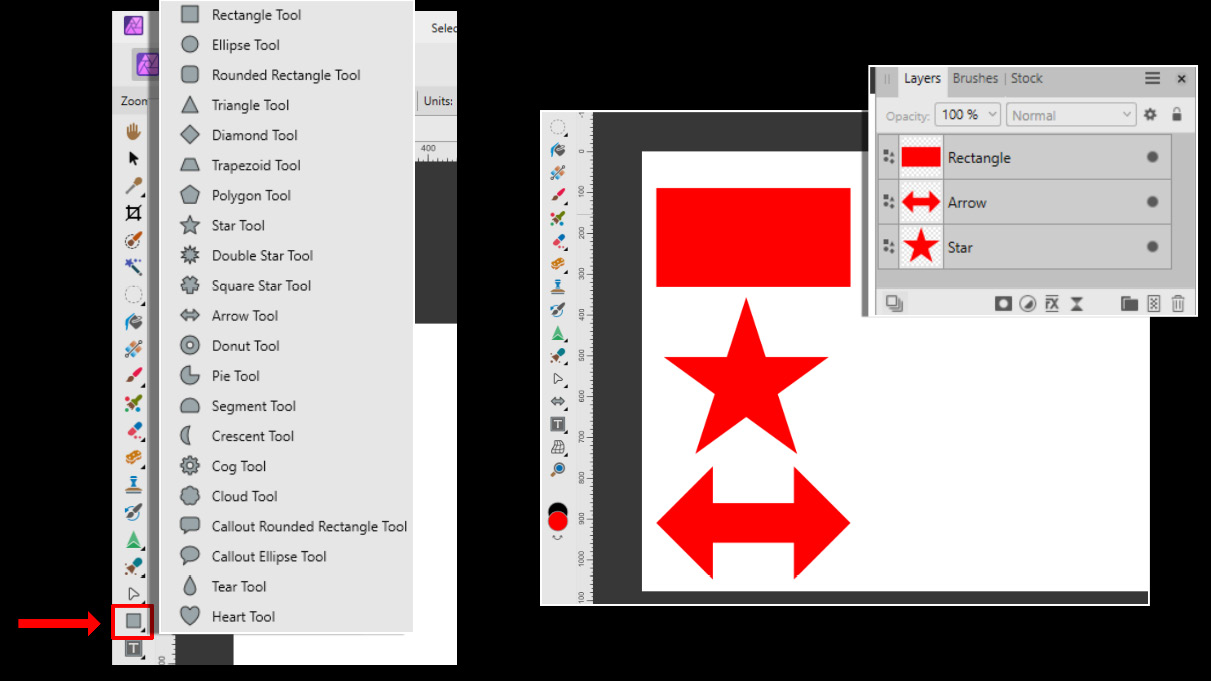
Figure 16.11 – Location of the shape tool and three shapes we will be using
There is a small triangle in the lower corner that has all the shapes in it. Notice that there are the normal shapes (such as rectangles, ellipses, and so on) but also some of the more abstract shapes (such as callout clouds, polygons, arrows, and so on).
To select a shape, simply choose the tool and click on the workspace, dragging the shape to the size you desire. See Figure 16.11, where I have used a rectangle, star, and arrow shape. If you...