

You can launch Lumberyard in one of three ways. First, you can click the Launch button immediately after installation, as illustrated in the previous section. You can also navigate to the location on your hard drive where you have Lumberyard installed, for example, C:/Amazon/Lumberyard/1.1.0.0/dev.
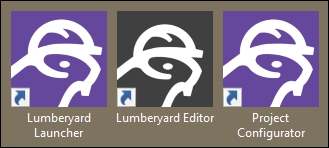
You can also double-click the Lumberyard Launcher icon on your computer's desktop. As part of the installation process, you will have three icons related to Lumberyard added to your desktop. We will use the Lumberyard Launcher icon now and address the Lumberyard Editor and Project Configurator icons later:
Note
The names and look of the aforementioned icons might be different on your system, depending on what version of Lumberyard you have installed. For example, the Lumberyard Launcher icon was replaced by/renamed to Setup Assistant in v1.2.0.0.
At this point, we want to ensure our installation is complete, including installing any additional software, SDKs, and plugins. The following steps will guide you through the process:
After launching the Lumberyard Launcher, or Setup Assistant depending on your version of the game engine, you are greeted with the Get started page. As you can see in the following screenshot, there are several things you can do right from this page:

-
On the Get started page, there is a link to Documentation in the lower-left corner of the screen. More importantly, you are presented with the opportunity to verify your Lumberyard installation location. If you do not see the
 indicator to the right of the Browse button, use that button to point the Launcher, or Setup Assistant, to your installation location.
Check the Run the Lumberyard Editor and tools checkbox. This will tell the Launcher, or Setup Assistant, what you want to accomplish and generate additional steps for you to follow.
Click the Next button in the lower-right corner of the screen. This will result in the Install software screen being displayed. As shown in the following screenshot, you might have additional software to install:

Using the links provided, install all software listed under the Required software heading.
You can decide if you want to install the software components listed under the Optional software heading. If you do not do this now, you can do it later.
Once you have all the desired software installed, select the Next button. This will display the Install SDKs screen.
As appropriate for your needs, install any SDKs that are listed but not already installed. Follow the on-screen guidance. You can always come back to this as your needs change.
Once you have all the required SDKs installed, select the Next button. This will generate a list of plugins.
Install any desired plugins by following the on-screen instructions.
Install any additional plugins you want that are listed under the Available content creation plugins header.
Tip
You will notice that most of the external plugins do not have associated URLs. You will need to install the software manually. You can use the refresh button in the upper-right corner of the screen once your software has been installed. This is a great way to verify that Lumberyard can locate the software.
Once you have installed everything you wanted on the Install plugins page, click the Next button. This will present you with the Summary page. Here you can review software, SDKs, and plugins that you still might consider installing. You should see on-screen text indicating that all required software has been installed.
On the Summary page, click the Launch Lumberyard Editor button. The first time you launch the editor, it can take several minutes to load. Lumberyard will perform a lot of housekeeping to ensure your development environment is set up correctly.
During the initial launch process, you will be presented with a Welcome to Lumberyard dialog window. Here you will need to enter, or create and enter, your Amazon or AWS account. You can even create a new Amazon account specifically for Lumberyard. This is highly recommended as it will help you segment your dealings with Amazon.
Create your Amazon account by following the on-screen instructions. This is a free account.
After creating your Amazon account and logging in, the Lumberyard Editor will open. Additional guidance is provided in the next section.