

The Lumberyard Editor is where you will spend most of your development time. This section will provide an overview of the major components of the Lumberyard Editor user interface. Additional details on components of the Editor are provided in the later chapters, when the functionality is first introduced.
Before you use the Editor, at least the first time you launch it, you will be presented with the Welcome to Lumberyard Editor dialog window, as shown in the following screenshot:
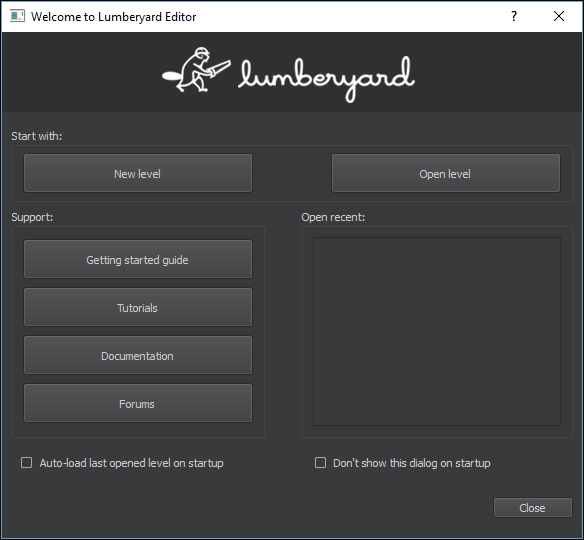
There are four content areas on the Welcome screen and two decisions. The first content area is Start with, which allows you to start a new level or open a level you previously created.
Note
Levels are components of games and games are created by developing multiple linked game levels. The Lumberyard Editor allows you to create and edit game levels.
The second section on the Welcome screen contains four support links, each accessible via a button:
Getting started guide (opens https://docs.aws.amazon.com/lumberyard/latest/gettingstartedguide/intro.html in your browser)
Tutorials (opens https://gamedev.amazon.com/forums/tutorials in your browser)
Documentation (opens https://docs.aws.amazon.com/lumberyard/latest/userguide/lumberyard-intro.html in your browser)
Forums (opens https://gamedev.amazon.com/forums/index.html in your browser)
There is also an Open recent: section to the Welcome dialog window. This area will list levels that you have previously saved. This gives you quick access to your recent work.
The final content area of the Welcome dialog window contains two checkboxes. By selecting or de-selecting the boxes, you can determine whether your last opened level will be automatically loaded when the editor is launched and whether you want to suppress the Welcome dialog window on future launches of the editor.
To review the editor's user interface, we will select New level from the Welcome dialog window. This generates a New Level dialog window. Here, we can name our level and indicate where to store the files associated with the level:
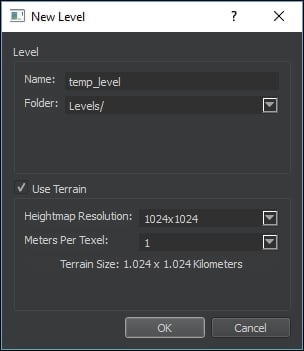
If terrain is being used, you can assign the resolution of the Heightmap and how many Meters Per Texel. We will look at the terrain settings later, in Chapter 3, Constructing an Immersive 3D Game World. For now, we will change the level's name to test_level and click the OK button. We are accepting the default location for new levels; you can change this if needed.
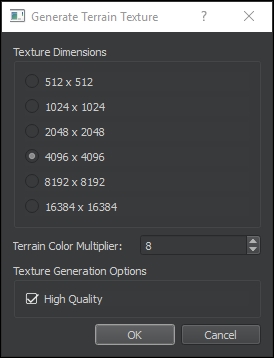
The Generate Terrain Texture dialog window appears next and is shown in the following screenshot. As you can see, there are several decisions we need to make here. At this point, we simply want to review user interface of the Editor. We'll take an in-depth look at the terrain options in Chapter 3, Constructing an Immersive 3D Game World. For now, simply click the OK button to accept the default settings:
In the next section, we will review user interface of the Lumberyard Editor.
The main interface of Lumberyard Editor is comprised of 10 areas, or workspace components. The following screenshot illustrates each of these areas:
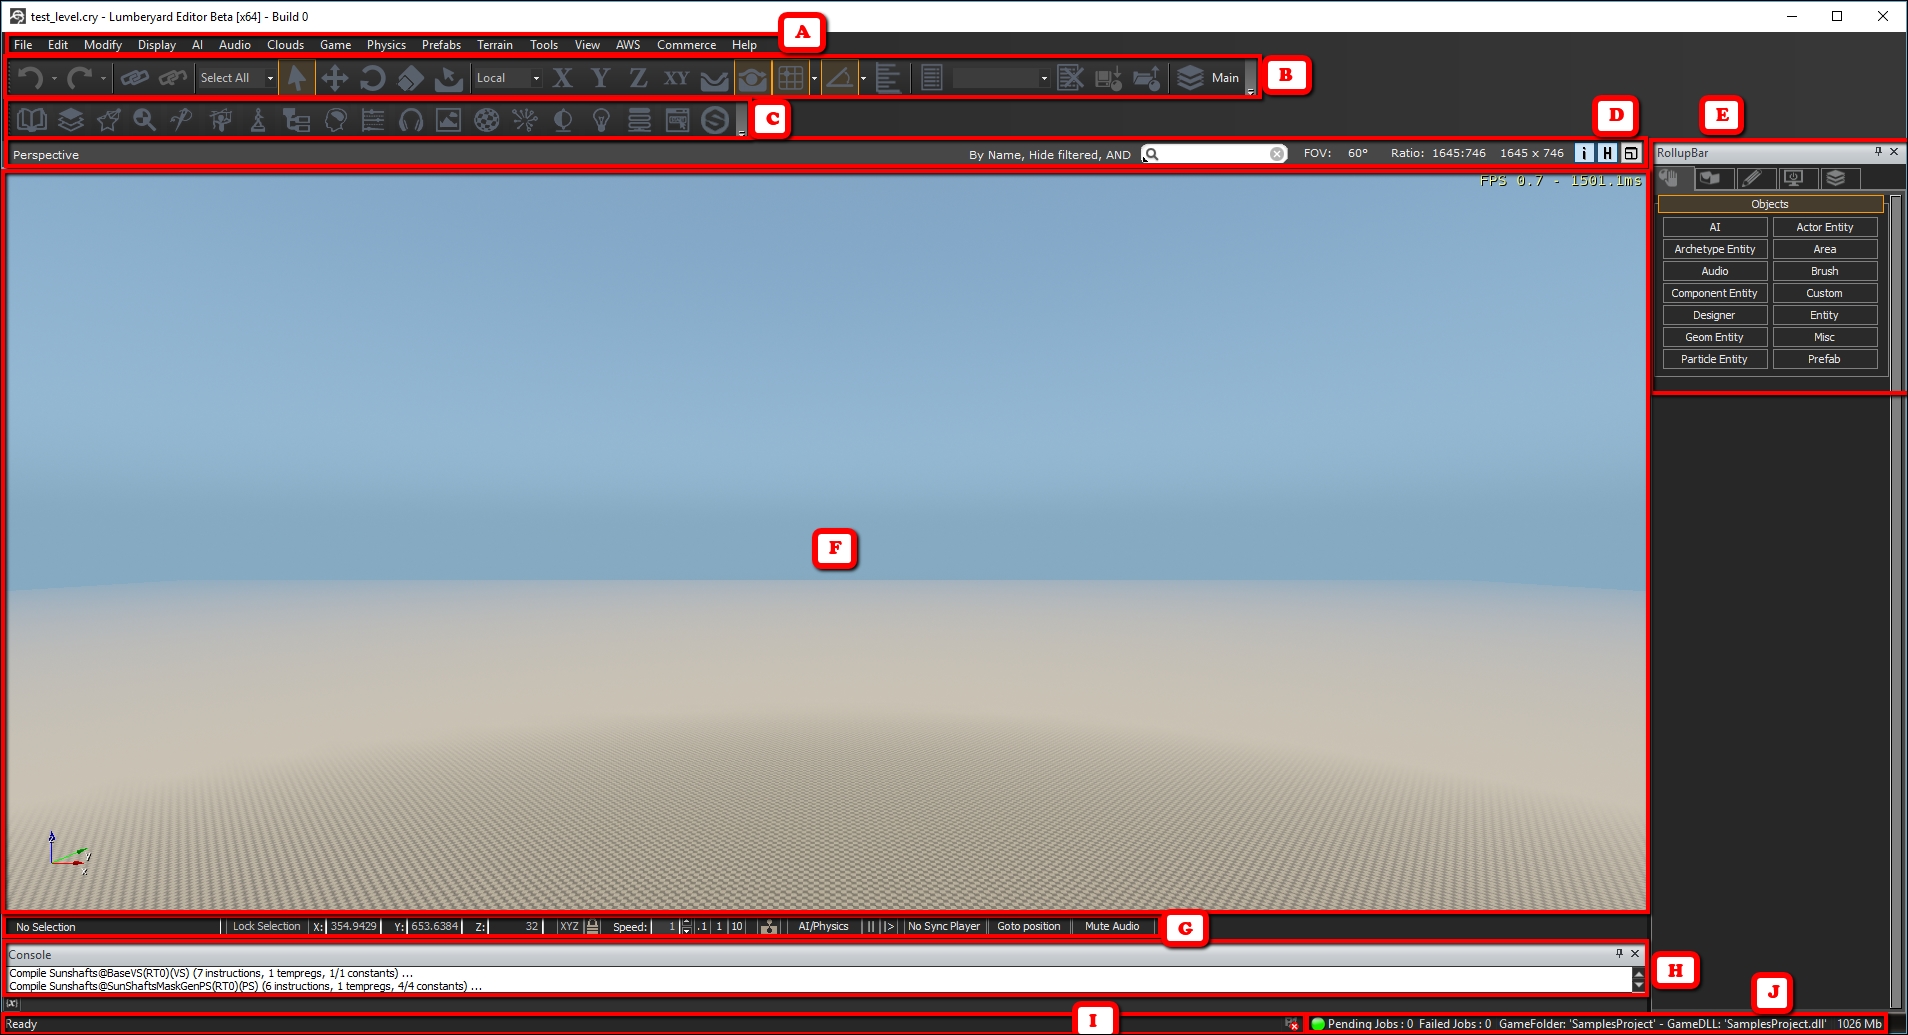
Each area of the user interface provides you with access to specific functions. The individual areas are described in the next 10 subsections with reference to the previous screenshot. You will learn more about each area and the supported functionality as we build our first game throughout the remainder of this book.
This area consists of a menu bar at the top of the interface. Each menu label, listed as follows, presents the user with multiple options and functions:
File - You can open, close, and export projects.
Edit - This menu is contextual and supports grouping, visibility, and more.
Modify - Here you have access to make modifications to your game objects.
Display - You can change and configure how your level is viewed in the viewport.
AI - Access to Lumberyard's artificial intelligence functionality.
Audio - You can refresh audio and stop all sounds.
Clouds - You can create, open, close, and destroy clouds.
Game - This is a set of tools relevant to your game to include enabling physics and AI, edit equipment packs, and more.
Physics - With this menu set, you can get and reset physics states and simulate objects.
Prefabs - Tools to create, edit, and manage prefabs.
Note
A prefab is a group of predefined assets. Using prefabs can speed up the content creation process.
Terrain - Access to terrain-related creation and editing.
Tools - A plethora of tools for scripts, textures, shaders, terrain, geometry, and more.
View - This menu gives you access to tailor your layout and open/close user interface components.
AWS - Access to AWS to include cloud computing and storage, GameLift, and more. This is where you will gain access to your AWS Profile.
Commerce - Web links to the Amazon developer portal and Merch by Amazon.
Help - Access to tutorials, the getting started guide, documentation, and more.
So far, we have only created a test level. You should feel free to explore the menu items to become more familiar with them.
The default view for the editor includes two rows of toolbars containing icons for commonly used functions and features. You are able to add, remove, and relocate these icons. You can even move the toolbars. This area is highly customizable. It is recommended that you leave the toolbars as is until you become more familiar with the interface and developing with Lumberyard.
This is an information header bar that pertains to the perspective viewport (area F). There is also a search bar to help you find objects. This is especially useful in complex game worlds where selecting a very specific object could be challenging.
The rollup bar provides categorized access to a host of game components and functionality. The features are categorized into tabs for Objects, Terrain, Modeling, Display, and Layers. You will gain exposure to these starting in Chapter 3, Constructing an Immersive 3D Game World.
This viewport provides a visual representation of your game level in 3D.
This area is located directly below the viewport. When an object is selected, the viewport controls allow you to modify X, Y, and Z axis values, lock and unlock objects, control speed, and more.
The console provides systems information, output, game data, and input, as appropriate. It can be a key component when debugging.