

When you start a new game, the first step is to configure an empty game project. For 2D games, creating empty games and setting up the initial environment and camera management can sometimes become a painful process. In this section, we will discuss on how to configure empty game projects for 2D games.
Note
If you have already worked on 2D games in Unity, then you can skip this section and use the starter project of Perky Penguin from the code in the next section.
When you launch Unity 5.6, it shows a project wizard as shown in the following figure:
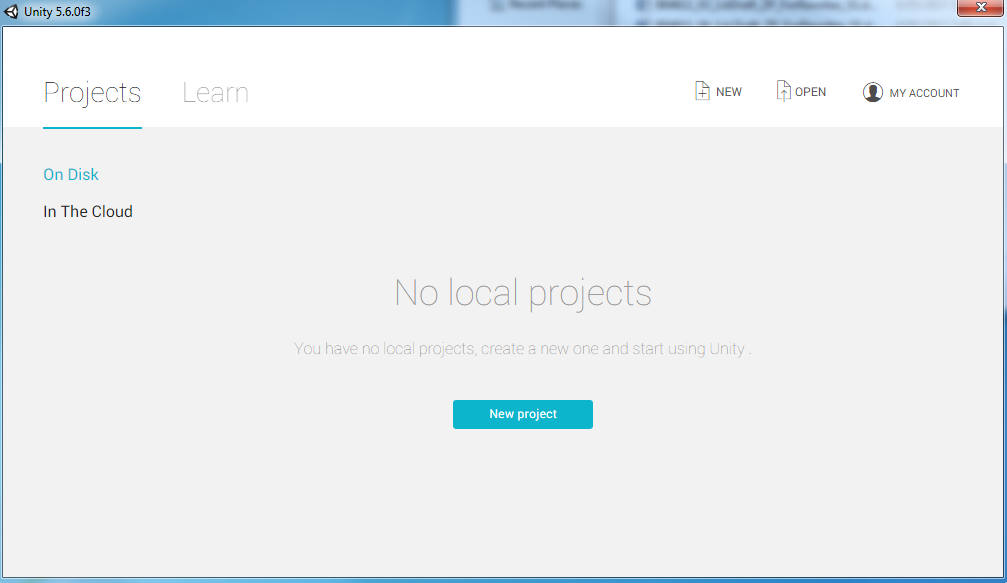
Figure 1.20 Project Creation Wizard
Unity has a nice and smooth user interface in its latest release, Unity 5.6. The project wizard shows a list of all the recent projects, along with their names. The most recent project is highlighted for quick opening. In the top-right side of the wizard, there are controls to create a new project from scratch and open any specific project from any directory. To guide new developers through basic concepts, the Get started tab offers a basic video tutorial.
Let's create new project by clicking on the New project button on top-right, and you will be presented with the following dialog box:
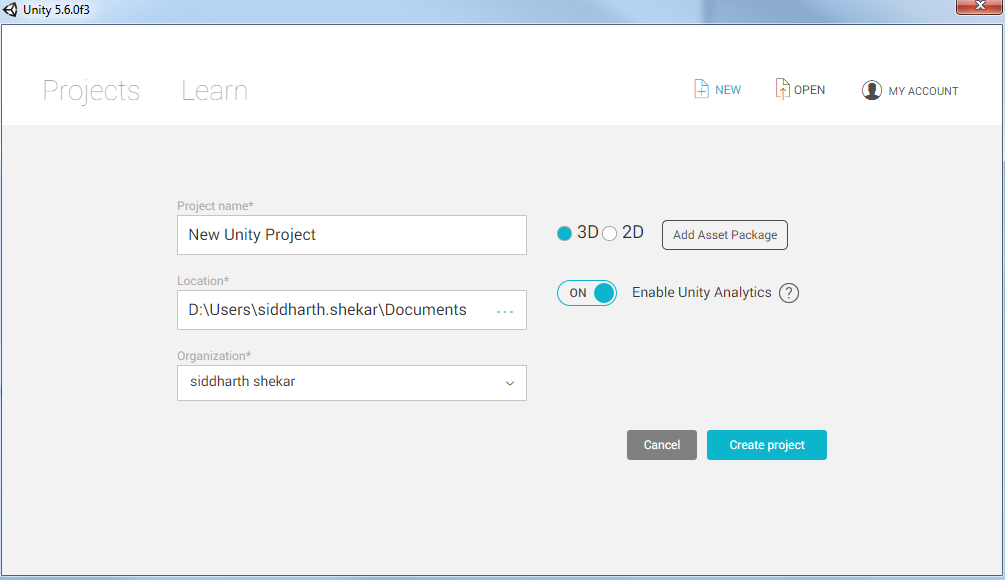
Figure 1.21 Project creation wizard
There are two text inputs, Project name and Location. Their names are self-explanatory. You will also notice 3D and 2D in the wizard, as shown in following figure:
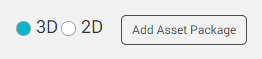
Figure 1.22 Project type selection toggle
This toggle lets you tell Unity whether your project is 2D or 3D. Although this doesn't affect the project in any way while working on it, this affects default project setting for easier workflow. For example, in 3D mode, when you import any image asset into project, Unity will take it as a texture and in 2D mode, Unity will take it as a Sprite type. You can also change the mode later from the project anytime, it is not necessary to select at project creation time. By default, Unity will create project in 3D mode.
Along with 2D/3D mode, you will also notice the Asset packages... button at bottom on the project creation wizard. One of the best features of the Unity is the Assets support. Unity lets developers to create, distribute, and sell reusable plugins and add-ons called Unity Assets through Unity Asset Store available at http://assetstore.unity3d.com. Unity comes with a big collection of free assets to help you get some things done within the minutes. This button lets you choose which assets to import in the new project, shown as following:
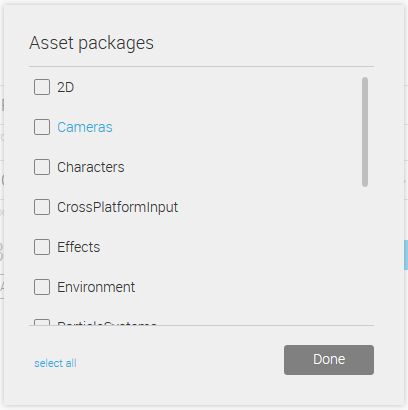
Figure 1.23 Asset Packages Dialogue
You can select any package or multiple packages, and the new project will be created with those that have been already imported in it. For now, you don't need to import any packages. You can also import these later as you need it.
So, for the project creation wizard, we have named our project Perky Penguin and we have selected 2D mode. Click on the Create project button, and you will see the Unity interface with an empty scene and project.
The first step to follow is to make sure that you are in 2D or 3D mode. If you have selected 2D mode, then you will see 2D toggle active on the control bar in the Scene View, as shown in the following screenshot:

Figure 1.24 Control bar in Scene View
Also, you need to check in Editor Settings to make sure that the project is in 2D mode. You can do it by going to Editor Settings by selecting Editor option from Project Settings in the Edit menu as shown in the following figure:
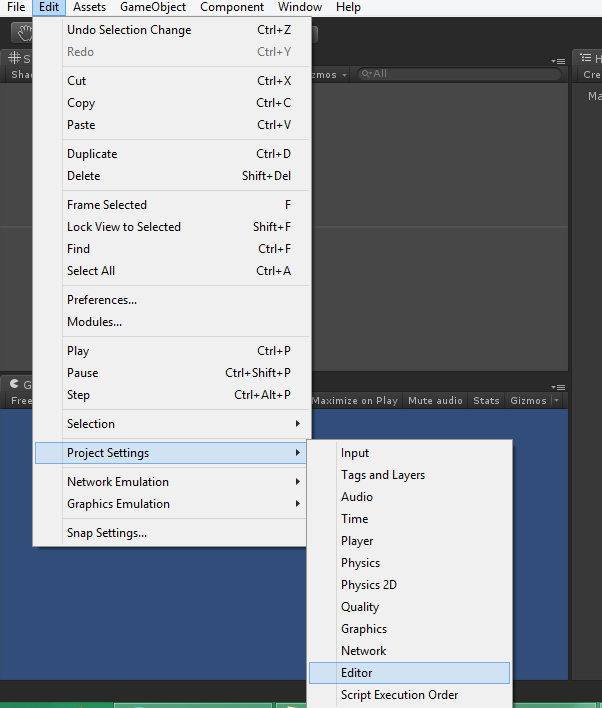
Figure 1.25 Editor Settings Menu
On selecting the Editor option, you will see settings in the Inspector panel. Make sure that Mode in Default Behavior Mode is set to 2D, as shown in the following screenshot:

Figure 1.26 Editor Settings in Inspector Panel
You can also change it to 3D if you want Unity to interpret images as textures and enable other 3D settings by default. The last thing to make sure that the scene is in 2D mode, you need to check the camera properties. You may have already have noticed a Camera game object placed in the empty scene when creating a new project.
Select the Camera object and you will see its properties in inspector panel as shown in the following screenshot:
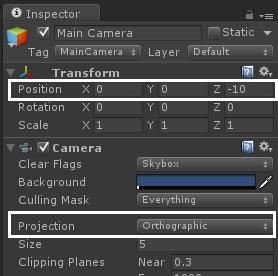
Figure 1.27 Main Camera Settings
You will notice that its Position will be set at (0, 0, -10) and its Projection setting will be as Orthographic.
Orthographic projection is a means of representing 3D objects in 2D. Orthographic views are commonly used in engineering as a means of producing object specifications that communicate dimensions unambiguously. For example, if you are looking at a larger scene with buildings then orthographic rendering gives a clear measure of distance between buildings and their relative sizes.
So, after making sure that the project is in 2D mode, let's save the scene. Unity project comes with a root directory of Assets, where all the assets used in project are placed. These assets can be scenes, scripts, textures, sprites, models, prefabs, or materials. There is no traditional or standard method of managing assets in Unity, and every developer has different methods. In this book, we will follow a simple method of managing assets. Our method of managing assets is to create different folders in the Assets directory for each type of resources. The following figure shows the directory structure in the Assets folder:
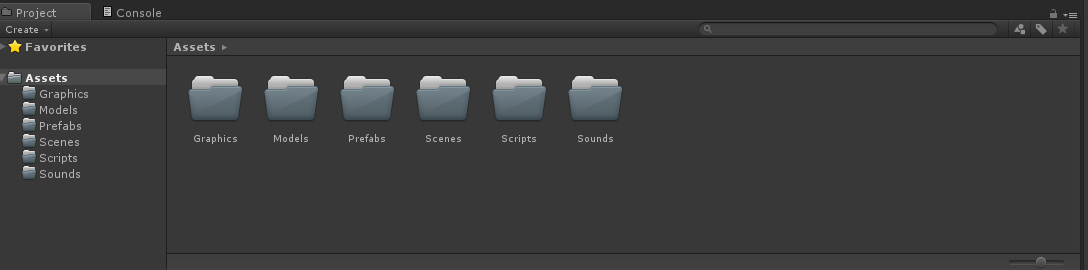
Figure 1.28 The Assets directory in Unity
After creating folders in Assets, let's save the empty scene with the configured camera in the Scenes directory with the name PerkyPenguin_GameplayScene.unity. Scene files have the .unity extension, and these files contain different game objects for camera, player, enemies, obstacles, environment, controls, and so on. Scenes are like different levels in the game. Any game can have one or more than one scenes and it is not necessary to create different scenes for each level. It is very important to note that all the scenes in the game should be added in Build settings in order to deploy them in the final package. We will discuss about deployment in more detail in the later chapters.
After saving the scene, we have only one thing left to fully configure an empty game project. That is configuring the game view so we can test our game. As this book is about Android game development, we have to set our project targeted to Android devices. Initially, the default target platform will be set to PC, iMac, and Linux standalone. You can see it in the Build Settings from the File menu as shown in the following screenshot:
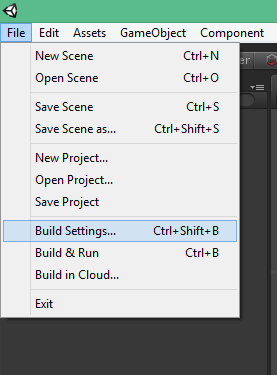
Figure 1.29 Assets Directory in Unity
You will be presented with a dialog containing all the possible platforms to build game to and all the scenes included in the game, as shown in the following screenshot:
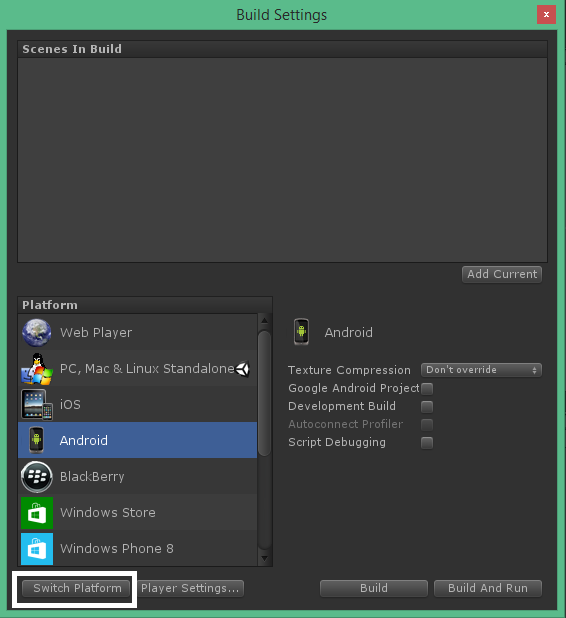
Figure 1.30 Build Settings
Select Android from the Platform list, and click on Switch Platform button and the project will be changed for Android devices. You might not notice anything after changing the target platform to Android but an easy way to check it is to see the resolutions list in the game view. You can do it by clicking on Free Aspect from the control bar in Game View as shown in the following figure:
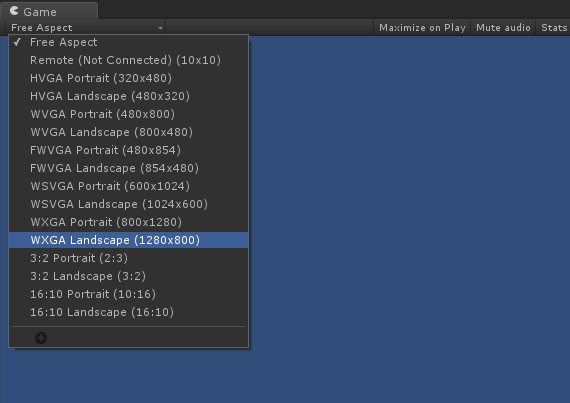
Figure 1.31 Resolution List of Android Platform
In order to create a game, that runs on all Android devices, we have to select a primary target size for viewport implementation. We have chosen 1280x800 as our target device in landscape mode. We will discuss the cross-resolution approach in details in the later chapters.
You can also add your own custom resolutions by selecting the small plus button in resolution list. It will show you a dialog to put the size of resolution either in pixels or as an aspect ratio with its name. The window is shown in the following figure:
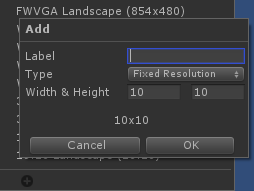
Figure 1.32 Add Custom Resolution in Game View
Finally, after setting the project in 2D mode and changing the platform to Android with our required resolution, we have only one little job remaining that is to configure camera according to our target resolution. Select the Main Camera from Hierarchy panel, and change the Size in Camera component to 3.2 as shown in the following figure:
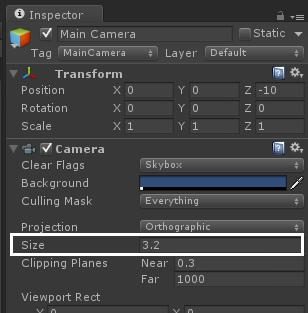
Figure 1.33 Camera Size
So far, a 2D Unity game project has been created with an initial directory structure and an empty scene which include a 2D configured camera in it. In the next section, we will discuss on what game will be created in this chapter and how to create any game from scratch.