Book Image

3D Game Design with Unreal Engine 4 and Blender

By : Jessica Plowman
Book Image

3D Game Design with Unreal Engine 4 and Blender

By: Jessica Plowman

Overview of this book

Unreal Engine 4 now has support for Blender, which was not available in earlier versions. This has opened up new possibilities and that is where this book comes in. This is the first book in the market combining these two powerful game and graphic engines. Readers will build an amazing high-level game environment with UE4 and will show them how to use the power of Blender 3D to create stunning animations and 3D effects for their game. This book will start with creating levels, 3D assets for the game, game progression, light and environment control, animation, and so on. Then it will teach readers to add amazing visual effects to their game by applying rendering, lighting, rigging, and compositing techniques in Blender. Finally, readers will learn how to smoothly transfer blender files to UE4 and animate the game assets. Each chapter will add complexities to the game environment.
Table of Contents (16 chapters)
3D Game Design with Unreal Engine 4 and Blender
Credits
About the Author
About the Reviewer
www.PacktPub.com
Preface
Index

Custom Marking Seams


Let's take a look at using seams effectively. Remember that the Unwrap tool will essentially flatten your object for texturing, splitting, and flattening along the lines we have marked as seams. For different primitive shapes such as cubes and cylinders, there are some best practices to be aware of. Knowing these standard unwraps can help us later when we run into more complex shapes, such as our tentacles.

Unwrapping Cubes

Practice makes perfect! Cubes and other primitive shapes are a great way to brush up on UV unwrapping

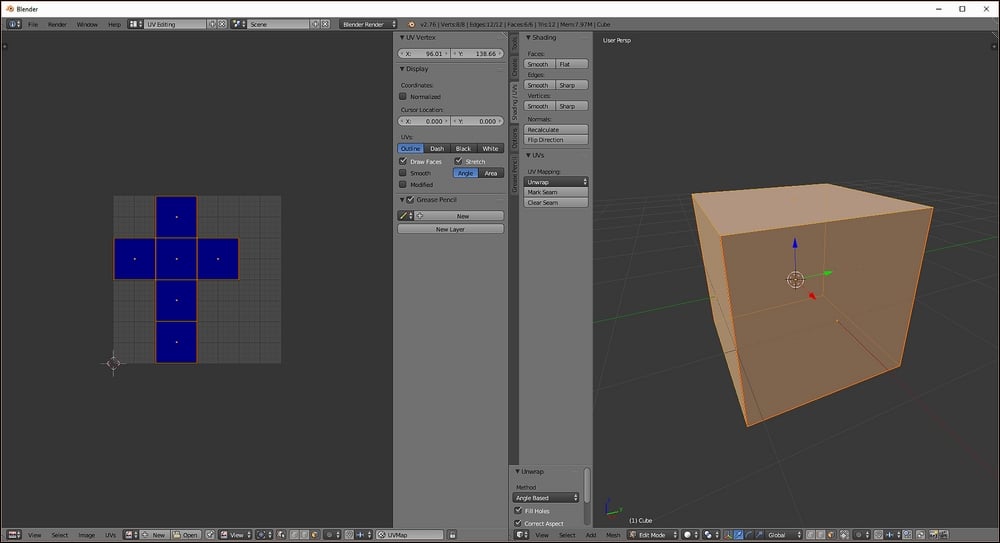
When unwrapping a cube, it is important to minimize the number of seams used. This is why we unwrap in a cross shape with the top face at the center. Let's try it!

  1. Head up to the Scene Layout dropdown and select UV Editing from the list.

  2. Select the default cube in the scene and head to Edit mode. Choose Line selection from the selection modes at the bottom of the screen and locate the top face. This will be our reference point as we add our seams.

  3. Locate...