
Discovering the limitations of the basic sculpting mode
So far, we've only made changes to the surface details of the Quad Sphere using the Draw brush. These changes are pretty cool, but the whole thing still just looks like a sphere with some details on it because the major forms haven't changed. We can think of the major forms of a model as large building blocks. If you squint and look at any object, you can roughly block it out into its major forms: cubes, spheres, cylinders, the head, the neck, appendages, protrusions, horns, the nose, eyeballs, and more.
The Draw brush is not well suited to making new major forms, so we will require a new kind of brush – one that pushes the polygons around in a very different way. In this section, we will try out the Snake Hook brush to begin creating new major forms on our sculpture.
Getting ready
In this section, we can either start with a new sculpting project or pick up where we left off in the Pushing polys with the basic sculpting mode section. If you start a new file, make sure that you turn on the statistics overlay so that you can see the tri count.
How to do it…
Let's try using the Snake Hook brush to create new major forms on our Quad Sphere:
- Locate the Snake Hook brush from the Toolbar.
- Click to activate the Snake Hook brush.
- Increase the brush Radius setting to around
250 px. - Hover your pen over your graphics tablet and align the pointer over part of the Quad Sphere model.
- Press the tip of your pen onto your graphics tablet to begin using the Snake Hook brush.
- Draw in an outward direction from the Quad Sphere to pull a piece of the sphere outward.
The Snake Hook brush is much better at moving around large areas of the sculpture than the Draw brush. Your results should appear similar to the following diagram:
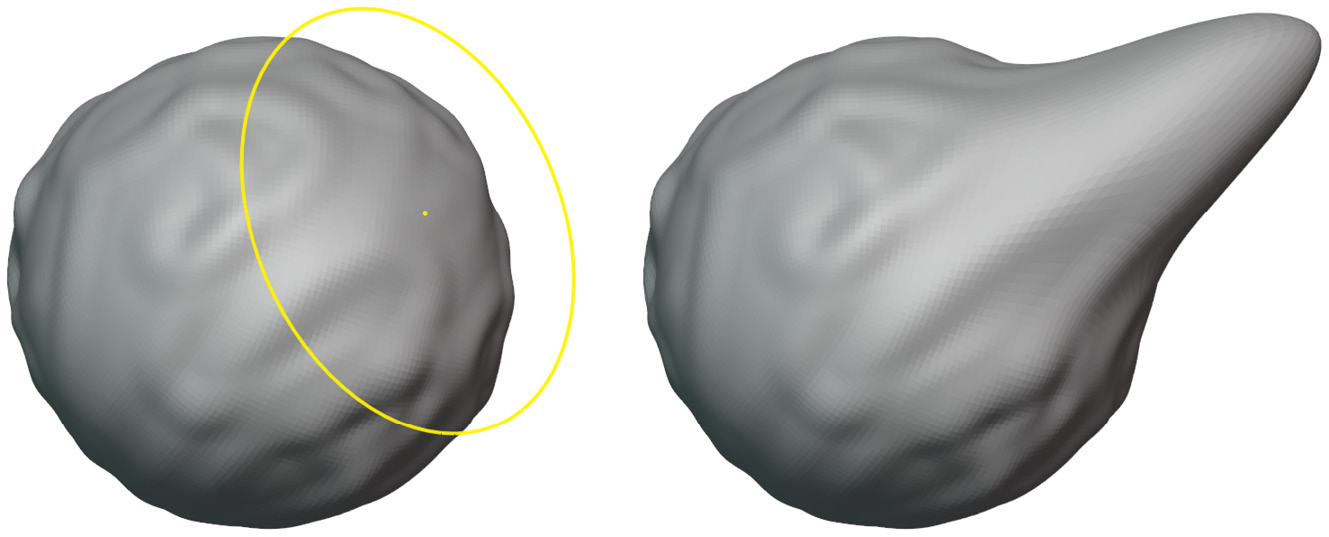
Figure 2.6 – The Snake Hook brush used to pull out a new segment of the Quad Sphere
Pretty cool! But we're starting to run into a problem. As we discovered in the Pushing polys with the basic sculpting mode section, the basic Sculpt Mode can only push around polygons that already exist in the model. The polygons of our Quad Sphere are getting a bit stretched out. To better visualize how stretched out these polygons have become, let's turn on the wireframe overlay:
- Open the Viewport Overlays pop-over menu.
- Check the box labeled Wireframe.
- Use the slider next to the wireframe checkbox to set the wireframe value to
1.000.
The polygons of the Quad Sphere will now be visible. They should appear similar to the following diagram:
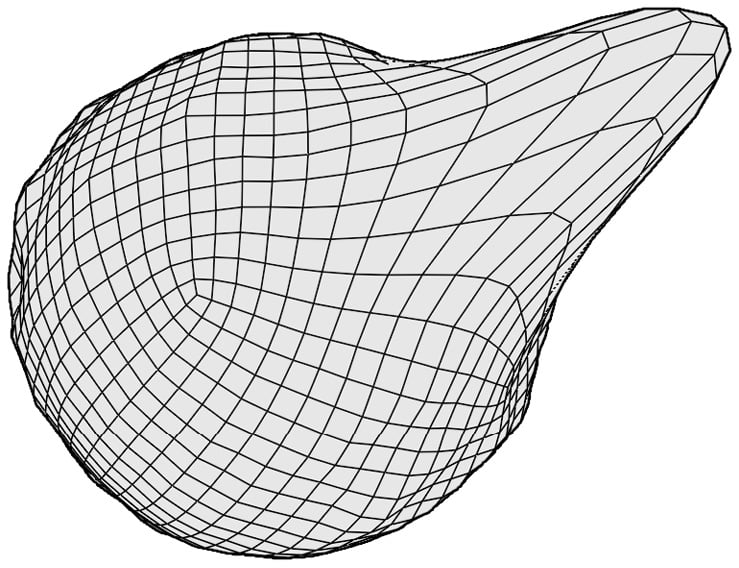
Figure 2.7 – The wireframe after using the Snake Hook brush (this diagram has been simplified for better visibility in this book)
Notice how the protrusion we created has led to large, stretched-out polygons? The further we pull these polygons away from the Quad Sphere, the more stretched out they will become.
So, let's examine what happens if we try taking this even further. Let's make a curvy shape using the Snake Hook brush:
- Use the Snake Hook brush to extend the protrusion further.
- As you draw, try making a curvy, swoopy S-shaped pattern.
You've probably noticed the problem by now. Our polygons have become so stretched out that they can't represent this shape properly, as you can see in the following diagram:
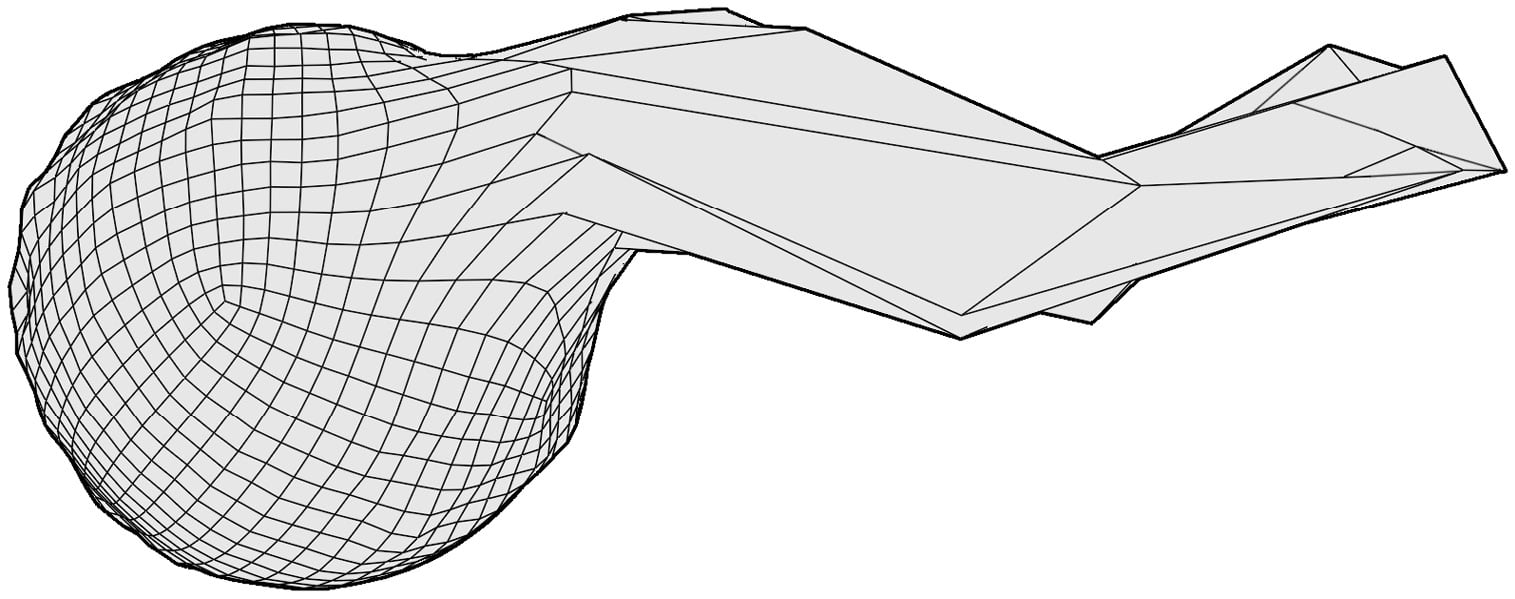
Figure 2.8 – The wireframe after making a curvy segment with the Snake Hook brush (this diagram has been simplified for better visibility in this book)
Oh, no! We ruined it. The Snake Hook brush did not play nicely with the polygons of our Quad Sphere. This is a major limitation of the basic sculpting mode. If we try to add new major forms to our models, we will end up with ruined, stretched-out geometry.
Stretched-out geometry such as this will always produce bad results in our finished sculptures. If you start to observe this happening to your sculptures, it means we are pushing the polygons too far. We need to do something else if we are going to overcome this limitation of the basic sculpting mode.