
Now that we have the software up and running, let's take a look at the interface . The basic layout of GameMaker: Studio can be broken down into four components: the Menu, the Toolbar, the Resource tree, and the Workspace. We will be exploring these components throughout this book, so don't expect a breakdown of each and every item. Not only would that be incredibly boring to read, it would delay us from making games. Instead, let's just focus on the stuff we need to know right now.
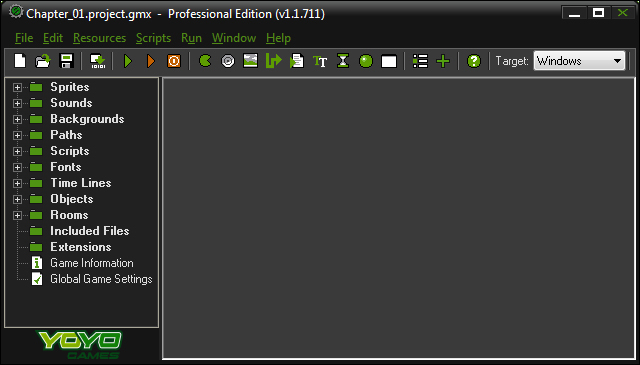
Firstly, as with most complex software, each of these components has its own way of allowing users to do the most common tasks. For example, if you want to create a Sprite you can navigate to Menu | Resources | Create Sprite, or you can click on the Create a Sprite button in the Toolbar, or you can right mouse click the Sprites group in the Resource Tree, or you can use Shift + Ctrl + S to open the Sprite Editor window in the Workspace. There are actually even more ways to do this, but you get the point.
While there is a lot of overlapping functionality, there are also many things that can only be done in each specific component. Here is what we need to know.
The Menu is where you will find every editor and tool you will need. There are a few very useful tools, such as the ability to Search in Scripts and Define Constants that are only found here. Why not just spend a moment and take a look at each menu option so that you have an idea of all the things you have available to you. We'll wait.
The Toolbar uses simple graphic icons for the most common editors and tools we will be using. These buttons are the easiest and quickest way to create new assets and run the game, so expect to be using these often. There is one very important, unique element on the Toolbar: the Target drop-down menu. The Target determines what format we will be compiling and exporting to. Set this to HTML5.
The Resource tree shows and organizes all the assets that have been created for the game. Keeping a project organized won't affect the performance of the software, but it will save us time and reduce frustration in the long run.
The Workspace is where all the various editors will open up. When the game is run, the Compiler Information box will appear at the bottom, and will show everything being compiled when the game is run. There is also a tab for Source Control, which can be used if you have an SVN Client and repository for working in groups.
Note
If you want to know more about Source Control, check out the following GameMaker: Studio wiki page: http://wiki.yoyogames.com/index.php/Source_Control_and_GameMaker:Studio