
You just learned how to set up and configure Power BI sites and the Power BI Designer. Now you will learn how to connect the Power BI Designer to the Dynamics CRM Online instance and put data entities into Power BI.
For our sales productivity dashboard, we will use the following Dynamics CRM entities:
Users
Leads
Accounts
Opportunities
Before we connect to Dynamic CRM with the Power BI Designer, let's quickly review the general requirements:
A user must specify a valid OData URL for a Dynamics CRM Online instance. The connector will not work with an on-premise CRM version.
Enable the OData endpoint in the site settings with Dynamics CRM. Then, select Settings | Customizations | Developer Resources. The OData URL is listed under Service Endpoints.
The user account that you use to access Dynamics CRM Online must be the same as the one you will use for Power BI.
Earlier, we downloaded and installed the Power BI Designer, which allows read-only access to the Dynamics CRM Online instance in order to make it easy for users to get the sales data they want.
To see how easy it is to access data:
Open Power BI Designer and select Query from the bottom-left corner of the Power BI Designer window.
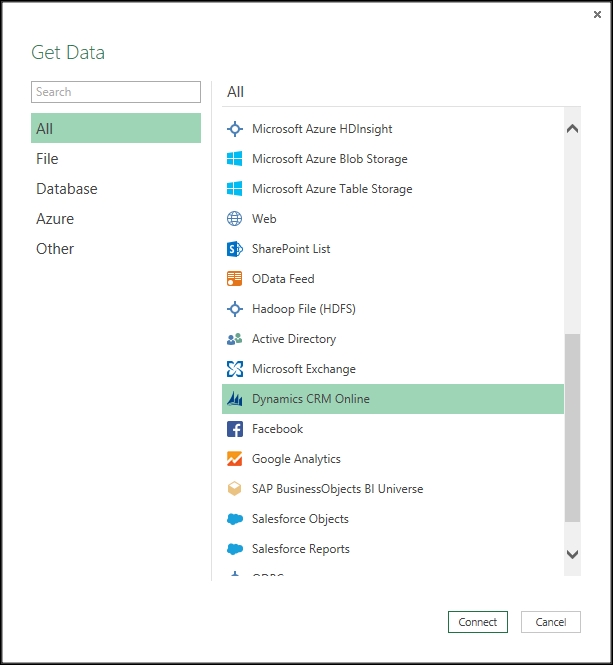
In the top-left corner of the Power BI Designer window, select Get Data.
In the Get Data Window, select All | Dynamics CRM Online to access the Dynamics CRM Online OData Feed window:
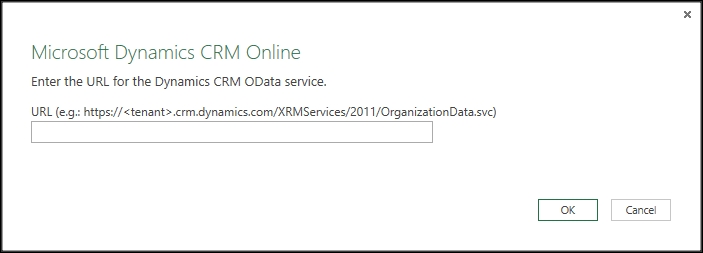
Once the Microsoft Dynamics CRM Online window opens, enter the Dynamics CRM Online OData (REST) URL previously captured during setup:
The Access Dynamics CRM Online OData Feed window may or may not appear to log in to the Dynamics CRM Online instance. If the window does appear, use Organizational account to sign in. For this book, we will select the first URL to connect the OData feed. If the Access Dynamics CRM Online Odata Feed window does not appear, you are already connected and authenticated to the Dynamic CRM instance:

Once you have successfully connected to your Dynamics CRM organization, the Query functionality of the Power BI Designer runs against the Dynamics CRM Online instance, and the navigator window returns a list of Dynamics CRM data entities to include in your dashboard.
By default, when you load the data to Power BI, all the items will be selected in the navigator window. To individually select multiple items, you will have to check the box to select multiple items.
Here's how you do it:
Navigate to the top-left corner of the navigator screen and locate the checkbox labeled Select Multiple items.
Once this checkbox is ticked, the subarea will include additional checkboxes to individually select the Dynamics CRM data entities.
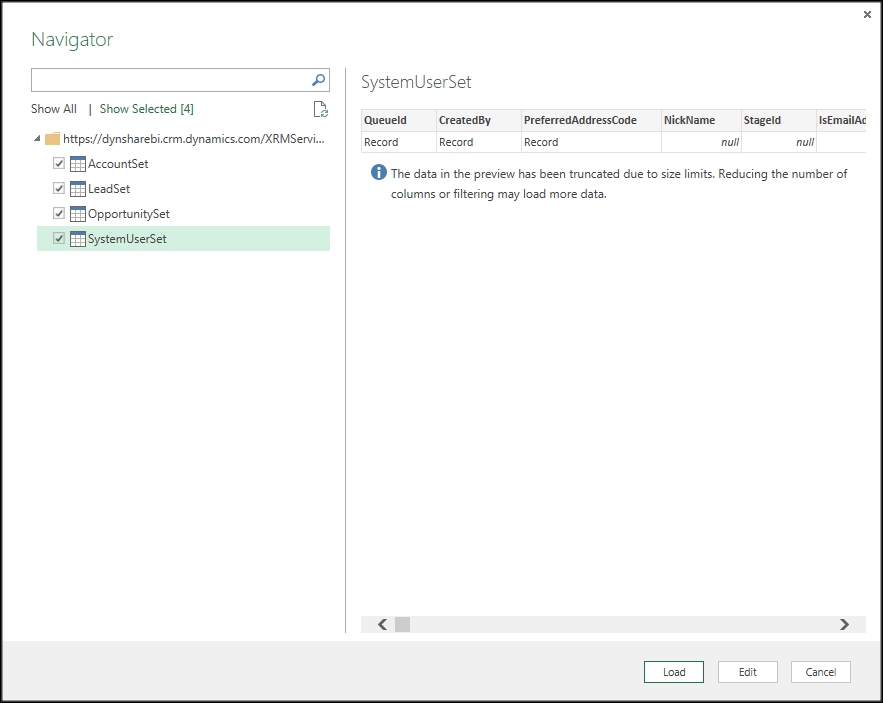
Select the following items from the navigator window:
AccountSet
LeadSet
OpportunitySet
SystemUserSet
The right-hand side of the navigator window will show you a preview of the fields included and data currently in the dataset.
Select Show Selected to see a queried list of just the dataset selected:
Our next step is to query the Dynamics CRM data that we will load to Power BI. We can do this by editing the query before we load the data or come back later and update the query. By querying only the data we need from Dynamics CRM before loading to Power BI, we can enhance the performance of our reports and dashboards.
Here is how it is done:
Select Edit Query from the bottom-right hand side of the window; a view of the entity data is presented in Query view:
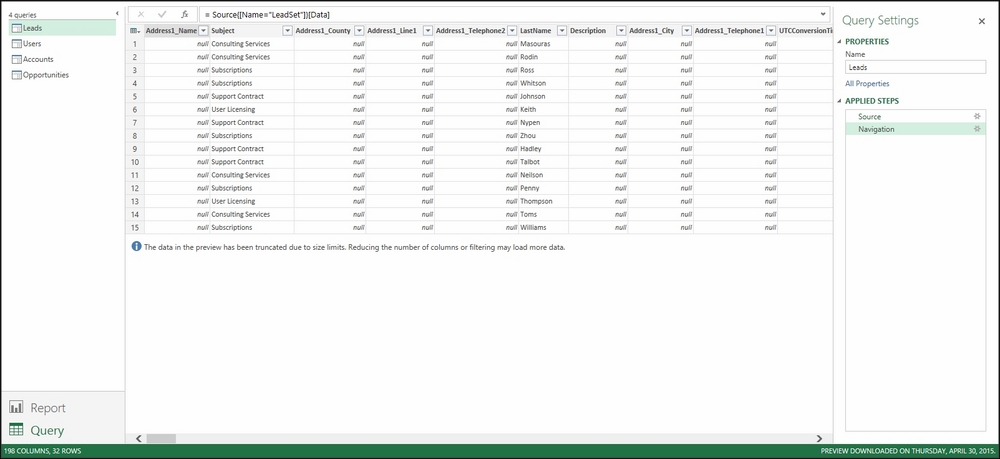
A view of the entity data
To modify the query after you load the data, in the top ribbon select View | Show | Query Settings to access the Query Settings pane.
Select Source in the Query Settings window to update the query entity data:

In the left-hand side pane, queries are listed and available for selection, viewing, and shaping. In the main pane, data from the selected query is displayed and available for shaping.