

Creating a bespoke workspace
It’s one thing to know your Photoshop tools and features, but quite another to make them more accessible. Delving into a rabbit hole of sub-menus to find a time-saving tool burns valuable time, diminishing its effectiveness. At first, the extra mouse clicks might seem inconsequential, but over the course of a year, that could amount to dozens of hours wasted when you could have been meeting deadlines faster. I would suggest thinking about which tools and panels you use most frequently and prioritizing your screen real estate.
In the following exercises, we’ll look at customizing panels, tools, and shortcuts. You can adjust these techniques to suit your individual workflow.
Modifying panels
Photoshop panels are arranged into “workspaces,” with the default, called Essentials, active when you open it for the first time, an option that Adobe believes is important to all Photoshop users. Arranged into two columns on the right-hand side of the interface, the right-hand column is expanded for high-use options, while the left-hand column is collapsed into a thin set of icons for less frequently used features. The Layers panel is core to almost everything we do in Photoshop, therefore it’s omnipresent and requires space. We will arrange other panels around it. Here’s how to do this:
- Click on the Workspace Switcher menu located at the top-right-hand side of the interface (A in Figure 1.10) and choose Essentials from the list of options. Then, return to the same menu and choose Reset Essentials:
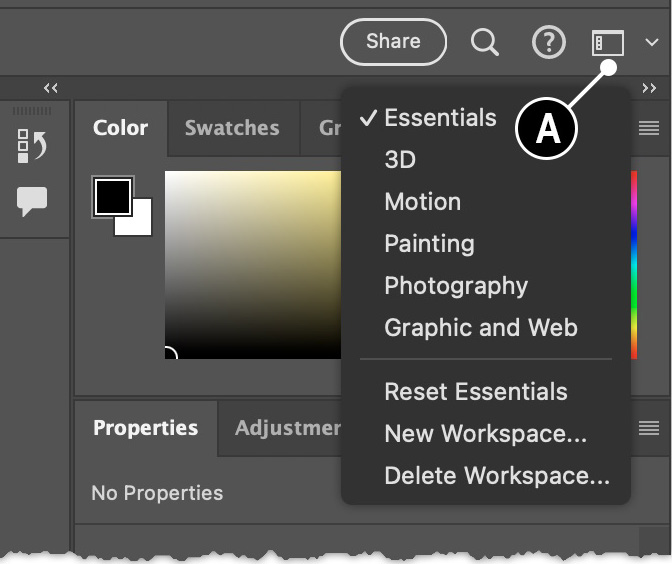
Figure 1.10: The Workspace Switcher menu
- Click on the Color Panel tab to make it active, then click on its Panel fly-out menu in the top-right corner. From the list of options, choose Color wheel. This can make the process of visualizing new colors easier. If you need to create a specific color value, you can simply left-click on the foreground icon located at the top of the Color panel.
- Next, hover your cursor over the Libraries Panel tab and drag it over to the image window to undock it. This panel often requires lots of height to browse through assets, and the best place I’ve found for it is in the left-hand column, collapsed into icons with the History and Comments panels. To add the Libraries panel to this column, drag the Libraries Panel tab above the icon for the History panel, at which point you will see a pale blue line appear. Release the mouse to dock it at the top of the column (B in Figure 1.11).
- The Libraries panel now appears in icon mode, left-click on it to expand it. Hover your cursor over its bottom edge to reveal the scaling symbol, a double-headed arrow, and drag the panel edge downward to extend its height so that more content will be visible when needed. Then, left-click on the Libraries Panel icon to minimize. Use the same technique to expand the height of the other panels in the column to reduce the amount of scrolling that is required with small panels:
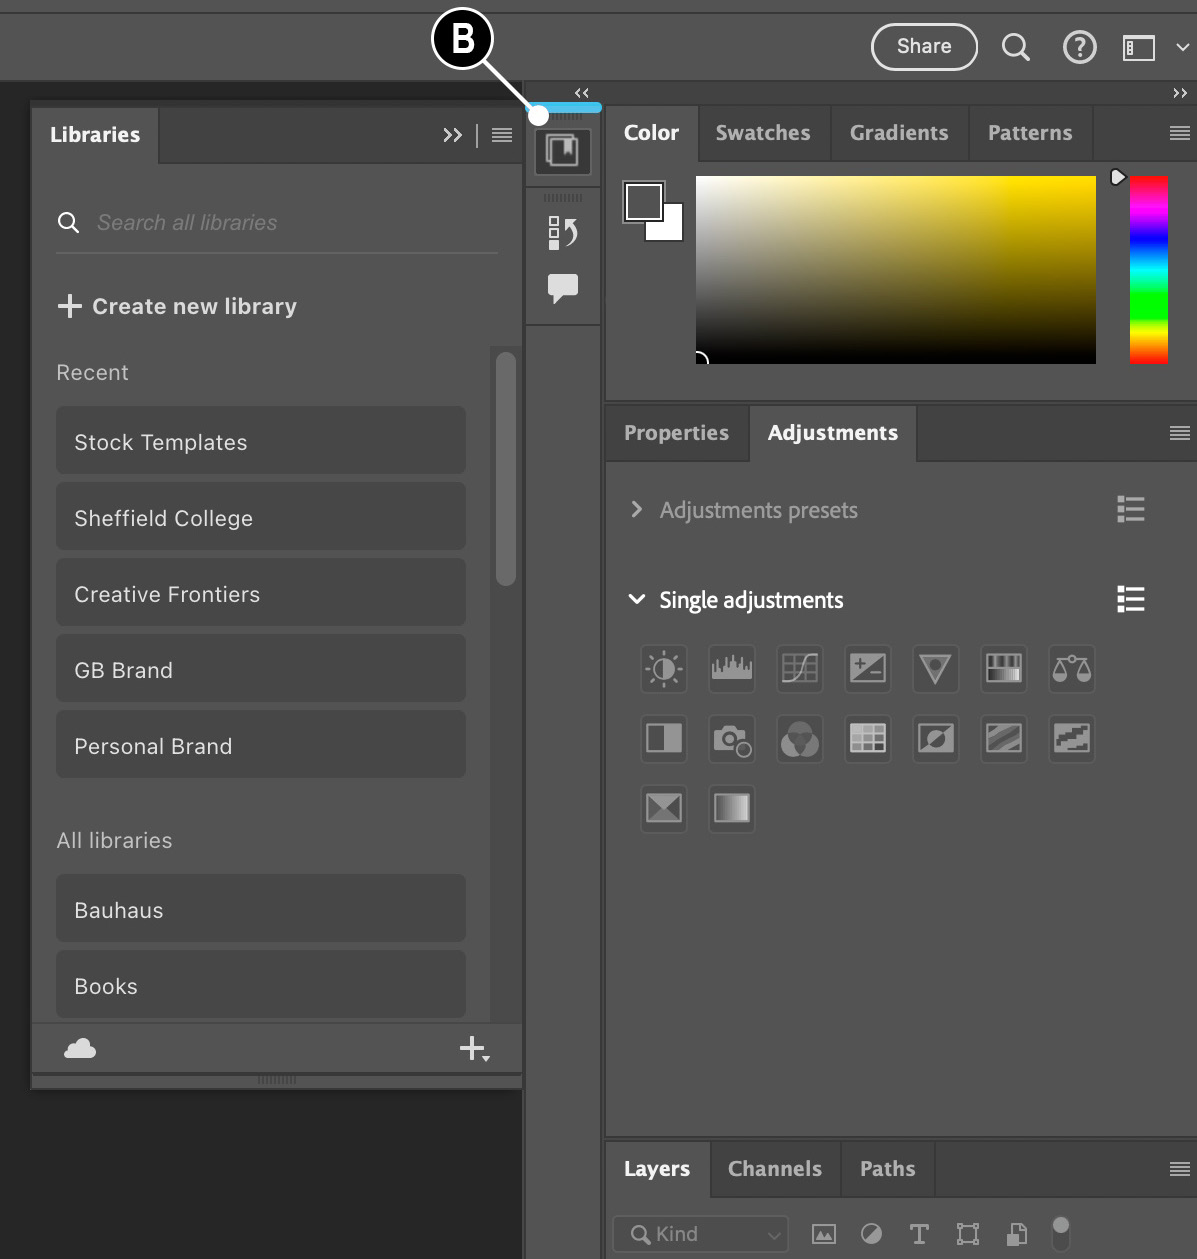
Figure 1.11: Repositioning the Libraries panel above the History panel
- Within the collapsed column, I also added the Brushes panel, which also appears with the Brush Settings panel (Window → Brushes). Both are handy. Using the same technique, you can add any other infrequently used panels to the collapsed column. In the example shown, and my personal preference, I also dragged the Patterns and Gradient panels, originally adjacent to the Color panel into the collapsed column, along with the Shapes panel and Styles panel, found under the Window menu:
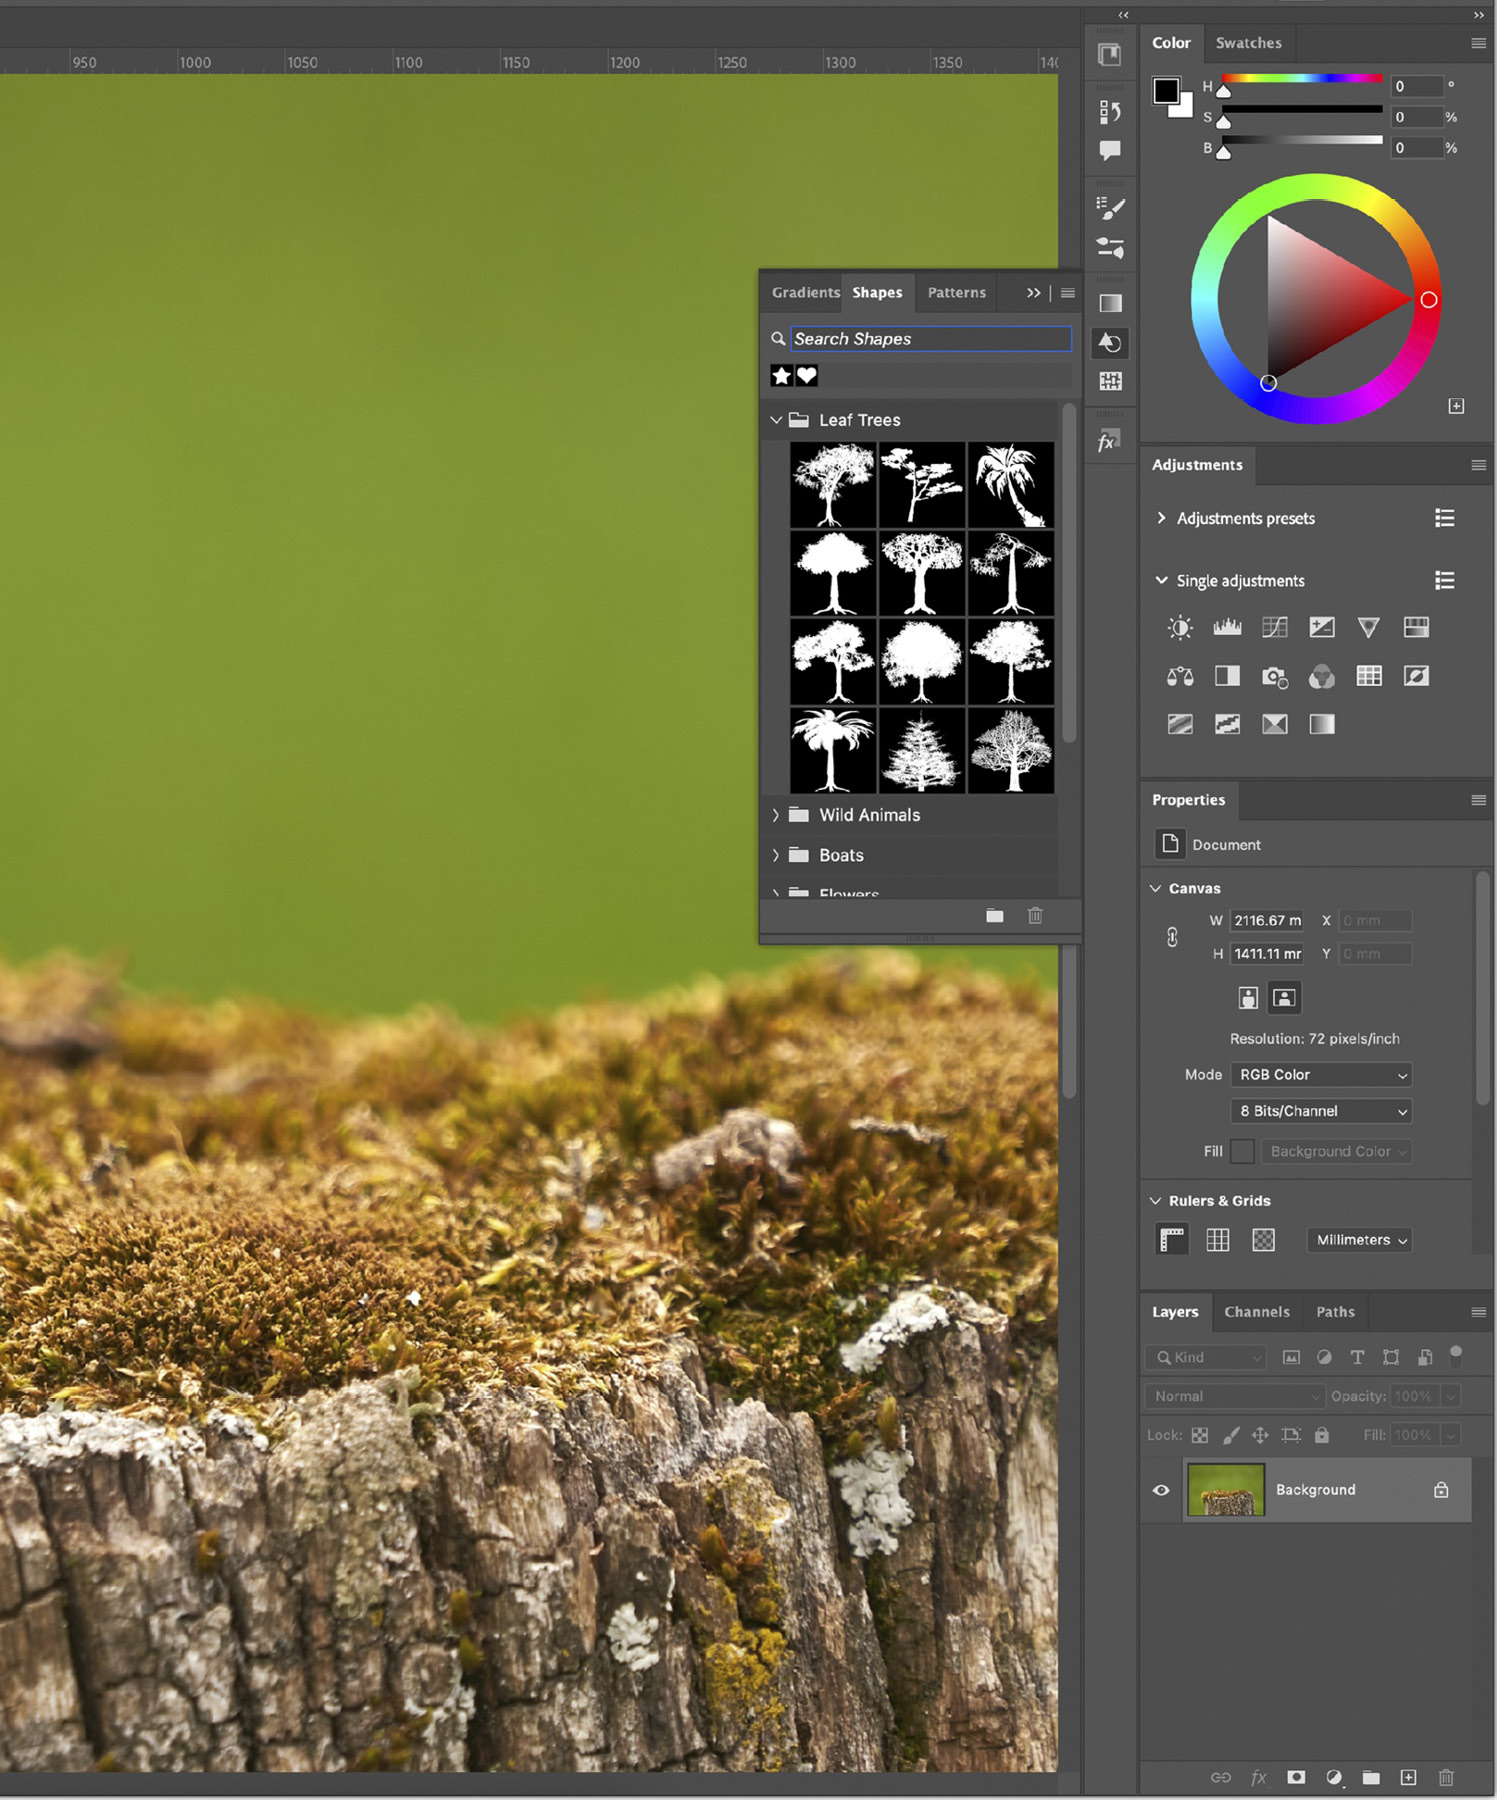
Figure 1.12: The workspace after reconfiguration
Customizing the Tools panel
The Photoshop Tools panel contains in excess of 70 tools; only 21 are visible at any one time, and the majority are hidden. This is another of those scenarios where Adobe can make a best guess as to the tools appropriate to your workflow, but never exactly. This leaves room for improvement and a little simplification. You can start by modifying the default set of tools or you can create a fresh tool panel with just a handful of specialist tools; the choice is yours. We’ll start with the former:
- Click and hold down on the Edit Toolbar button in the lower section of the Tools panel, (shown as three dots). From the pop-out menu that appears, click on the only option, also called Edit Toolbar.
This opens the Customize Toolbar dialog, where you’ll be presented with two columns. The left-hand column, named Tools Panel, lists tools included in the Tools panel, and there is an Extra Tools column on the right-hand side for tools you wish to hide. It’s likely there will be no tools listed on the right at this point.
The list of tools on the left is grouped; each group represents a “slot” on the Tools panel. Take the second group down in the list, starting with the Rectangular Marquee tool, currently visible in the Tools panel in the second slot down, under the first slot of tools that include the Move tool. The remaining three selection tools in the group, Elliptical Marquee, Single Row, and Single Column, are hidden under it.
- Start by dragging the Single Row and Single Column selection tools to the right-hand column. I can honestly say I’ve used them twice in the last 20 years. Repeat the same step for the Slice tool and the Slice Selection tool.
- As the Frame tool behaves like a clipping mask within which you can place images, it can be associated with the crop tools. Drag the icon for the Frame tool under the Perspective Crop tool to add it to the same group of tools.
- Focusing on the next group down, drag the 3D Material Eyedropper, Ruler, Notes, and Count tools to the right-hand column.
- Hover your cursor over the edge of the tool group containing the eraser tools. This will allow you to drag the entire group across to the right-hand column.
- Drag the Red Eye, Color Replacement, 3D Material Drop, Vertical Type Mask, and Horizontal Type Mask tools to the right-hand column.
- Although not entirely necessary, you can combine all of the brush tools by dragging the History Brush and Art History Brush tools into the same group as the Brush tool.
- Having removed what I would call redundant tools, you may wish to click on the Save Preset button, give your new Tools panel a name, and save it in the folder presented to you by Photoshop. Then, click Done.
Naturally, this is how I alter the Tools panel, but you may need to adjust this layout to better suit your own needs by using the same techniques covered in the exercise:

Figure 1.13: The customized Toolbar dialog alongside the edited Tools panel
Saving a custom workspace
Now that we’ve created a streamlined version of the interface, it’s time to save it. This will achieve two things: firstly, the layout of panels will be captured for future use, and secondly, you can reset a saved workspace back to its original state if you find panels have been moved around on screen. Let’s get started:
- Head up to the top right-hand side of the Photoshop interface and click on the Workspace Switcher menu. From the list of options provided, click on New Workspace. Despite its misleading name, the command won’t undo any of your hard work arranging panels; it simply saves the current state of the interface.
- From the New Workspace dialog that will now appear, enter a name for your workspace. I entered
Proin this example, but you can choose your own name. Just make sure it’s short and snappy so that it fits neatly into the Workspace Switcher drop-down menu.By default, panel locations are saved with every new workspace, but you can also capture alterations to the Tools panel, keyboard shortcuts, and menu items. The latter two will be explored in the next exercise. I prefer to keep the Tools panel consistent no matter the task I’m performing. You can update an existing workspace anytime and choose to include changes to the Tools panel, keyboard shortcuts, and menu items. Just enter the same name as the existing workspace to update it.
- In this example, we’ll capture just the panel locations. As such, leave the checkboxes unchecked and click Save to complete the process. You will now find that your new workspace is located at the top of the Workspace Switcher drop-down menu, while Adobe’s supplied workspaces are listed lower down in the dropdown:
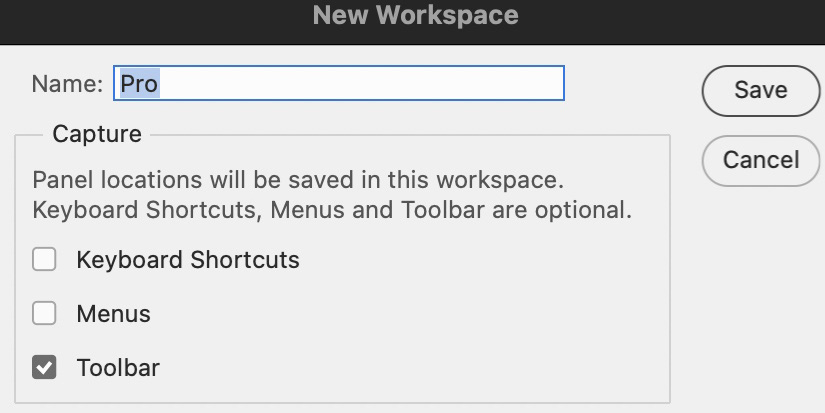
Figure 1.14: The New Workspace dialog captures panel locations, shortcuts, and menus
Modifying keyboard shortcuts and menus
Keyboard shortcuts can save you invaluable time and help avoid navigating through convoluted sub-menus, from more rudimentary tasks such as copying to applying warps. You can also hide redundant menu commands, found from the application dropdowns at the top of the screen. In this exercise, you will explore techniques for assigning a custom shortcut and hiding a menu option:
- Go to Edit → Keyboard Shortcuts and Menus. Ensure the Shortcuts For drop-down menu is set to Application Menus (Figure 1.15, A). Scroll down the list to Window and expand the toggle to reveal the sub-categories.
- Under the right-hand column, labeled Shortcut, click in the empty space adjacent to 2-up Vertical (Figure 1.15, B) to open the type entry field. Type into the field
Ctrl+Alt+1(Windows) orCmd+Option+1(macOS). If the shortcut is already assigned elsewhere, click on the Accept button in the upper right-hand side of the dialog. - Once you have all other remaining shortcuts, click on the Create New Set button (Figure 1.15, C). Enter a name for the set of shortcuts and click Save.
- Then, click on the Menus tab (Figure 1.15, D), scroll down the list until you reach Image, and click on the toggle to expand and open a list of sub-categories. Turn off the visibility icons for Auto Tone, Auto Contrast, and Auto Color (Figure 1.15, E). This will hide those destructive editing options in the Image menu.
Once you have altered the visibility settings of all other menus of your choosing, click on the Create New Set button (Figure 1.15, F). Enter a name for the set of menus and click Save. Then, click on OK to close the Keyboard Shortcut and Menus dialog. Click on the Image menu, and you’ll notice the items have been hidden. To temporarily reveal them, you can click on the Show Menu items at the bottom of the list:
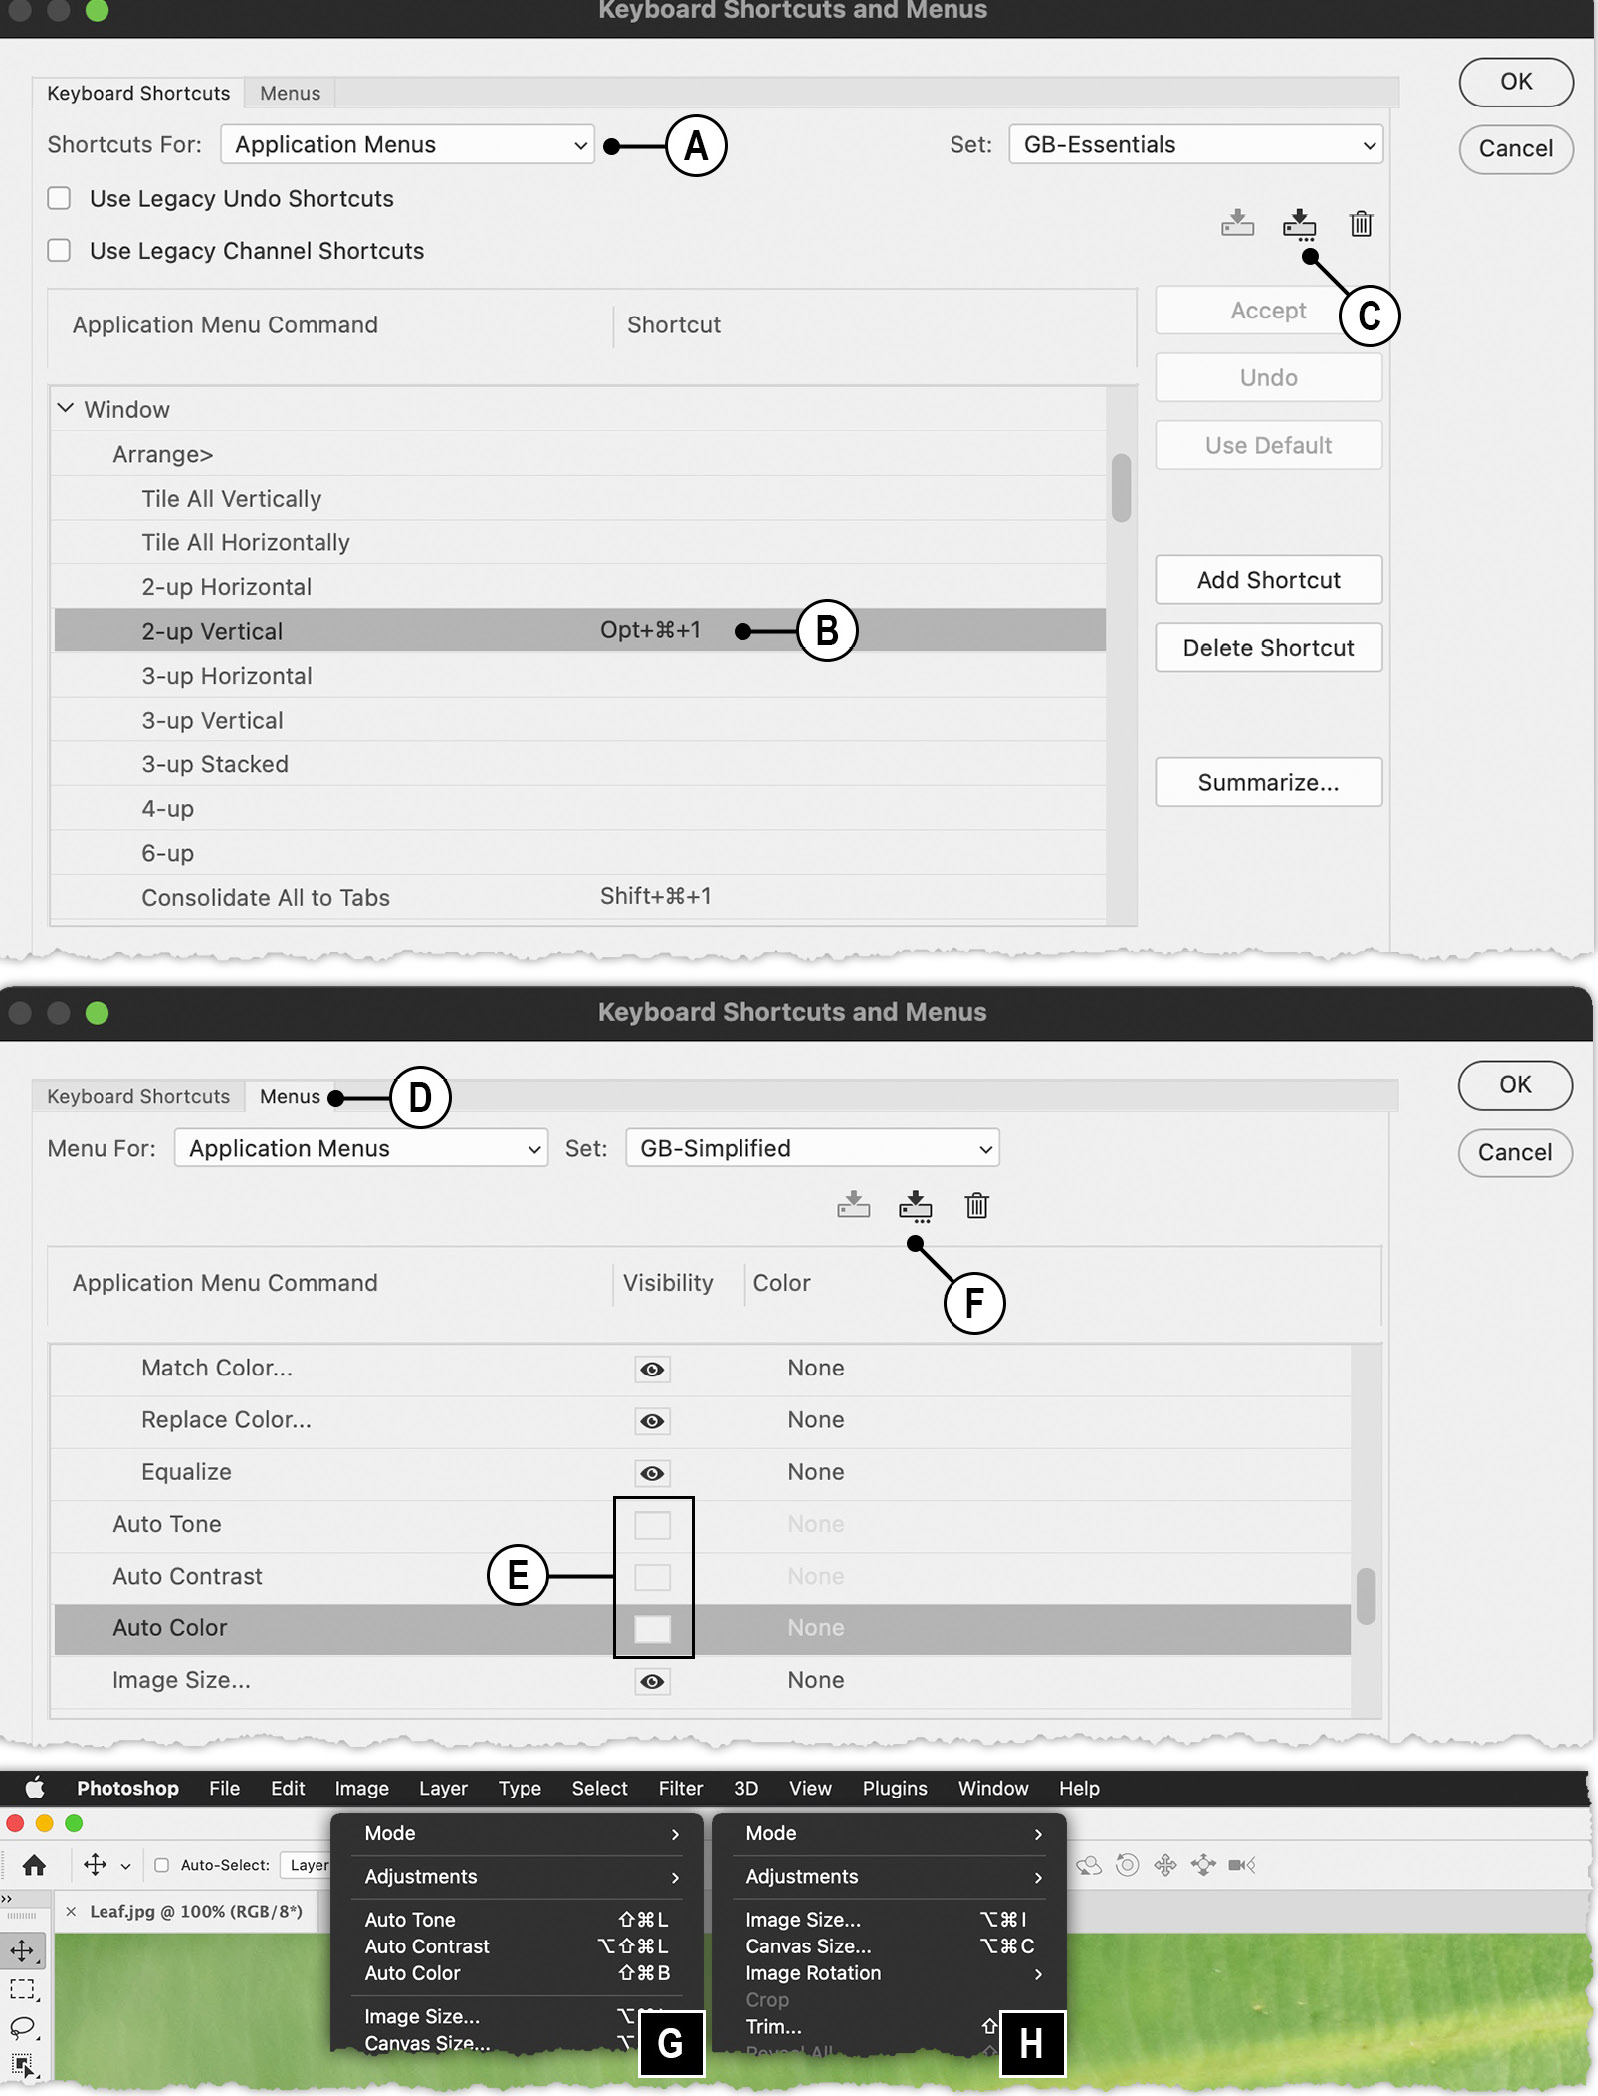
Figure 1.15: You can edit keyboard shortcuts and hide menu items; default (G) and with the three Auto Tone, Auto Contrast, and Auto Color commands hidden (H)
As we’ve seen, Adobe can only make educated guesses as to which tools and features are appropriate to our needs. As such, refining the interface is an essential first step to making day-to-day editing faster by making the tools we need easy to find. In the next section, we’ll modify preference settings, changing a multitude of options, from the interface brightness to the appearance of painting cursors.