Book Image

Unreal Engine 5 Game Development with C++ Scripting

By : ZHENYU GEORGE LI
Book Image

Unreal Engine 5 Game Development with C++ Scripting

By: ZHENYU GEORGE LI

Overview of this book

Unreal Engine is one of the most popular and accessible game engines in the industry, creating multiple job opportunities. Owing to C++ scripting's high performance, advanced algorithms, and engineering maintenance, it has become the industry standard for developing commercial games. However, C++ scripting can be overwhelming for anyone without a programming background. Unreal Engine 5 Game Development with C++ Scripting will help you master C++ and get a head start on your game development journey. You’ll start by creating an Unreal Engine C++ project from the shooter template and then move on to building the C++ project and the C++ code inside the Visual Studio editor. You’ll be introduced to the fundamental C++ syntax and essential object-oriented programming concepts. For a holistic understanding of game development, you’ll also uncover various aspects of the game, including character creation, player input and character control, gameplay, collision detection, UI, networking, and packaging a completed multiplayer game. By the end of this book, you’ll be well-equipped to create professional, high-quality games using Unreal Engine 5 with C++, and will have built a solid foundation for more advanced C++ programming and game development technologies.
Table of Contents (18 chapters)
1
Part 1 – Getting Started with Unreal C++ Scripting
6
Part 2 – C++ Scripting for Unreal Engine
12
Part 3: Making a Complete Multiplayer Game

Creating the UI widgets

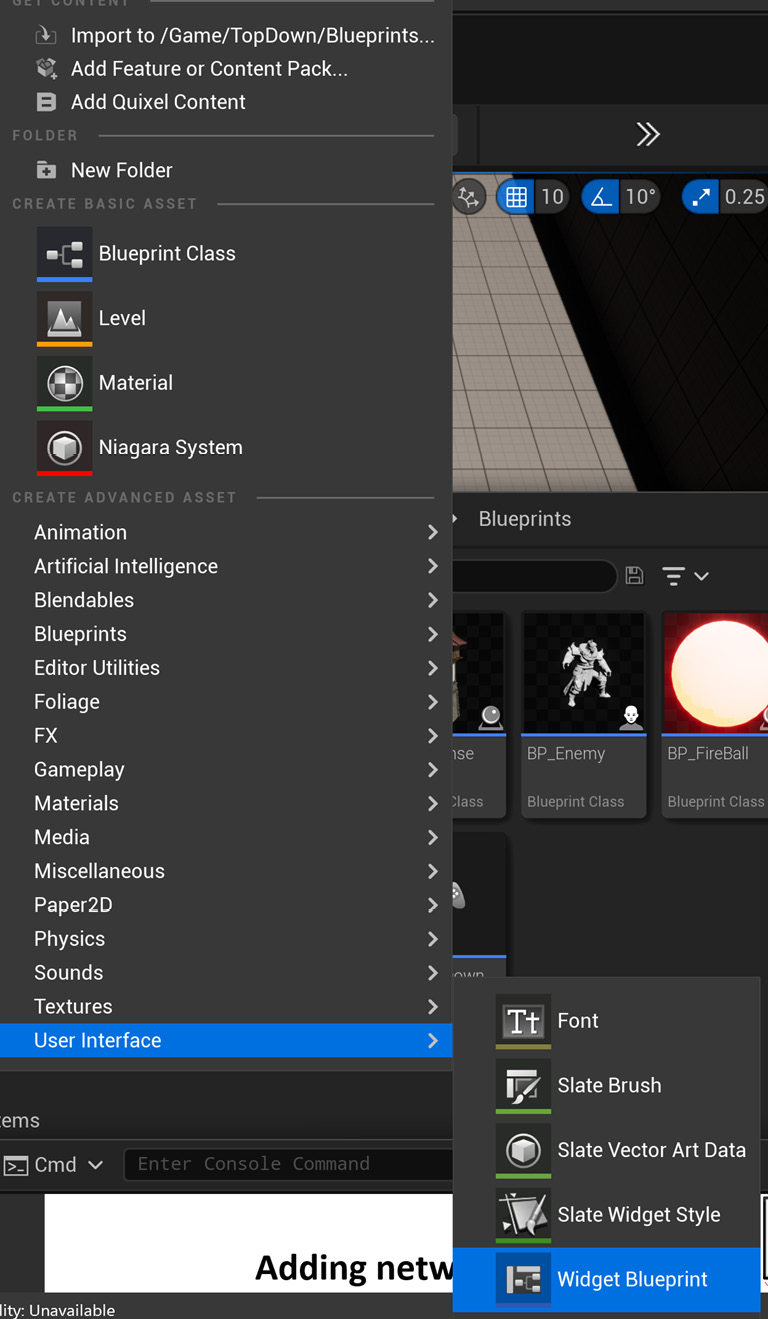
To create UI widgets, first, select the All | Content | TopDown | Blueprints folder (or wherever you want to place the new widgets in the Content Drawer). Then, right-click in the empty area and choose User Interface | Widget Blueprint from the pop-up menu:

Figure 11.2 – Creating a UI widget from the editor pop-up menu

Figure 11.2 – Creating a UI widget from the editor pop-up menu

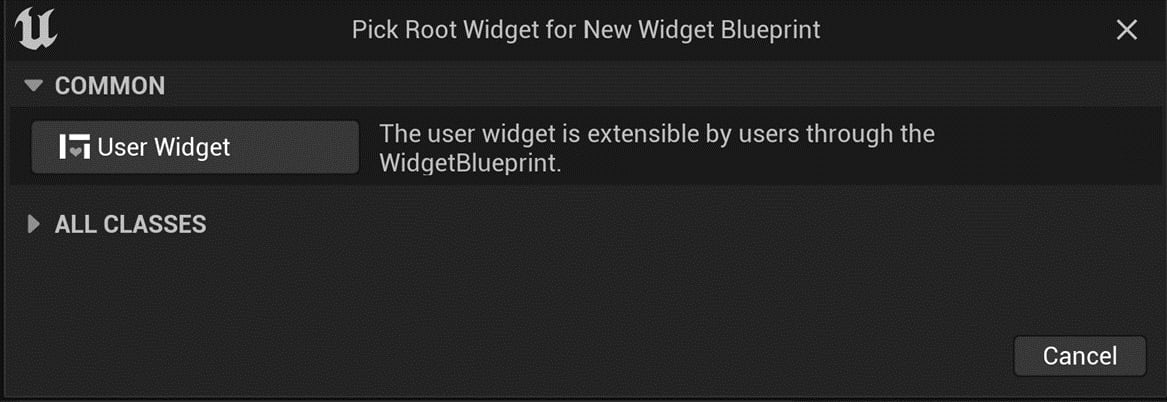
Now, click the User Widget button to pick the root widget:

Figure 11.3 – Clicking the User Widget button to create the widget

Figure 11.3 – Clicking the User Widget button to create the widget

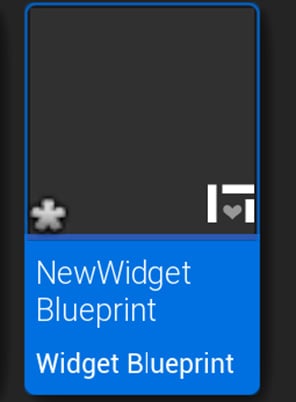
After picking the root widget, you should see a new item named NewWidgetBlueprint in the folder:

Figure 11.4 – The new widget blueprint

Figure 11.4 – The new widget blueprint

Rename the new widget to the name you want – I will choose BP_LobbyWidget. Then, repeat these steps and create two more widgets called BP_HUDWidget and BP_GameOver.

Now, let’s edit these widgets’ settings.

Creating BP_LobbyWidget

With BP_LobbyWidget...