

Often we will want to activate one activity from within another. Although this is not a difficult task, it will require more setting up than the previous two recipes as it will need two activities to be declared in the Manifest, a new Class to serve as our second activity, and a button along with a click listener to perform the switch.
This recipe can be started from scratch, so create a new Android project in Eclipse and call it ActivitySwitcher. Creating a project with the wizard automatically generates the first of our activities. This example can be built against any platform target and here we have used 2.2 (API level 8).
First we create a new public class that we will use to create the second activity:
Create a new public class in the same location as the original activity subclass using the tool bar's New Java Class icon or the package's context menu from the Package Explorer, selecting New and then Class.
Name the class
MySubActivityor something similar and make sure to complete the Superclass field as seen in the following screenshot: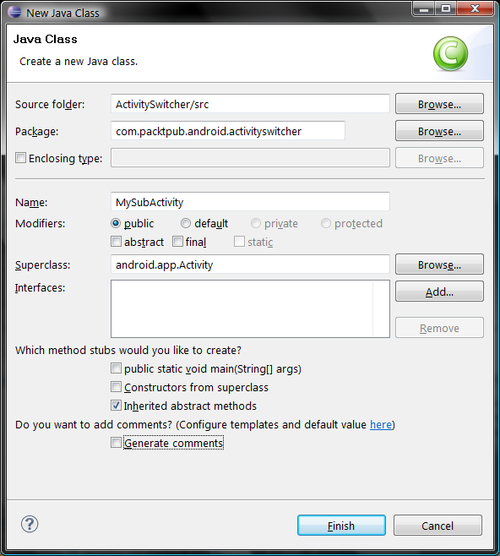
Next, we need to declare our new activity in the manifest file. Open the
AndroidManifest.xmlfile from the Package Explorer and select the Application tab.Under Application Nodes, click on the Add... button and then select Activity.
In the panel on the right-hand side, fill in the Name field as
.MySubActivityand the Label field asmy sub activity.Open the AndroidManifest.xml tab and check whether these changes are reflected in the XML, which should look similar to the following snippet:
<activity
  android:name=".MySubActivity"
  android:label="my sub activity">
</activity>
Next, we must add a button that the user can click on to switch activities. This is set up through the
main.xmlfile which resides in theres/layoutfolder in the Package Explorer.Open the
main.xmlfile and click on the XML tab at the bottom so that the code can be edited.Add the following
<Button>element just after the<TextView>element that was generated automatically:<Button android:text="click to switch activities" android:id="@+id/main_activity_button" android:layout_width="wrap_content" android:layout_height="wrap_content"> </Button>
Now open the original Java activity class,
ActivitySwitcheror whatever you called it.Add the following code to the
onCreate()method after thesetContentView(R.layout.main);statement, making sure to replace the package and class parameters in thesetClassName()call with your own, as they will most likely be different:Button switchButton = (Button) findViewById(R.id.main_activity_button); switchButton.setOnClickListener(new OnClickListener() { @Override public void onClick(View v) { Intent intent = new Intent(); String packageName = "com.packtpub.android.activityswitcher"; String className = "com.packtpub.android.activityswitcher.MySubActivity"; intent.setClassName(packageName, className); startActivity(intent); } });Run the application on a device or emulator. Clicking on the button will now start the sub activity.
This new activity is not a very exciting application. Our activity does nothing but demonstrate how to switch from one activity to another, which of course will form a fundamental aspect of almost any application that we develop.
In most cases there would be a separate layout declaration alongside main.xml in the res/layout folder for each new activity. Also a button, or some other object, to return us to our original activity would be quite reasonable but these features have been omitted here simply to save us the extra typing, and of course, the user can always use the device's own Back button to achieve this.
We have seen how to create a new subclass for each new activity and how to declare these in the manifest. We have also seen how a UI element such as a button is declared in an XML file, main.xml, and then associated with a data member in Java with the findViewById() method.
Again we have made use of the intent object, not only to start the new activity but also to specify which activity class to run.
To learn more about embedding widgets like the Button, see Chapter 3, Widgets.