

Being able to store information about our activities on a temporary basis is very useful but more often than not we want our application to remember things across multiple sessions.
Obviously we can use an SQLite database, but this is a bit extreme if all we want to store the user's name or some preference or the other. Android provides a lightweight technique for doing this in the shape of the SharedPreferences interface.
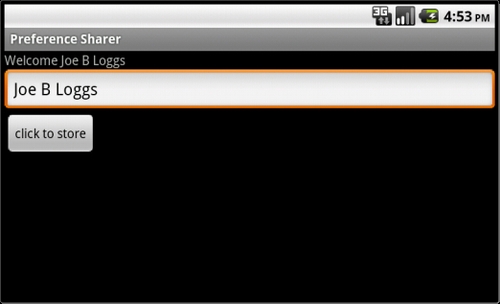
It is possible to use SharedPreferences in any activity (as well as other application components). The example we use here makes use of a TextView, an EditText, and a Button to permanently store the user's name:

In this recipe the persistent data that we want to store is a string value used to represent the user's name. We will store this during the activity's onPause() method and restore the value in the onCreate() method (as they are called when we most likely need to restore and retrieve our preferences) but SharedPreferences can be applied anywhere:
Declare a class-wide String field,
mUserNameand a String constant KEY with value null.Include the following lines in the
onCreate()method after thefindViewById()statements:SharedPreferences settings = getPreferences(MODE_PRIVATE); mUserName = settings.getString(KEY, "new user"); mTextView.setText("Welcome " + mUserName);Override the
onPause()method and complete it as shown here:@Override protected void onPause() { super.onPause();SharedPreferences settings = getPreferences(MODE_PRIVATE); SharedPreferences.Editor editor = settings.edit(); editor.putString(KEY, mUserName); settings.edit().putString(KEY, mUserName).commit(); }
Add a button and a listener to the
onCreate()method so that we can actually enter a value to be stored, as follows:mButton.setOnClickListener(new OnClickListener() { @Override public void onClick(View v) { mUserName = mEditText.getText().toString(); mTextView.setText("Welcome " + mUserName); } });Run the application on a device or an emulator. Once a new value has been entered it will persist across sessions. In fact we would have to clear it using the device's Applications Manager in Settings, or uninstall and reinstall the application to completely reset it.
We stored just one value here, the string KEY, but we could have stored any number of primitive name/value pairs. Each data type has equivalent getters and setters, for example SharedPreferences.getBoolean() or SharedPreferences.setInt().
When we retrieve the value, in the onCreate() method we provided a string literal "new user". This will be used in the absence of a stored value when the file has not yet been saved and is very useful for handling first-run events.
The saving of our preferences requires the services of the
SharedPreferences.Editor. This is evoked with edit() and accepts remove() and clear() procedures as well as setters like the putString() one we used. Note that we must conclude any storing we do here with the commit() statement.
There is a slightly more sophisticated variant of the getPreferences() accessor, getSharedPreferences(), which can be used for storing multiple preference sets.
Using getSharedPreferences() is no different from its counterpart but it allows for more than one preference file. It takes the following form:
getSharedPreferences(String name, int mode)
Here name is the file and the mode can be one of MODE_PRIVATE, MODE_WORLD_READABLE or MODE_WORLD_WRITABLE and describe the file's access levels.
To store more complex data, see the recipe Creating an SQLite database in Chapter 5, Data and Security.