
Getting your media files in and organized
The Media page has some advanced functions for importing media that big-budget feature films use. However, it is quick and easy to import media directly into the Cut page. In fact, every page has the space to quickly import media – it’s called the Media Pool. The Media Pool is located in the upper-left corner of every page (Figure 1.6), which makes it easy to locate.
Import Media
In the upper-left corner, underneath the Media Pool button of the Cut page, there are two icons that allow you to quickly import media into Resolve:
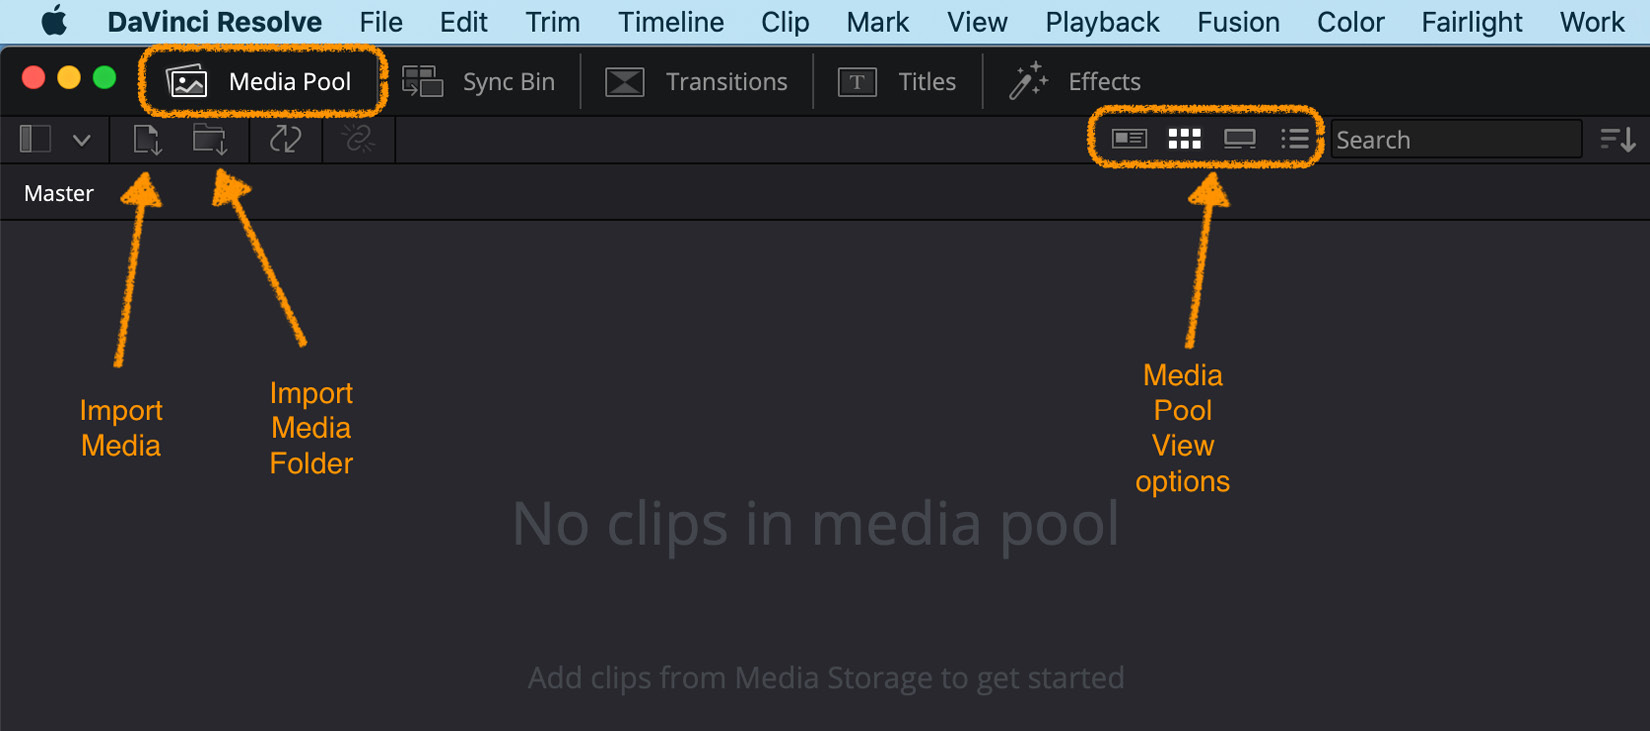
Figure 1.6: Media Pool
The first button, Import Media (Figure 1.6), imports media files:
- Left-mouse click on the Import Media button.
- In your computer’s File Manager window that pops up, navigate to where you have your media files stored.
- Select the files you want to import.
- Click on the Open button.
- If your imported footage (clip) does not have the same frame rate as your project’s frame rate, you will get a pop-up message (Figure 1.7) asking you to change the project frame rate to match the footage you are importing:
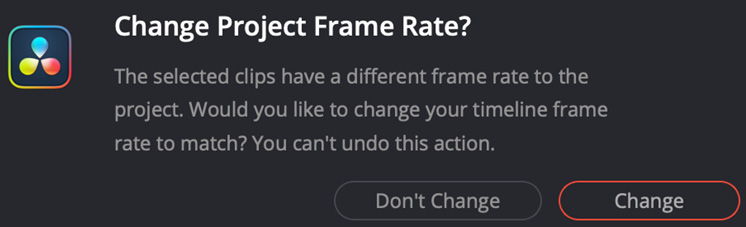
Figure 1.7: The Project Frame Rate pop-up message
- Go ahead and click on Change to change the project frame rate to match the frame rate of your imported clips. We will cover project frame rates in more detail later.
You should notice that your Media Pool is now filled up with the media you just imported.
Now, let us look at the different ways we can view our clips in the Media Pool so that we can check we have the right footage before moving it to the Timeline.
Media Pool – changing your views
By default, your imported media are shown as thumbnails, but you can change this at any time. Let’s do this now:
- Click on the Media Pool View options (Figure 1.6) in the top-right corner of the Media Pool.
- Select List View (the fourth button from the left).
The thumbnails disappear but you can now see a more detailed list of the file properties of the media you imported.
The most common file property is the name of the file, “filename.” The problem with most cameras or audio recorders is that they name the files they create with a semi-random name such as SA478937.mov. This probably means a lot to the camera but means nothing to us.
Of course, the temptation is to change the filenames on our computer to make the file content easier to understand. The problem with this approach is that each time you change the filename on your computer (after you have imported it into Resolve), Resolve can no longer find it because it is looking for the previous filename.
A better approach is to use a feature in Resolve called Clip Name, which means you can change the name of the media in your bins as often as you like while retaining the original filename on your computer:
- Make sure you are in List View.
- Select Clip Name.
- Type in the Clip Name field to change the clip name to something memorable.
- Press the Return key on your keyboard or click outside the text field.
You have now changed your clip names to easily identify what they are.
Top tip
If you want to see a combination of the Thumbnail View and the List View, with a list of the most common properties of the media file, select the Metadata View.
Now, let’s preview some of the files that you have imported to see whether they were the ones you wanted to import:
- Select Thumbnail View again (the second button).
- Select a clip to load it into the Viewer.
- Hover your mouse over the thumbnail.
- Move your mouse cursor over the thumbnail.
As you move your mouse cursor over the thumbnail, you will notice the media will play back in the Viewer window.
This is a quick way to review your footage before committing it to the Timeline. There is an even quicker way if you have a lot of media to review, which we will show you later.
A few words about bins
By default, Resolve has a Master bin in the Media Pool that contains all the media (video, audio, and graphics) you have imported into your video project.
You might be wondering why it is called the Master bin, as like in real life, a bin on a computer is usually where we delete files.
Bin is a word that professional film editors use for a folder. It comes from the early days of celluloid film editing where strips of film would be pegged up over a bin, waiting for the film editor to splice them into the main edit (Figure 1.8):
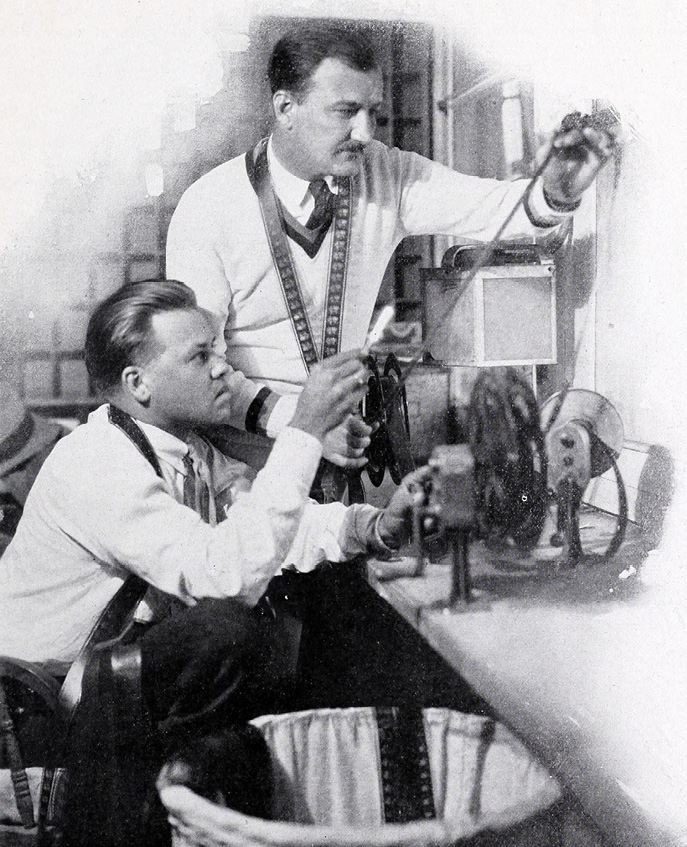
Figure 1.8: Old 1925 photo of film over a bin (Source WikiCommons)
Creating a new bin
You can create extra bins to keep your media organized, for example, one bin for separate audio such as music and sound effects, and another one for video. Let’s do that now:
- Right-mouse click anywhere on a blank space inside the Master bin.
- Select New Bin.
- A new bin will be created in the Master bin.
- Name the bin
Video. There are two ways to do this:- Right-click on the bin and select Rename Bin
- Type directly in the Bin Name field under the Bin icon
- Create another bin using the preceding steps and name it Audio.
Top tip
You can rename any bin apart from the Master bin by right-clicking on the bin and selecting Rename Bin. Right-clicking on objects such as bins, media, Timeline, and Viewers will usually reveal a hidden options menu. Try it and see what hidden options you can discover!
Now that we know what a bin is, and we have created our own, let’s look at the second button to import media with, called Import Media Folder.
Import Media Folder
This imports media but also imports the folders that are on your computer and converts them into bins:
- Click on the Import Media Folder (Figure 1.6) button.
- In the pop-up window, navigate to where your media files are stored.
- Select the folder and files you want to import.
- Click on the Open button.
You will now notice that nested inside the Master bin are other bins with the same name as the folders that held the media on your computer.
It is good practice to put all your media into appropriately named folders on your computer and import them using this second option rather than the time-consuming approach of creating your bins from scratch every time you edit. The other way to save time is to import the bins that have already been created in another project.
Importing bins
Let’s import some of the bins that I have created for you:
- From the menu bar, select File > Import > Bin….
- In the pop-up window, choose where on your computer you want to import your bins from.
- You are looking for the
Lances_Bins.DRBfile you downloaded onto your computer. - Select Open.
You will now see a series of bins in your Master bin called Video, Audio, Credits, and Graphics. Each one has a blank media file in it. This is because Resolve needs content in the bins to be able to successfully export or import them. You can delete this temporary media by selecting it and then pressing the Delete key on your keyboard.
Deleting bins
You most likely are not going to need the Credits bin, so let’s delete it:
- Right-click on the Credits bin.
- Select Remove Bin….
- The bin should now be removed.
Selecting the bin with your mouse and pressing the Delete key on your keyboard will also delete the bin.
Exporting bins
If you have a favorite layout for your bins, as of version 17, you can now export your bins structure as a .DRB file (which stands for DaVinci Resolve Bins) and store this on your USB with your UI presets. Let’s export your new bin structure without the Credits bin:
- Click on the Bin List button (or the drop-down arrow next to it) to reveal a list of bins (Figure 1.9):
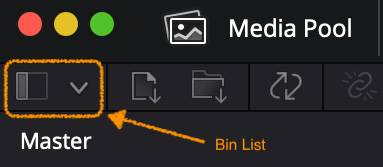
Figure 1.9: Bin List
- Right-click on the name of the bin you want to export.
- In the pop-up window, choose where on your computer you want to export your bins.
- Where it says Save as, name your
bins.DRBfile something useful, such asVideo Binswo Credits. - Select Save.
Now you can create, delete, rename, import, and export bins to better organize and keep track of all your project’s media. Now, let’s start reviewing and editing our media.