
Stabilizing video on the Color page
Stabilizing video on the Color page uses the same tools as the Cut and Edit pages, but the interface is very different. As the Color page interface is so different and can be confusing for even advanced editors, we will only look at how the Color page stabilizes video and not the vast amount of other tools we can access there:
- Place the playhead over the clip you want to stabilize on the Timeline.
- Go to the Color page; the clip you selected on the Timeline will already be selected.
- Open the Tracker palette (Figure 7.9).
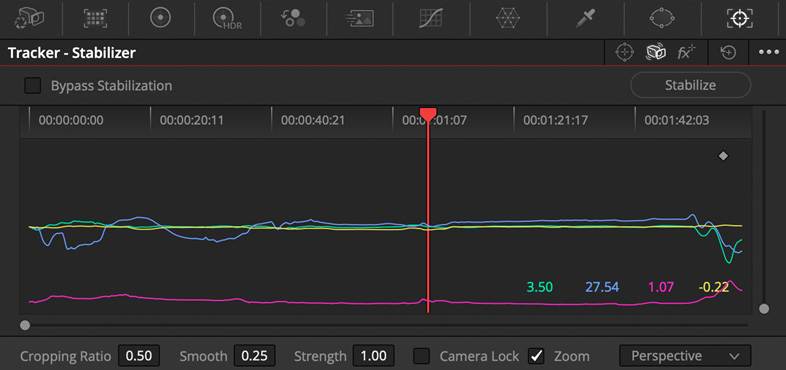
Figure 7.9: The Tracker palette
- Select the Stabilizer icon (which looks like a camera shaking in Figure 7.9).
- The drop-down menu at the bottom right of the palette (Figure 7.9) allows you to select your stabilization method, just like we did on the Edit and Cut pages.
- Along the bottom of the Tracker palette (Figure 7.9) are the same stabilizer controls from the Inspector...