-
Book Overview & Buying
-
Table Of Contents

iOS 15 Programming for Beginners - Sixth Edition
By :
iOS 15 Programming for Beginners
By:
Overview of this book
With almost 2 million apps on the App Store, iOS mobile apps continue to be incredibly popular. Anyone can reach millions of customers around the world by publishing their apps on the App Store. iOS 15 Programming for Beginners is a comprehensive introduction for those who are new to iOS. It covers the entire process of learning the Swift language, writing your own app, and publishing it on the App Store.
Complete with hands-on tutorials, projects, and self-assessment questions, this easy-to-follow guide will help you get well-versed with the Swift language to build your apps and introduce exciting new technologies that you can incorporate into your apps. You'll learn how to publish iOS apps and work with Mac Catalyst, SharePlay, SwiftUI, Swift concurrency, and much more.
By the end of this iOS development book, you'll have the knowledge and skills to write and publish interesting apps, and more importantly, to use the online resources available to enhance your app development journey.
Table of Contents (32 chapters)
Preface

Part 1: Swift
 Free Chapter
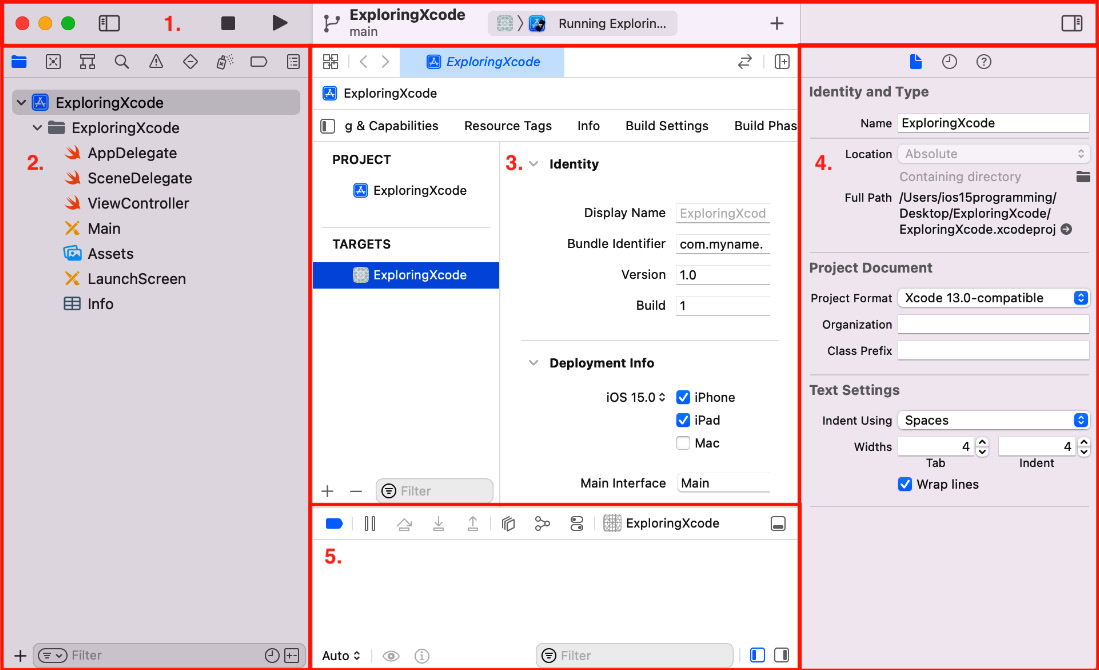
Chapter 1: Getting Familiar with Xcode
Chapter 2: Simple Values and Types
Chapter 3: Conditionals and Optionals
Chapter 4: Range Operators and Loops
Chapter 5: Collection Types
Chapter 6: Functions and Closures
Chapter 7: Classes, Structures, and Enumerations
Chapter 8: Protocols, Extensions, and Error Handling
Part 2: Design
Chapter 9: Setting Up the User Interface
Chapter 10: Building Your User Interface
Chapter 11: Finishing Up Your User Interface
Chapter 12: Modifying and Configuring Cells
Part 3: Code
Chapter 13: Getting Started with MVC and Collection Views
Chapter 14: Getting Data into Collection Views
Chapter 15: Getting Started with Table Views
Chapter 16: Getting Started with MapKit
Chapter 17: Getting Started with JSON Files
Chapter 18: Displaying Data in a Static Table View
Chapter 19: Getting Started with Custom UIControls
Chapter 20: Getting Started with Cameras and Photo Libraries
Chapter 21: Understanding Core Data
Part 4: Features
Chapter 22: Getting Started with Mac Catalyst
Chapter 23: Getting Started with SwiftUI
Chapter 24: Getting Started with Swift Concurrency
Chapter 25: Getting Started with SharePlay
Chapter 26: Testing and Submitting Your App to the App Store
Other Books You May Enjoy