
Running the app in the iOS simulator
The iOS simulator is installed when you install Xcode. It provides a simulated iOS device so that you can see what your app looks like and how it behaves, without needing a physical iOS device. It can model all the screen sizes and resolutions for both iPad and iPhone so you can test your app on multiple devices easily.
To run your app in the simulator, follow these steps:
- Click the Scheme menu in the toolbar and you will see a list of simulators. Choose iPhone SE (2nd generation) from this menu:
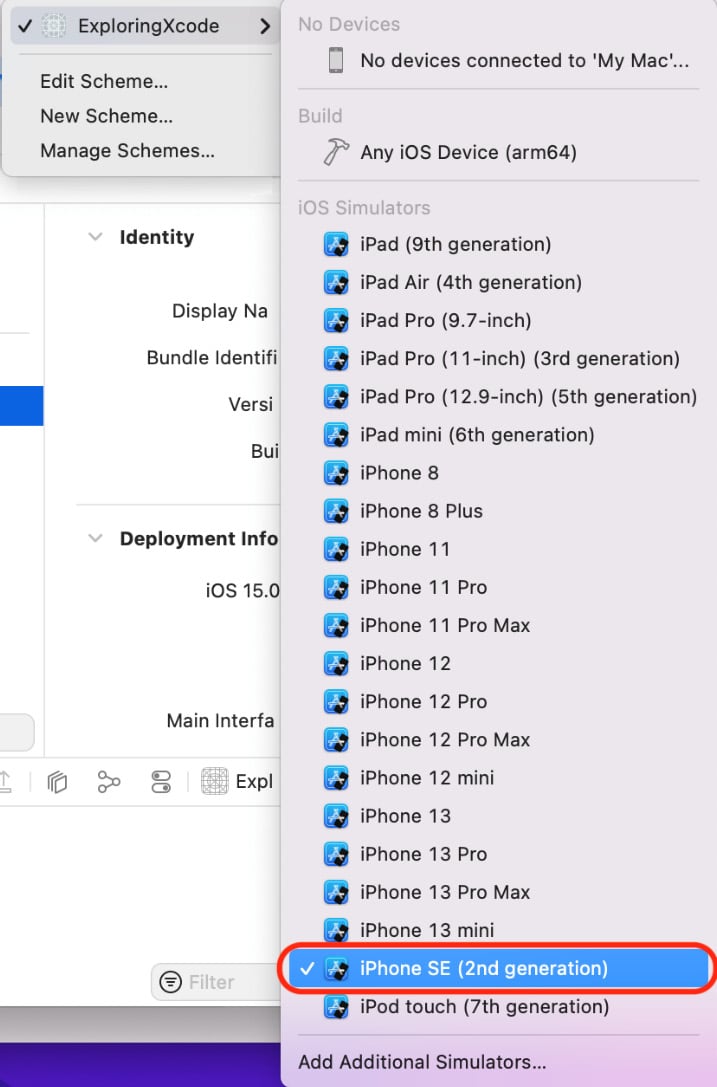
Figure 1.10: Xcode Scheme menu with iPhone SE (2nd generation) selected
- Click the Play button to install and run your app on the currently selected simulator. You can also use the Command + R keyboard shortcut.
- If you see the Developer Tools Access dialog box, enter the
usernameandpasswordof the Mac's administrator account, and click Continue. - The simulator will launch and show a representation of an iPhone SE (2nd generation). Your app displays a white screen, as you have not yet added anything to your project:
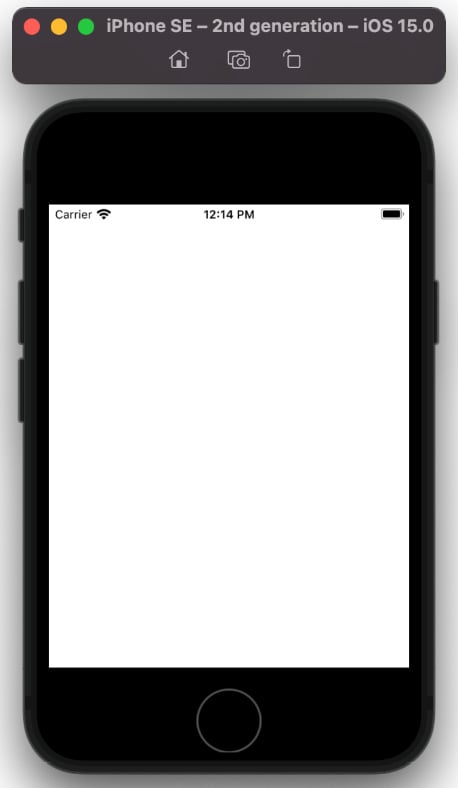
Figure 1.11: iOS Simulator
- Switch back to Xcode and click on the Stop button (or press Command + .) to stop the currently running project.
You have just created and run your first iOS app in the simulator! Great job!
If you look at the Scheme menu, you may wonder what the No Devices and Build sections are for. Let's a look at them in the next section.
Important Information
If you are using an M1 Mac you will see My Mac (Designed for iPad) instead of No Devices in the Scheme menu.
Understanding the No Devices and Build sections
You learned how to choose a simulator in the Scheme menu to run your app in the previous section. In addition to the list of simulators, the Scheme menu also has No Devices and Build sections. These allow you to run apps on actual iOS devices, and prepare apps for submission to the App Store.
Click the Scheme menu in the toolbar to see the No Devices and Build sections at the top of the menu:
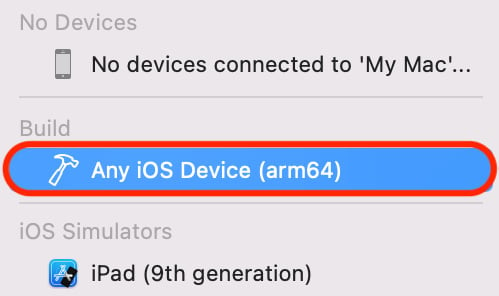
Figure 1.12: Xcode Scheme menu with Any iOS Device (arm64) selected
The No Devices section currently displays text stating No devices connected to 'My Mac'... , because you currently don't have any iOS devices connected to your computer. If you were to plug in an iOS device, it would appear in this section, and you would be able to run the apps you develop on it for testing. Running your apps on an actual device is recommended as the simulator will not accurately reflect the performance characteristics of an actual iOS device, and does not have some hardware features and software APIs that actual devices have.
The Build section has only one menu item, Any iOS Device (arm64). This is used when you need to archive your app prior to submitting it to the App Store. You'll learn how to do this in Chapter 26, Testing and Submitting Your App to the App Store.
Now let's see how to build and run your app on an actual iOS device. The vast majority of the instructions in this book do not require you to have an iOS device though, so if you don't have one, skip the next section and go straight to Chapter 2, Simple Values and Types.