

The GXT toolkit also has a MessageBox class. It is very similar in concept and functionality to the Dialog class, except for its convenience methods for specific displays and the icons associated with these displays (which can be achieved with the Dialog class too, but with a little hair-pulling). It's therefore safe for us to call them (both classes) Dialogs, especially considering them from a presentation perspective, but they are different.
1. Call
MessageBox.alert(), passing in a title, a message to show, and an optional listener as parameters, to display an alert dialog.2. Call
MessageBox.confirm(), passing in a title, a message to show, and an optional listener as parameters, to display a confirmation dialog.3. Call
MessageBox.prompt()with a title, a message to show, and an optional listener, to display a prompt dialog.
@Override
public void onModuleLoad() {
// So we can handle your button clicks
Listener<MessageBoxEvent> listener = new Listener<MessageBoxEvent>(){
@Override
public void handleEvent(MessageBoxEvent evt) {
Button btn = evt.getButtonClicked();
Info.display("Recipe Four", "The '{0}' button was pressed", btn.getText());
MessageBoxType msgBoxType = evt.getMessageBox().getType();
if(msgBoxType != null &&
(msgBoxType.equals(MessageBoxType.PROMPT) ||
msgBoxType.equals(MessageBoxType.MULTIPROMPT))){
Info.display("Recipe Four : Prompt", evt.getValue());
}
}
};
// Show alert message
MessageBox.alert("Alert", "Invalid Login Credentials", listener);
// Show confirm message
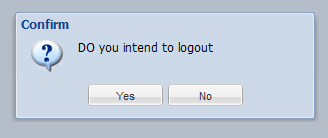
MessageBox.confirm("Confirm", "Do you intend to logout", listener);
// Show prompt message
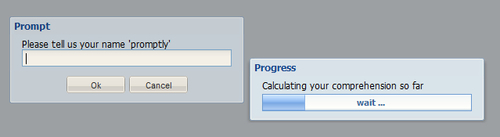
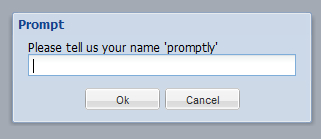
MessageBox.prompt("Prompt", "Please tell us your name 'promptly'", listener);
// Show progress message
final MessageBox pBar = MessageBox.progress("Progress", "Calculating your comprehension so far", "wait ...");
pBar.getProgressBar().auto();
Timer pBarTimer = new Timer(){
@Override
public void run() {
pBar.close();
}
};
pBarTimer.schedule(5000);
}
For clarity we have segmented our code; the first segment shows how we make a listener, simply to show an info window stating which MessageBox button was clicked — not to cover the concept of events and listeners, but just to see how listeners can be created and attached to MessageBox objects.
It turns out that using a MessageBox object is very easy once you have made up your mind which one to use. To alert the user (of course with a non-obtrusive widget, unlike the standard browser alert dialog, which freezes the entire application), we simply call MessageBox.alert(), passing three parameters — a title, a message to be displayed, and a callback (listener), to handle the user's click action on the OK button. This automatically gets displayed with an alert icon:

We use MessageBox.confirm() to pop up a confirm dialog, also requiring a title, a message, and a listener callback, as parameters. At the end of the call, we get a confirm dialog (as in the next screenshot) posing a question (ideally in response to a user action), which the user can respond to with either the Yes or No buttons:
We also use MessageBox.prompt() to elicit input from the user (see the following screenshot). The call expects the three standard parameters — a title, a message, and a listener callback. The result of this call is a cool prompt dialog with a text field for a single line of text. Although we can allow multiline text entry, that would have required us to pass true as the third parameter, while our callback becomes the fourth parameter to the MessageBox.confirm() call.
The MessageBox class is really handy, especially because of its ease and convenience. The idea of having a fully functional confirm or prompt dialog, kitted with icons and event listener support, and with just one line of code is quite amazing, don't you think?