Put the SugarCRM zip file on the desktop within your session on your server.
Right-click on the file and select rename. Change the file name to sugarcrm.zip. Then right-click on it again, and select extract to sugarcrm/.
Click on SUSE | System | File Manager | File Manager—Super User Mode, and enter the root password when prompted. From file:/root, navigate upwards one click to file:/. Click on the srv folder, and then www, and then htdocs.
Drag and drop the entire sugarcrm directory from the desktop to this directory. Confirm it is a Move when prompted.
Right-click on the sugarcrm folder, and select Properties. On the Permissions tab, set Ownership to wwwrun, and Group to users. Set Owner to Can View & Modify Content, and Group and Others to Can View Content. Click on the box to apply changes to all subfolders, and then click on OK.
We now begin the actual installation process:
Installer Welcome Screen: Run the Konqueror browser by clicking on its icon on the panel across the bottom of the screen. Enter localhost/sugarcrm/install.php as the URL. You should see the SugarCRM Installer Welcome screen. You’re getting close to the finish line! Click on Start.
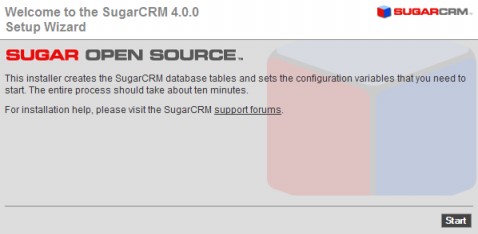
SugarCRM Installer Welcome Screen
License Acceptance Screen : The SugarCRM license acceptance screen is the next one you will see. Click on the I Accept checkbox, and then on the Next button.
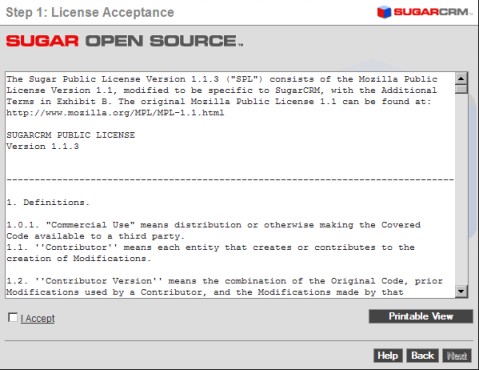
SugarCRM License Acceptance Screen
System Check Screen: Next you see the SugarCRM system check screen. The SugarCRM installer checks several aspects of the installation environment, and reports their status to you on this screen. You will see a series of green (and perhaps a few red) status messages down the right-hand side of the screen. They need to be all green for the installation to proceed. Now click on the Next button to proceed to the next step of the SugarCRM installation process.

System Check Screen
Database Configuration Screen: Set Host Name to localhost, Database name to sugarcrm, Database User Name to sugarcrm, and Database User password to whatever you chose above (sugardbpsw was suggested). Set the Admin password to your choice of password. Click on Drop & Re-create Existing Tables if this is a re‑installation. Click on Populate Database With Demo Data if you would like some test data created for you. Set the Privileged Database User Name to root, and the Privileged Database User password to the root password for MySQL (as defined in step 5 of the section Configure MySQL). Then click on Next. (If you see a prompt re: Kwallet, cancel it.)
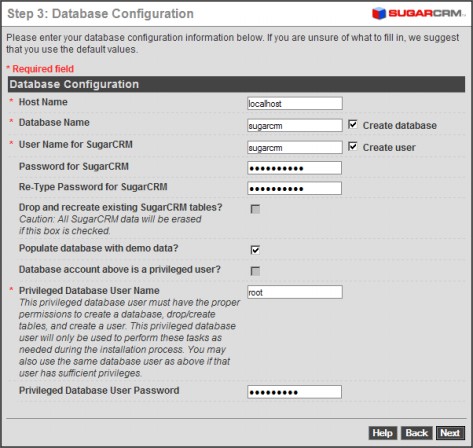
Database Configuration Screen
Site Configuration Screen: Enter the new password you wish for the SugarCRM Admin user, and confirm it. Then click on Next to proceed to the Confirm Settings screen.
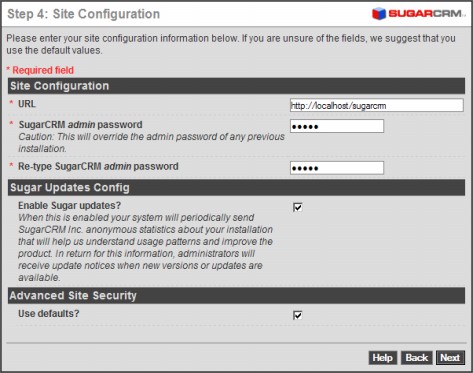
Site Configuration Screen
Confirm Settings Screen: This screen simply shows you all the settings you have provided for the SugarCRM installation. If they look correct, click on the Next button to proceed with the actual SugarCRM installation.
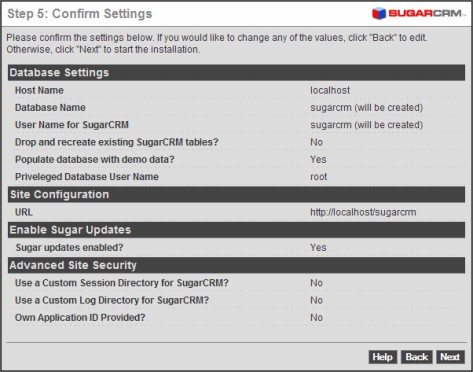
Confirm Settings Screen
Perform Setup Screen: You should see a screen like the one opposite generated. Note it will take a minute or two to complete—so be patient! Your database tables have now been created. If all goes well, this step will end with the message—The Setup of SugarCRM 4.0 is now complete.
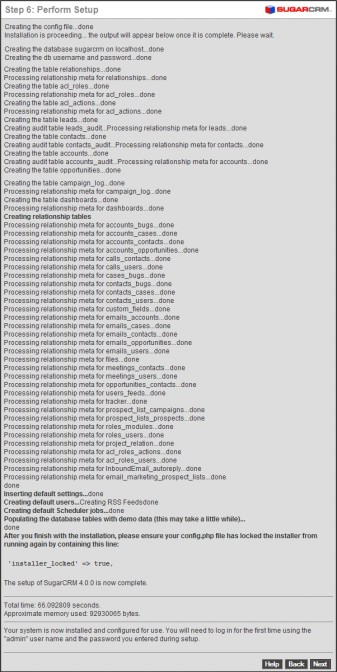
Perform Setup
Log In Screen: Congratulations, you’re done. Just click on Finish to log in to SugarCRM for the first time. You should see a screen like the one shown below. Log in, using the user name admin, and the admin password you provided on the Site Configuration screen.

SugarCRM Log In Screen
Implementing SugarCRM
By :
Implementing SugarCRM
By:
Overview of this book
<p>SugarCRM is a popular customer relationship management system. It is available in both free open source and commercial versions, making it an ideal way for small-medium business to try out a CRM system without committing large sums of money. Although SugarCRM is carefully designed for ease of use, attaining measurable business gains requires careful planning and research. This book distils hard won SugarCRM experienced into an easy to follow guide to implementing the full power of SugarCRM. SugarCRM is an extensive PHP/MySQL based application but with its rich administration interfaces no programming is required to get the most of it.</p>
<p>This book will give you all the information you need to start using this powerful, free CRM system. Written by veteran SugarCRM expert and experienced documentation author, Michael J. Whitehead, this book is the definitive guide to implementing SugarCRM. Whether you are wondering exactly what benefits CRM can bring, or you have already learned about CRM systems but have yet to implement one, or you're working with SugarCRM already; this book will show you how to get maximum benefit of this exciting product.</p>
Related Content you might be interested in
Current Title:
Implementing SugarCRM
No titles found
Table of Contents (18 chapters)
Implementing SugarCRM
Credits
About the Author
About the Reviewer
Preface
 Free Chapter
Doing Business—Better
One Size Does Not Fit All—CRM Your Way
CRM Deployment Options: Which One Is Right for You?
CRM Basics
Extending Your CRM’s Business Role
Commercial and Open Source Add-Ons for SugarCRM
Managing Your CRM Implementation
Linking SugarCRM to Your Customers
Installing SugarCRM on Linux
Installing SugarCRM on Windows Server
Data Import and Export
The System Administrator Role
Index
Customer Reviews