
Creating wooden crates
One of the most widely used props across all genres of games is the humble crate. They come in many different shapes and sizes and make for a great asset that can be duplicated and stacked on top of one another. Crate models are also a prop that can be very easily scaled, stacked, and modified. In this recipe, we will be going over how to create a basic wooden crate model.
How to do it…
We will begin the recipe by creating a large cube and then creating an extruded outline along the top and bottom. Next, we will create corner and diagonal braces. To finish the recipe, we will apply color and material to the crate after we group and name the model.
Let us start:
- Insert a square block part onto the baseplate.
- Rescale the part to be a large cube. In this recipe, the cube size being used is scaled
5,5,5studs. - Next, place a
0.5 x 0.5stud block across one of the top sides of the cube. Have the part sticking out of the cube by0.25studs to create a lip. - Duplicate the top part and add it to the other three top sides. It should look like what is shown in Figure 1.8:
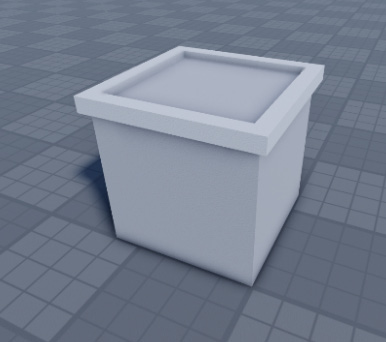
Figure 1.8: Square block outline at the top with square parts
- Duplicate the four parts at the top and move them to
0.25studs below the bottom of the cube. - Duplicate one of the side parts and then place it vertically on all four corners of the box. This completes the initial outline for the box:
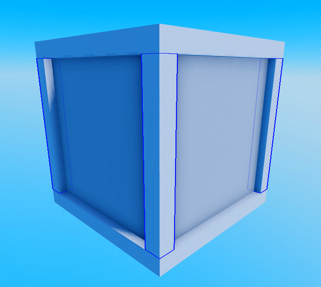
Figure 1.9: Parts placed on each corner
- To create a diagonal part across the faces of the box, duplicate one of the vertical border parts and move it to the middle of the face.
- Rotate the part by increments of
45degrees until it lines up with the corners:
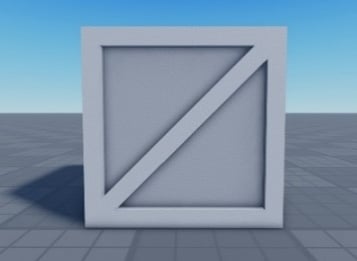
Figure 1.10: Diagonal brace after rotating
- Rescale the diagonal part along its x axis to extend out of the other side of the box. This allows us to create the same diagonal shape on the other side of the box without using an extra part, which helps keep our total part count low, as seen in the cut-away view in Figure 1.11:
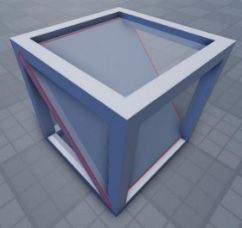
Figure 1.11: Diagonal brace extended onto both sides
- Rescale the diagonal part inward
0.15studs to give another layer of depth to the model. - Duplicate the diagonal part and then rotate the duplicate part
90degrees. - Next, group the parts into a model.
- Rename your model
Crate. - Now, color the parts in your
Cratemodel. Use a darker shade on the inside (or outside) parts of the crate so that the depth of the braces stands out better, as seen in Figure 1.10. In this example, I used (108,88,75) for the inside parts and (138,112,96) for the outer crate parts. - Finally, add material to your crate. Wood was the material used in this recipe’s example.
If you are using the Wood material, use the
MaterialFlipplugin to fix any incorrect woodgrain flow.
That completes the recipe for building crates. Make sure to anchor your model if you have not done so already!
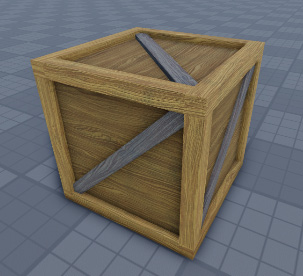
Figure 1.12: Finished crate
Now, you can use this model as a template to create a wide variety of crates to use across your maps.
There’s more…
Z-clipping, also known as Z-fighting, occurs when two faces intersect with each other. This results in both materials fighting to be rendered and is often seen as flickering on the surface. To fix this, move the flickering parts up by at least 0.001studs.