
Refining the block out to add detail
With our block out now complete, we should start adding details to our model. This process, just like the one before, consists of focusing first on the bigger details, and then going on to smaller and smaller ones (if you need/want them). Those are called primary, secondary, and tertiary details. We already completed the primary phase, which mostly focuses on the silhouette and general structure.
Secondary details
This type of detail consists of medium-sized shapes that add complexity and interest to the bigger shape – things such as metal plates, tubes, and bigger carvings in walls. Although still relatively big, they play a big role in making a model look nice.
Though the idea of adding detail everywhere can seem very good, it’s very easy to add too much detail, and even worse, adding too much detail to one part while leaving the others empty.
Here are some suggestions of secondary details to add to our headphones:

Figure 1.44 – Secondary detail added to the earcups
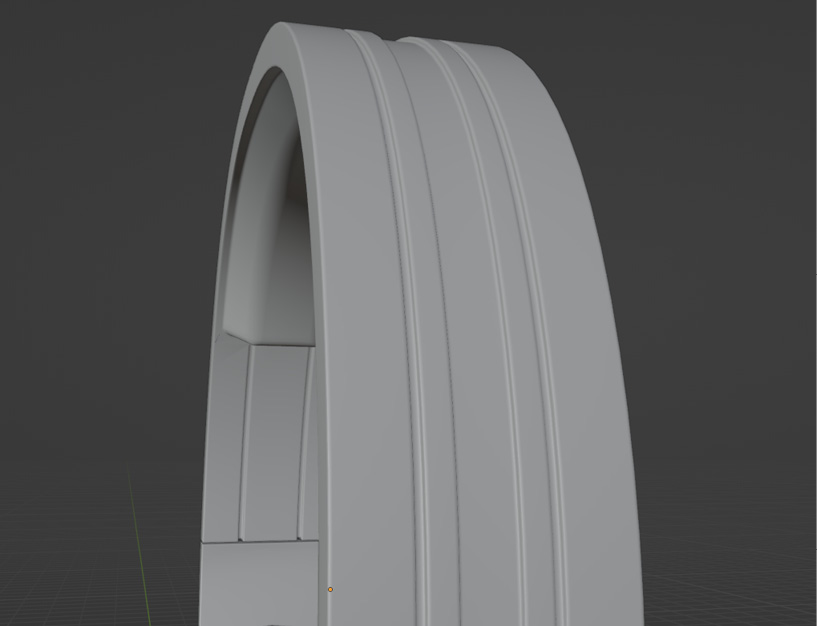
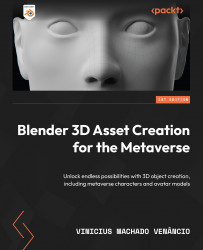
Figure 1.45 – Secondary detail added to the headband
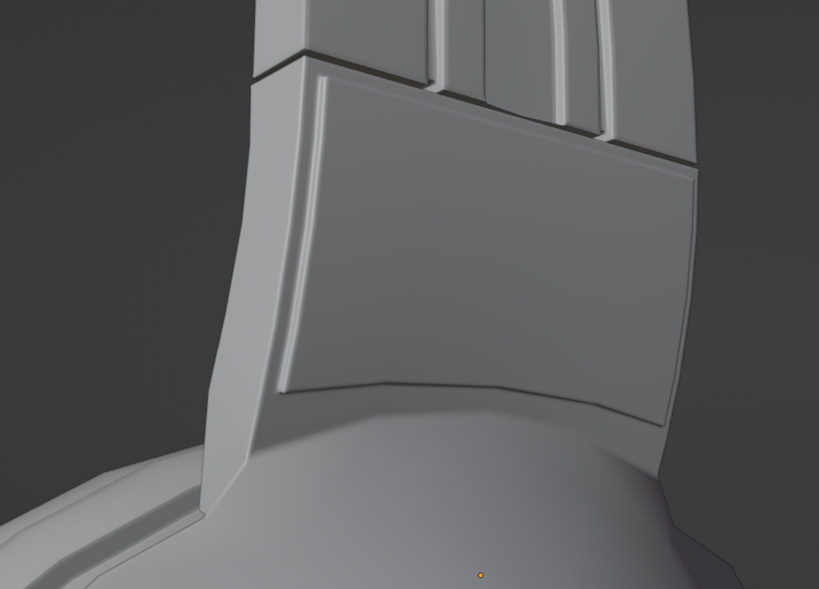
Figure 1.46 – Secondary detail added to the bottom part of the headband
As you can see, the secondary details added made our headphones look less “bland” and generic. Rounded edges were also added with a bevel modifier, but if you plan on doing the same, be very careful as it adds a significant amount of geometry, which can make the model too heavy for a game: what once was a headphone with only around 3.5k faces turned into nearly 11k faces just by adding the bevel modifier set to 3 faces.
It does look nicer though, so you need to find a balance between looks and the object’s importance in the game. For example, if the model is going to be seen from far away, you probably don’t need the rounded edges, but if it’s going to be very close to the player, you can use more detail if your object needs to look realistic. We’re going to keep the bevel modifier for looks but you might not want to add it (it won’t make a big difference to the process).
We should avoid applying the bevel modifier as much as possible for now, as applying it will make our life way harder when we move on to unwrapping the model (which will be explained later on).
Here are the full headphones with secondary details added:
Figure 1.47 – Full headphones with secondary details
Tertiary details
This type of detail is composed of smaller shapes such as bolts, small wires, smaller indents, small holes… small shapes in general.
As with any type of detail, some sort of balance should also be struck with its usage throughout the model; note that not every part of the object will need this LOD.
As for our headphones, tertiary detail is more useful for the lower parts, so here is a suggestion for what could be added:
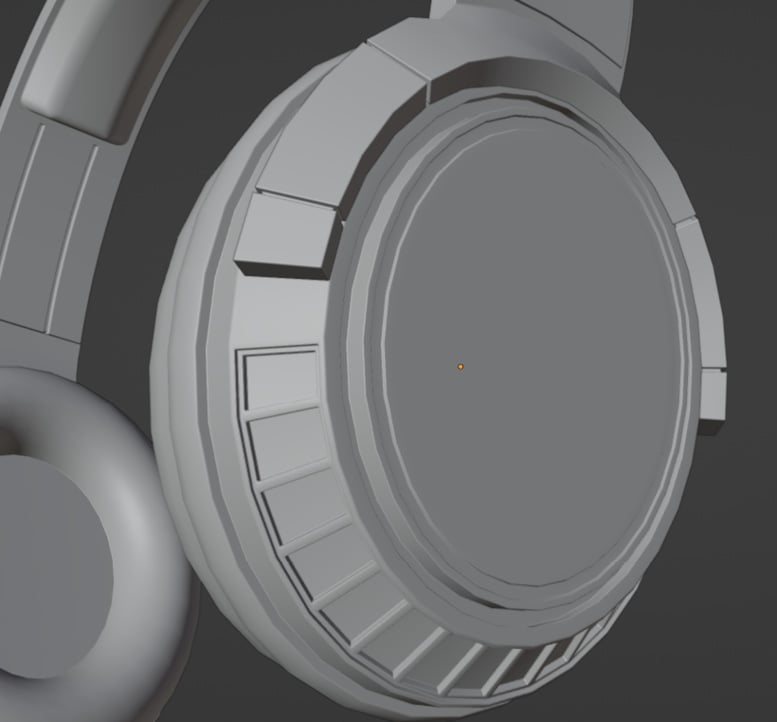
Figure 1.48 – Tertiary details added to the earcups and bottom part of the headband
This was done using the same techniques explained before, except for the grid-like structure on the earcups, which were done using individual face insetting, by pressing I twice when insetting more than one face. Then, we can extrude the faces along the normals as usual. After that, this is what the full model looks like:

Figure 1.49 – Final model after adding tertiary details
Congratulations, you finished the modeling part of your asset! Now, we might need to optimize it to make it lighter to render.
As a quick reminder for future projects, here’s a small table with a few of the most useful and common modeling shortcuts learned by now:
|
Shortcut |
Function |
|
Tab |
Switches between viewport modes |
|
Shift + A |
Adds an object |
|
G |
Grabs the selected objects/faces/edges/vertices |
|
S |
Scales the selected objects/faces/edges/vertices |
|
R |
Rotates the selected objects/faces/edges/vertices |
|
I |
Insets the selected faces |
|
E |
Extrudes the selected faces/edges/vertices |
|
Shift + D |
Duplicates the selected objects/faces/edges/vertices |
|
Ctrl + B |
Bevels the selected edges |
|
Ctrl + A |
Applies a parameter, selected in the menu |
There are many more shortcuts, and some of them will be covered and used throughout the next chapters, but these are some of the most used ones.