

Creating a 3D reference model
Another way to create a bottle 3D model would have been to use multiple sketches and then to use the Loft tool to generate a 3D model. Sometimes, that can complicate a model since we will have multiple sketches on multiple planes all at different heights, which can get confusing. Using one sketch profile can make a complicated model much easier to navigate: we will now use that single sketch to generate the 3D model using the following steps:
- Select the Revolve tool within the CREATE panel. The profile should be automatically selected. For Axis, select the long vertical line that represents the center of the bottle.
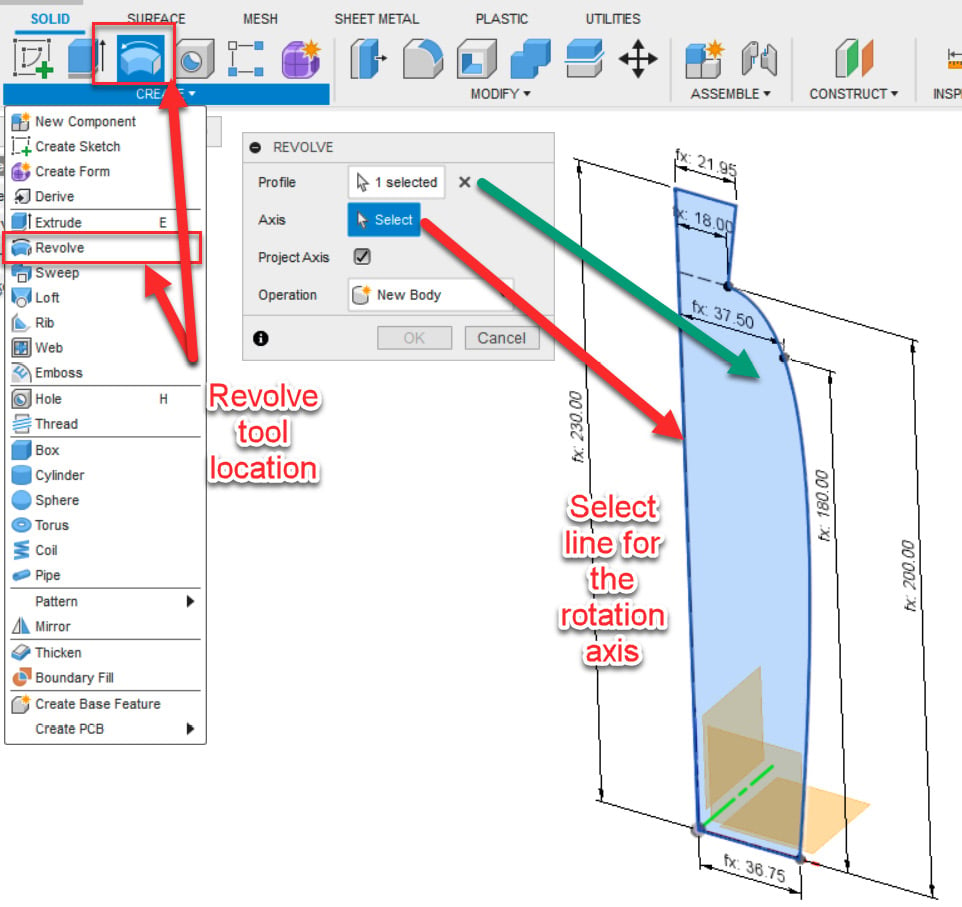
Figure 8.20 – Revolve tool location and axis selection