

The CREATE and MODIFY tools
It’s time to flex your artistic muscle now. In this section, we will explore the tools located within the CREATE panel and the MODIFY panel. These are the main areas that you will spend most of your time creating in within the FORM environment.
Let’s start by creating some artistic forms by using the CREATE and MODIFY tools together:
- Start a new drawing by clicking on File | New Design or by clicking on the plus (+) icon in the top-right corner.

Figure 11.12 – New Design location
- Click on the FORM tool within the CREATE panel to be brought into the FORM environment and then click on the Box tool within the CREATE panel.
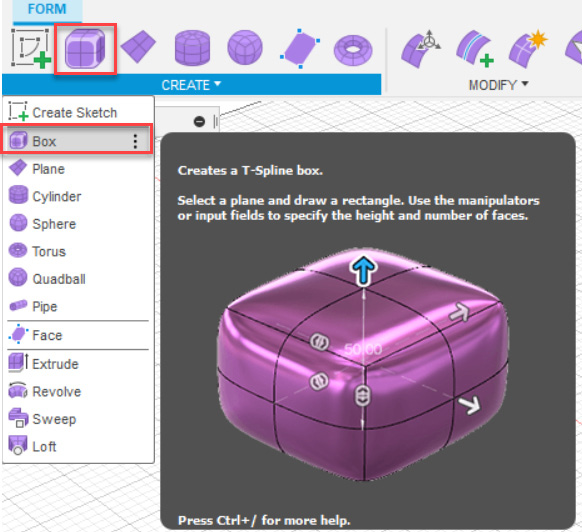
Figure 11.13 – The location of the Box tool
- Select the bottom plane, then choose the center origin dot, and in the BOX options on the right side of the screen, choose Center for the Rectangle option.
Important note
...