What are sketches?
Sketches are profiles of geometric objects that are built within Fusion 360. These sketches could be just a simple line that creates a surface object or an enclosed circle that generates a solid object. You can create any enclosed shape to generate a solid object, so long as it shows a light blue interior shaded area. Once you have created your sketch and generated your 3D object, you can go back into the sketch to make further changes to your 3D model. You can see the location of the Create Sketch tool here:
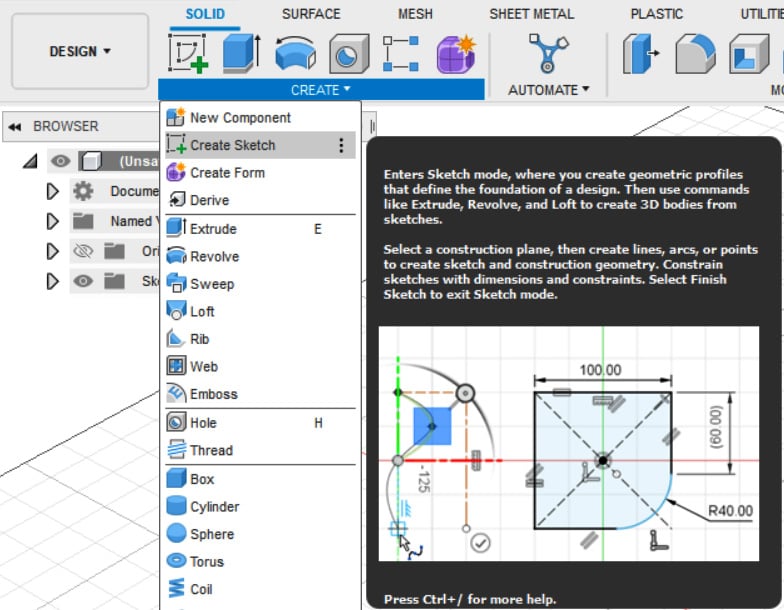
Figure 2.10 – Create Sketch tool location
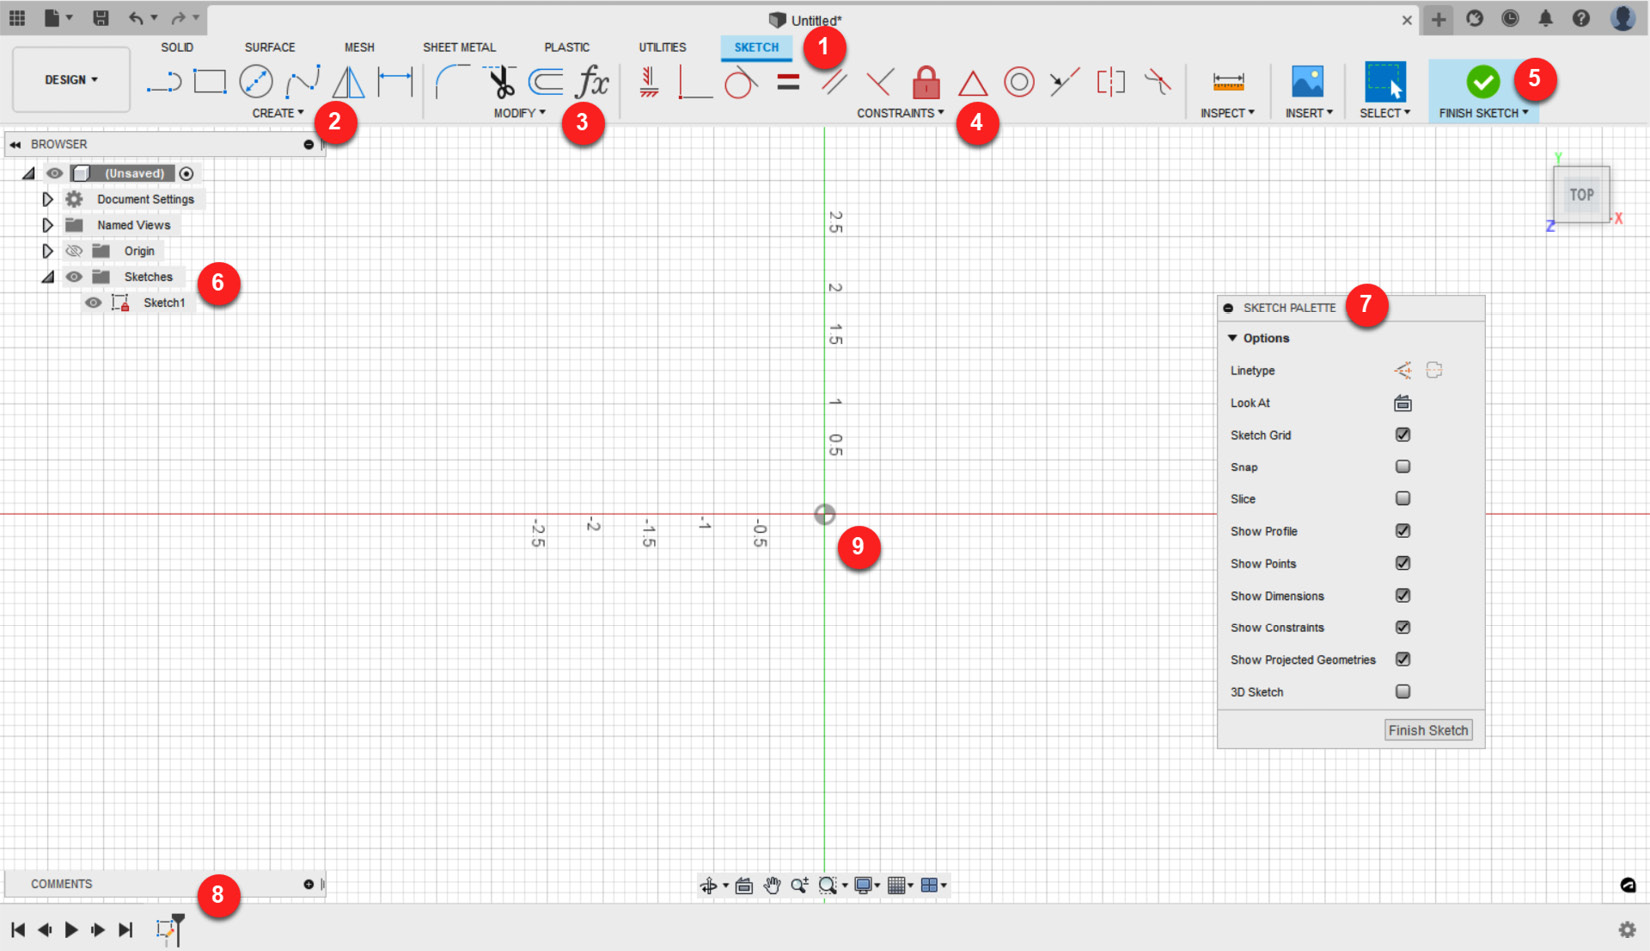
We will now explore the SKETCH environment, which changes the toolbar icons at the top of your screen once a plane is selected and will show new tools for this design space.
The SKETCH tab
Once you have started a sketch by clicking on the Create Sketch tool and have selected a plane to draw on, you will notice that your toolbar changes into a new layout: