

Creating the grip attachment
Continue working within the Holder 01 container. If you exited Fusion and then open the project up once again, Fusion will start with the top level being active instead of the Holder 01 container. Keep a watchful eye on the browser and which container has the black dot.
Follow these steps to create the grip attachment:
- Be sure that
Holder 01is your active component. - Select the OFFSET PLANE tool and select the bottom face of the bottle holder. The reason why we are selecting that face is that if there are any changes made to the bottle holder body, such as its location, the grip will move as well.
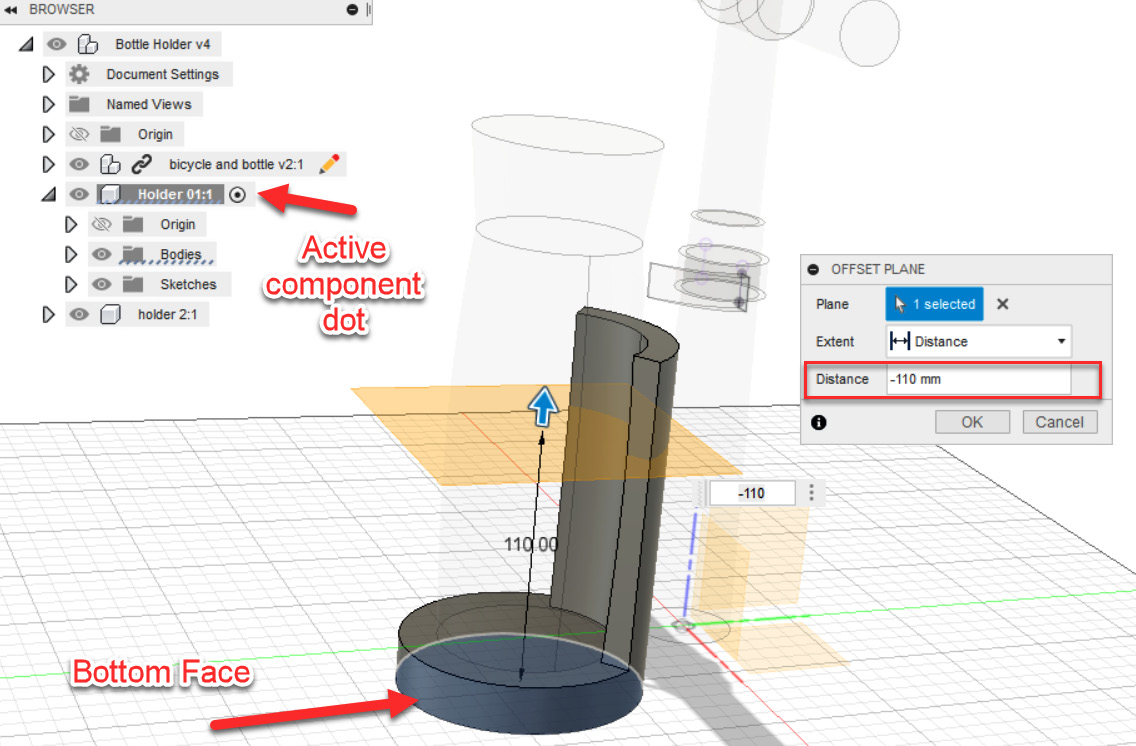
Figure 9.15 – The OFFSET PLANE tool with a distance of –110 mm
- Create a new sketch on the new offset plane that we just created.
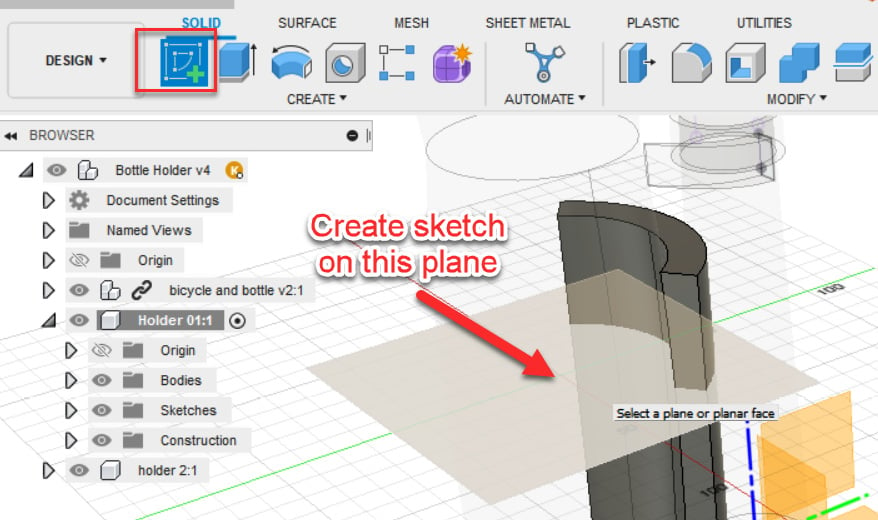
Figure 9.16 – Create the new sketch on the offset plane
The screen will now change to view the sketch plane from the top view...