

Exploring the various design approaches
There are various ways to create a simple object in Fusion 360. I will go over a few different ways to draw, each of which has its benefits and downsides. It’s up to you, as a designer, to choose which approach works best for you and the next changes you will make to the model. The main questions to think about when designing are how quickly the object can be created, how easy it would be to modify it if there were a design change, and how accurate the model is.
The top-down design method
Designing from the top down means that you can create custom parts within Fusion 360 and design them to fit other custom parts. You take the time to plan out your model before anything is created. This is a more structured approach. These custom parts can control other parts, as shown in Figure 1.13. The custom legs control the design of the custom tabletop:
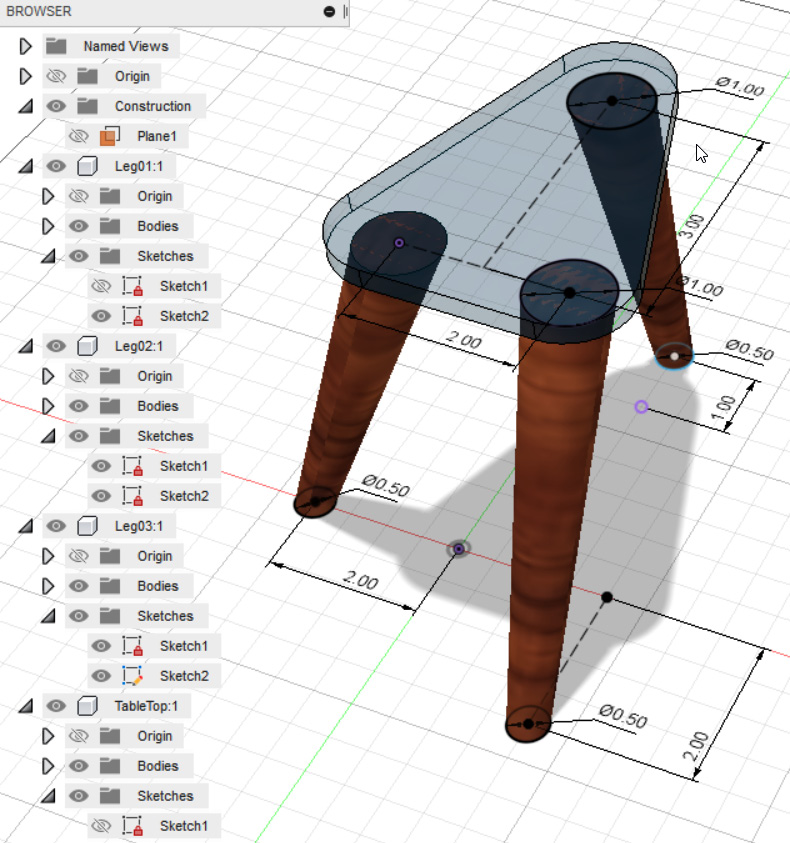
Figure 1.13 – A top-down approach to modeling that involves taking a custom table and using its legs to control the design of the tabletop
As the legs change to different locations, the table will change as well (see Figure 1.14). The parts that you design can be exported to other models if need be:
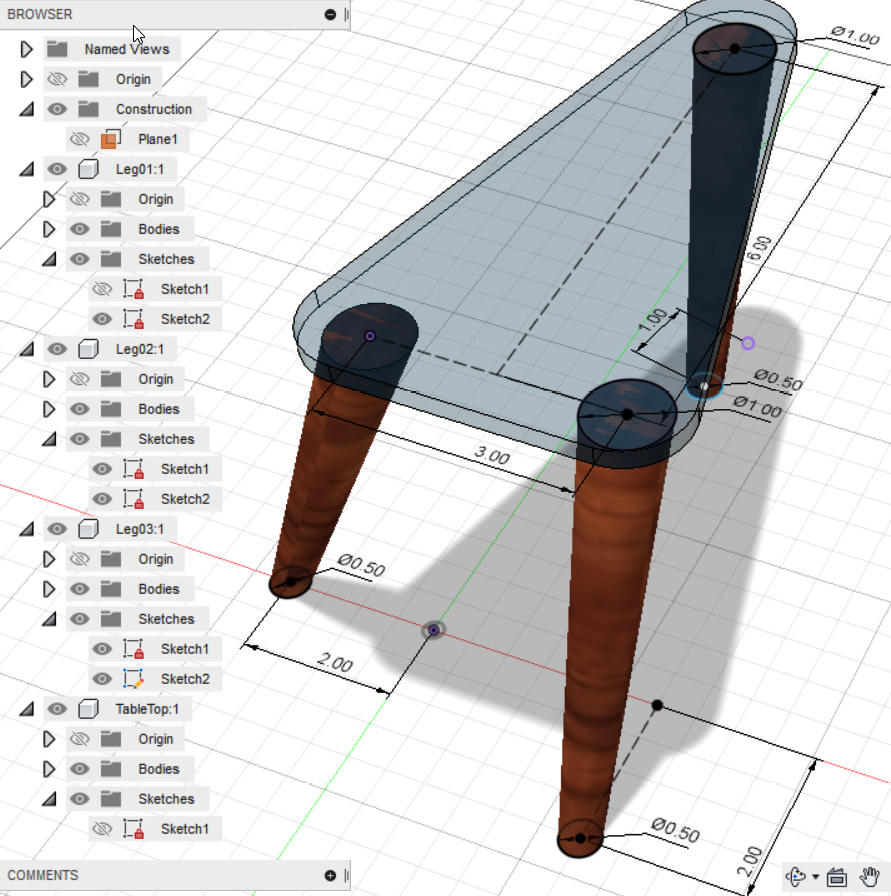
Figure 1.14 – A design change controlled by the table legs’ dimensions
This is a very powerful design method but requires some forethought as to what part you want to drive other parts. The best way to learn which design method is best is through experimenting.
The bottom-up design method
Design from the bottom up involves starting with smaller pieces and building to a larger project. This takes on more of a creative side to design since you start from an existing part and create from there. An example of this is when you know of the design goal and have all the main parts to insert into Fusion, such parts as from another designer on your team or parts from McMaster-Carr. You pull all these parts into Fusion 360 and then start assembling them to build the main assembly. Then, you design some other parts to fit this assembly and manipulate them as you design. You will end up with more separate models in your library, but these models can be used across other designs:
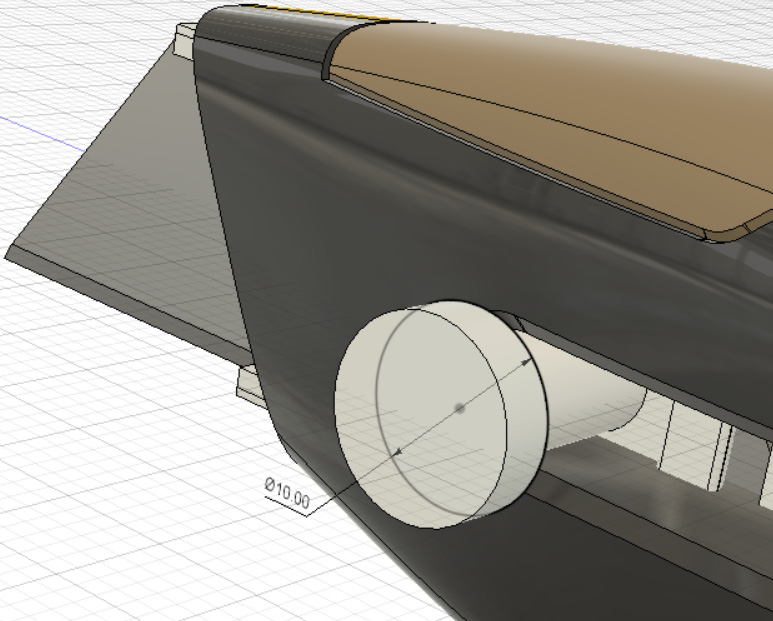
Figure 1.15 – A bottom-up approach to modeling and adding to an existing model
Some prefer one way to design over the other but a blend of both can often provide the best results. You will often find that starting from the top down is the easier way to start, but as you grow as a modeler, using both methods will make you a much stronger designer. Being able to switch how you work and not be confined to a certain methodology will make your models much more efficient to work with:
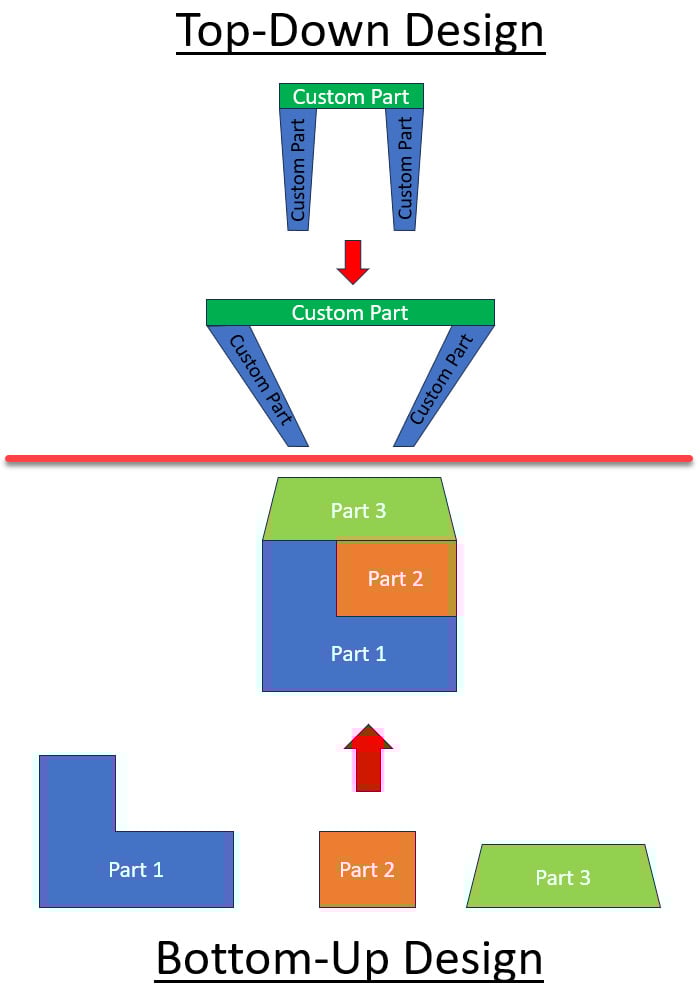
Figure 1.16 – The top-down and bottom-up design workflow
Now that we’ve learned about the UI and the difference between top-down and bottom-up designs, let’s take a look at the different subscription models and how to get the hobbyist (free) version.