

Creating a reference model using parametric designs
We can see from the previous model that primitive modeling is a very crude, simple way of creating an object for quick reference. That method works great when you’re short on time, but what if we need a few more details and want to see some size adjustments? This is where parametric modeling works very well. In this section, we will recreate the handlebars, the handlepost, and the handlepost clamp and demonstrate why parametric modeling is a much better way to build models:
- With the top level active, right-click and select New Component. Name the new component
Parametric Handlebar Refand click OK.
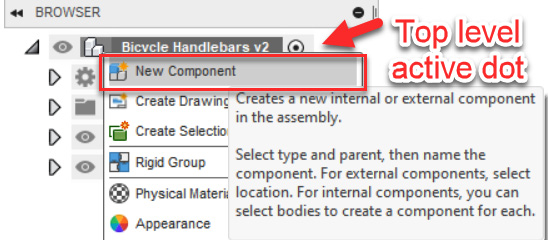
Figure 7.18 – Showing the top level active and New Component
Important note
If you happen to create the New Component within the previous component, your model will still work fine but may show incorrectly for a Bill of Material (BOM). If you notice that it was placed in the wrong...