

Adding sketch lines and dimensions
We can now add the sketch geometry to generate the 3D model. Let’s first adjust the location of the image so that the tip of the sword is placed close to the origin dot. The reason why we will want to move the image is because it will give us a better center location if we want to mirror the sword on the opposite side:
- Open the
Canvasesfolder in the BROWSER window on the left-hand side, and then right-click on the Sword image. Then, select Edit Canvas.
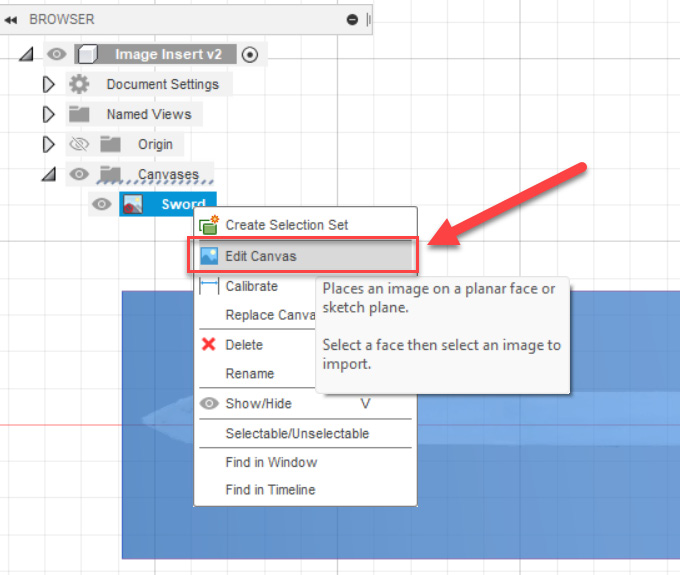
Figure 14.7 – The Edit Canvas tool location
- With the EDIT CANVAS window open, we can now move the image:
- Drag the X Distance arrow by about
20.4inches. - Then, drag the Y Distance arrow in the negative direction by
-.13inches to place the tip of the arrow close to the origin dot; it may not be exact, but it’s close to what we need. Click OK to complete the command.
- Drag the X Distance arrow by about
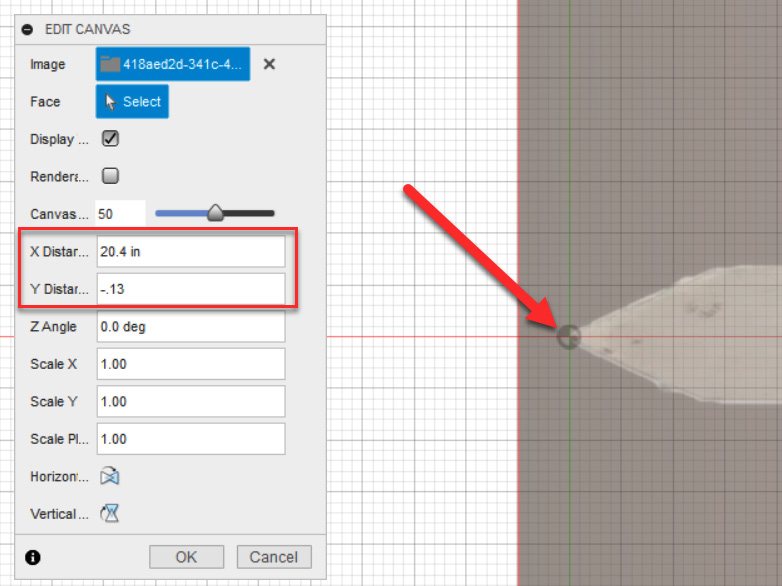
Figure 14.8 – The EDIT CANVAS tool...