

Getting ready for 3D printing
The first thing we need to do is to convert the mesh into a solid body. You do have the ability to 3D print meshes without converting, but I ran into some issues when I was adding supports to this model as it treated each model separately. Converting the mesh to a solid solved this issue, so let’s get into it:
- Select the MESH tab and click on the MODIFY drop-down arrow and select the Convert Mesh tool. The CONVERT MESH floating window will open up.
- Select the body and leave the other settings as is and click OK.
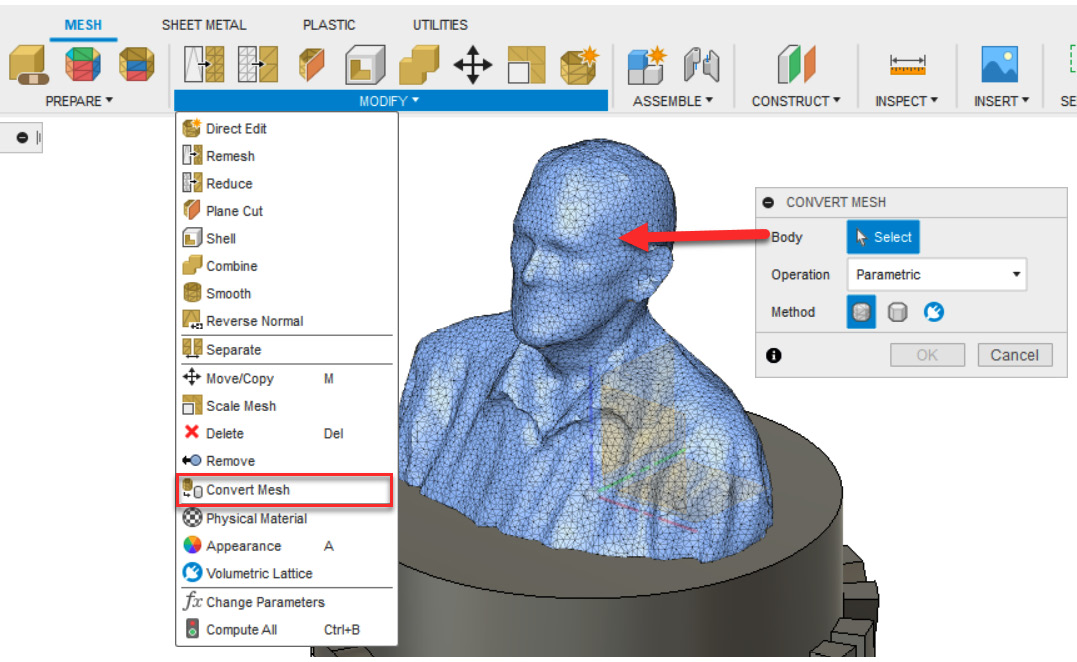
Figure 15.25 – Converting the mesh to a solid body
Now that the mesh is a solid body, we can use various solid modeling tools on it, such as the Combine tool to connect it with the base model. Let’s first move the model down slightly so that it forms a clean edge.
- Click on the SOLID tab, then select the Move/Copy tool located within the MODIFY panel.
- Set Move Type to...