Book Image

Real-Time Animation with Adobe Character Animator

By : Chad Troftgruben
Book Image

Real-Time Animation with Adobe Character Animator

By: Chad Troftgruben

Overview of this book

Adobe Character Animator is a power app for non-animators that provides easy rigging and easy-to- understand tools that enable you to create entertainment or business videos in no time. This guide to Character Animator gives you a comprehensive overview of the app, helping you learn the entire process—from importing a character designed in Adobe Photoshop to animating a sequence. Complete with background art, multiple character rigs and Character Animator project files, this book will show you how to animate a scene in Character Animator from start to finish. Starting with a character PSD from another artist, you’ll organize and condense the file to prepare it for rigging and animation. From there, you’ll systematically rig the character while exploring advanced behaviors and triggers to animate a complex scene that takes advantage of the app’s best features. By the end of this book, you’ll be able to create appealing animations in Character Animator for any purpose.
Table of Contents (19 chapters)
1
Part 1: Preparing Character Art for Rigging
5
Part 2: Rigging Character Art for Animation
11
Part 3: Animating and Refining Your Scene

Export options in Character Animator

While Character Animator is a fully featured animation suite, there are some tasks best left to other applications – tasks such as integrating visual effects, and filters, cutting out unneeded frames, and editing sequences together. Before we get too ahead of ourselves, let’s look at our options for exporting and sharing media with other Adobe apps.

Setting export duration

Before we export our file, let’s make sure we have the timeline set up to render only what we need. There’s no need, for example, to render several seconds of the scene after the keyframes we animated. This is easy to correct:

  1. Make sure you’re on the Record tab with access to the timeline.
  2. At the top of the timeline, above and to the right of the text frames, is a dark gray or, if selected, a light gray bar.
Figure 12.1: The light gray bar at the top of the timeline shows us what will be exported

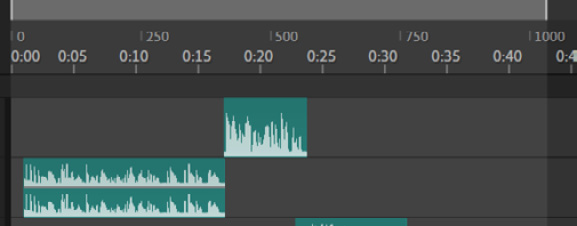
Figure 12.1: The light gray bar at the top of the timeline shows us what will be exported...