

To make any picture stand out, it needs a really good background, so in Chapter 5, Screen Space, World Space, and the Camera, I created this simple 3D space scene for us to paint our UI on:
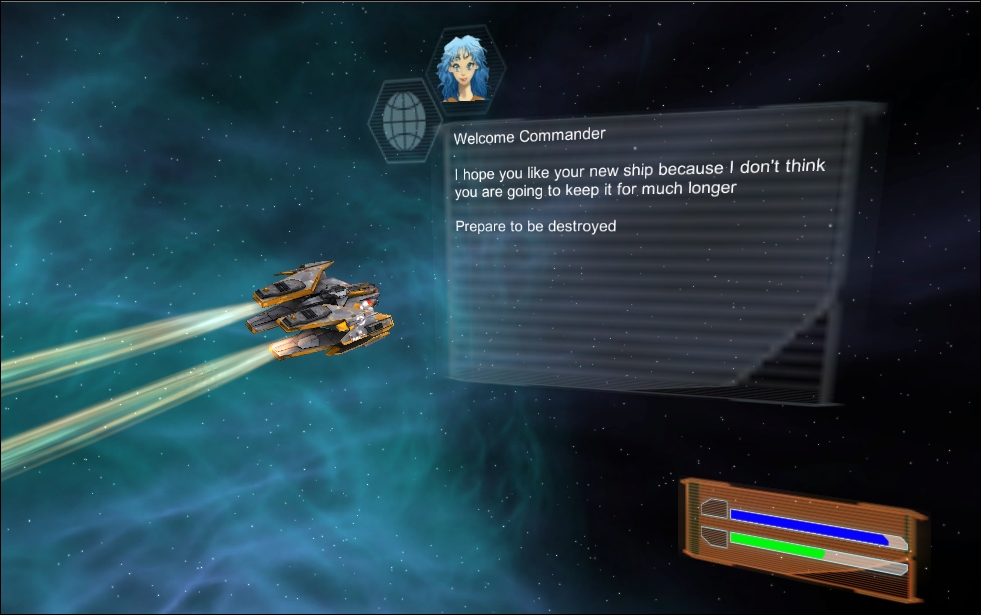
It's a cool mix of different Canvas UI elements displayed in a 3D scene, all with completely free assets!
First off, for our big example, let's grab a few things:
Start a new 3D project or just create a brand new scene for our playground.
Add the standard Particle project asset that comes with Unity (either when setting up the project or through Assets | Import Package | Particles in the menu).
Grab the Skybox Volume 2 Nebula asset package from the store (it's free and fantastic for demos — http://bit.ly/NebulaSkybox).
Grab the Free SciFi Fighter asset package from the store (it's pretty—http://bit.ly/SciFiFighter).
Tip
The free SciFi Fighter asset package when imported doesn't use its own folder (very annoying), so after you have imported it, create a new folder called
SciFi Fighterand move its assets to this folder (theMaterials,Meshes, andTexturesfolders and theSciFi_Fighter_AK5scene), just to keep the project structure tidy.
It is truly amazing what free stuff is available for game creators these days!
I almost had a little too much fun creating this basic scene and even learned some new tricks along the way. It's not crucial for the UI setup, so you can skip it if you want to, but it'll only take 5 minutes or so to complete:
Start with a new scene (if you haven't done so already) and save it as
Example_UI.Drag the
SciFi_Fighter_AK5.fbxmesh asset into the scene from the Meshes folder (either from the project root or theSciFi Fighterfolder you created).Change the Rotation of the SciFi Fighter to X
357, Y18, Z317. This gives a nice outbound flight path for the fighter.Drag the Main Camera (in the Hierarchy) as a child of the SciFi Fighter and reset its transform (using the cog icon in the top right-hand corner of the Inspector with the Main Camera selected, then select Reset). This ensures that the camera is always following the fighter and keeps it in view.
Set up the Main Camera's transform as follows:
Position:
X 38,Y 48,Z -47Rotation:
X 31,Y340,Z 30
Remove the GUILayer, Flare layer, and Audio Listener from the Main Camera by right-clicking on each component and selecting the Remove Component option. These just get in the way here because it's following the ship.
Set the Clear Flags property to Depth Only and the Depth to
0on the Main Camera since this is just a tracking camera in front of a background (which we'll add in a bit).Add a Directional Light using Create | Light | Directional Light to the scene to light the way.
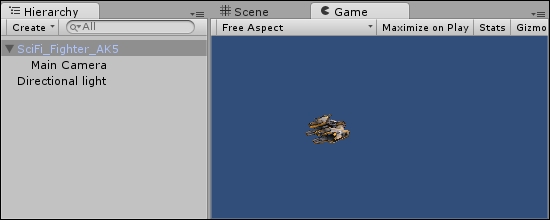
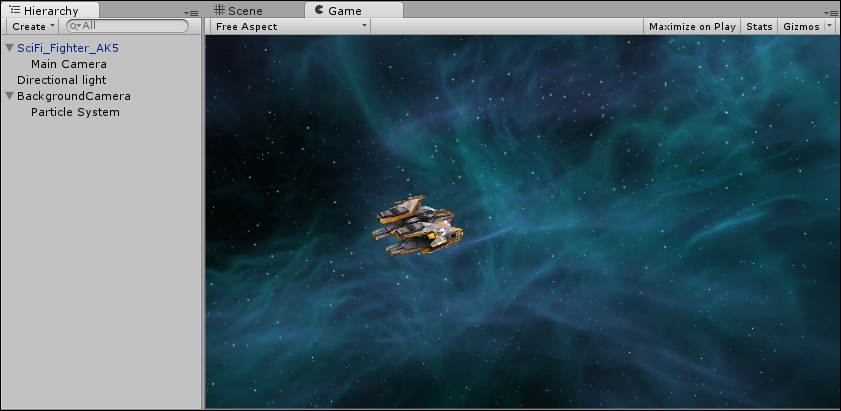
Here's where you should be up to now, no UI yet, just the beginnings of a scene:
Next, let's smarten it up a bit with a background skybox and even a trail for the ship:
Add a new Layer to the project (through the Layer menu in the top-right corner of the Inspector for every GameObject) called Background (this just helps you identify background objects for the background camera). This should be in the User Layer 8 field (but any position in the Layer array will do).
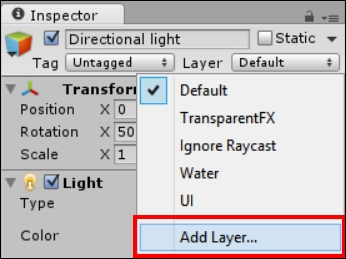
The Add Layer... option in the Inspector
Add a new Camera to the scene (using Create | Camera) and rename it to
BackgroundCamera.Set the Depth for the
BackgroundCamerato1.Set the Layer for the
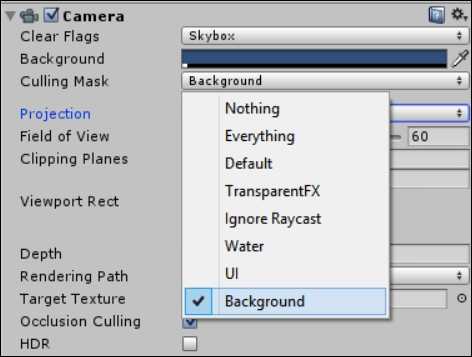
BackgroundCamerato the new Background layer using the Layer combobox shown earlier.Configure the Culling Mask of the BackgroundCamera to just Background by selecting Nothing in the drop-down selection and then selecting Background. (For an added bonus, also remove the Background layer from the Culling Mask of the Main Camera so it does not render it.)
Add a Skybox component (Add Component | Rendering | Skybox) to the BackgroundCamera and set the Custom Skybox property to one of the skyboxes from the
SkyBox Volume 2folder. You can do this by dragging the DSG.mat asset (the material, not the textures) to the Custom SkyBox property of the Skybox Component. I personally went for theDeepSpaceGreen SkyBox(in the folder of the same name under theSkyBox Volume 2folder).Finally, add a new Particle System as a child of the BackgroundCamera (right-click on BackgroundCamera and select Particle System) with the following settings (any settings you won't alter are the defaults):
Transform
Position: X = 83, Y = 28, Z = 76
Rotation: X = 10, Y = 240, Z = 1.8
Particle System
Duration = 20
Start Lifetime = 20
Start Speed = 10
Emission Rate = 5
Shape
Shape = Box
Box X = 50
Box Y = 50
Box Z = 5
Renderer Max Particle Size = 0.005
The Particle System should now look like the following screenshot:

All this does is it simply adds some flavor to our scene so it's not boring.
Note
I've found in situations where you want a background and a moving target that you want to follow, it is best to have the background and the target use separate cameras.
After all that, our demo scene now looks like the following:
Lastly, let's kick our ship into action and make it at least look like it's moving:
Add a Rigidbody component (Add Component | Physics | Rigidbody) to the SciFi_Fighter_AK5 and uncheck the Use Gravity property. (It's space; there is no gravity!)
Add two new Empty GameObjects as children to the SciFi_Fighter_AK5 (right-click on the fighter and select Create Empty). Name them Engine1 and Engine2.
For Engine1, set its Transform Position to X -
3.24, Y -0.04, Z -1.69(Rotation values should all be0and Scale values should all be1).For Engine2, set its Transform Position to X
3.49, Y -0.04, Z -1.69(Rotation values should all be0and Scale values should all be1).Select BOTH the Engines in the project Hierarchy. Then, in the Inspector window, click on Add Component and select Effects | Trail Renderer.
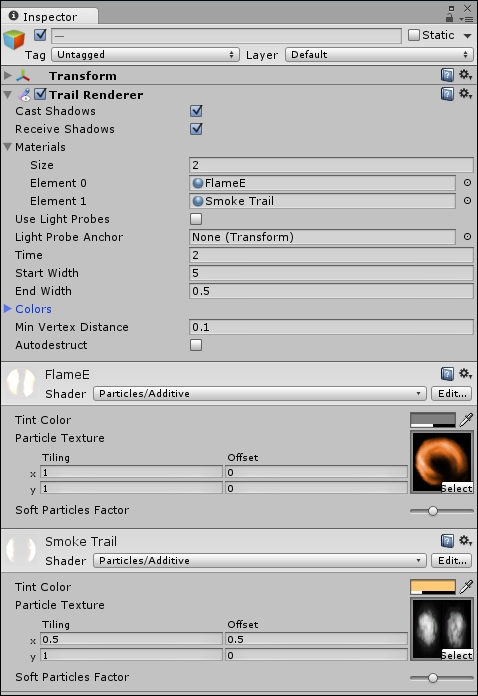
Still with both the Engines selected, expand the Materials section of the Trail Renderer in the Inspector and set the Size to
2.Drag the FlameE material from the standard
Assets\Particles\Sources\Materialsfolder onto Element0of Trail Renderer Materials.Drag the Smoke Trail material from the standard
Assets\Particles\Sources\Materialsfolder on to Element1of Trail Renderer Materials.Set the Time to
2, Start Width to5, and End Width to0.5.
The Trail Renderer in the Inspector window should now look like the following screenshot:
Almost there! One last thing remains. If you run the scene now, you won't see any change. There are no trails; the ship just sits there and does nothing. Simply put, it's doing nothing because we haven't told it to do anything. For the Trail Renderer to work, the ship has to move.
For the last touch, create a new C# script called ShipMove and replace its contents with the following:
using UnityEngine;
public class ShipMove : MonoBehaviour {
void Start () {
//Kick the ship in to action with a bit of force.
GetComponent<Rigidbody>().AddForce(Vector3.forward * 50,
ForceMode.VelocityChange);
}
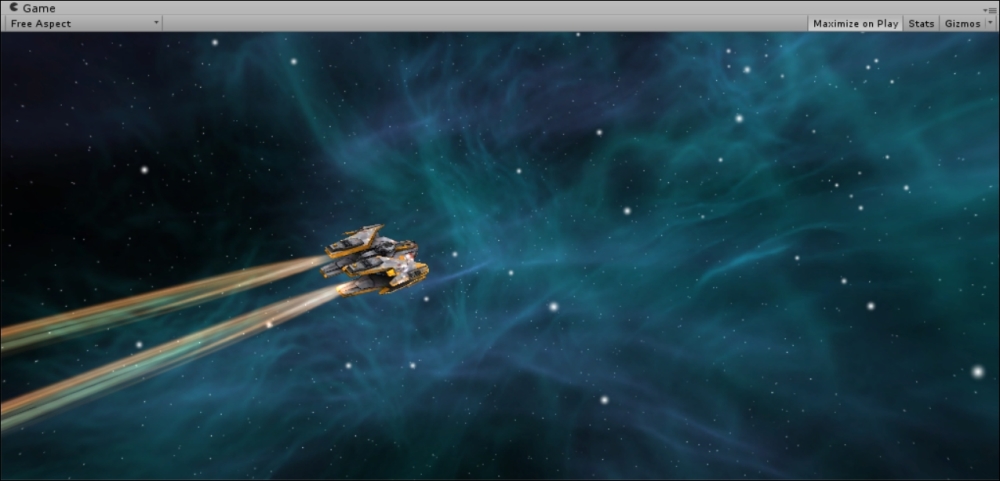
}Now, simply attach the script to the SciFi_Fighter_AK5 GameObject and hit play and your fighter will be screaming through the stars on its way to oblivion.
Note
The complete scene is also available as a Unity package and can be downloaded from http://bit.ly/UIEssentialsCh5DemoScene.
Now, return to Chapter 5, Screen Space, World Space, and the Camera, and start adding some UI to this amazing scene you have created.