

Assets are image files, audio files, programming scripts, and so on that make up the reusable mix-and-match pieces of our game.
Project Browser contains all the assets; it lists them in a project and allows us to view and organize them in folders, as shown in the following screenshot:
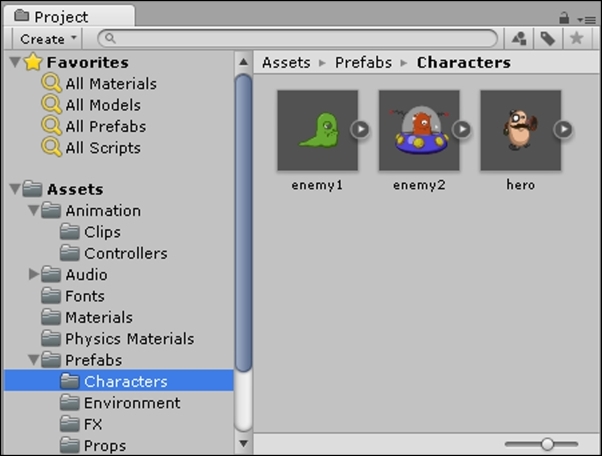
In the left panel are the folders that contain our assets in an ordered structure/hierarchy that we will create when creating our games.
Different assets in our project such as materials, animation, audio, and so on should be placed in their own folders, often in further subcategories for clarity.
On the right panel are the asset files from the selected folder, and they can be edited here.
When making a game, some assets will be created outside of Unity (such as in an image-editing or sound-recording program). Those assets will be imported into Unity to be used, while other assets can be created inside of Unity, such as cameras, game objects, scripts, and animations.
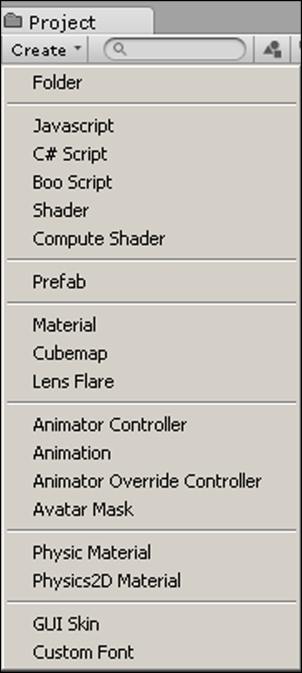
When we click on Create, at the top of the left panel, we are given a list of assets that we can create, as shown in the following screenshot:
We can easily search for any asset from the Project Browser toolbar. This is done by either selecting the label button to search by its name or selecting the type button to search by its type. Depending on which button we select, we type either the asset's name or type in the search bar and then press Enter to search.
Assets that are used often can be set as favorites by clicking on the star button. For quick and easy access, we can then search for or filter them under the Favorites drop-down menu in the left panel.
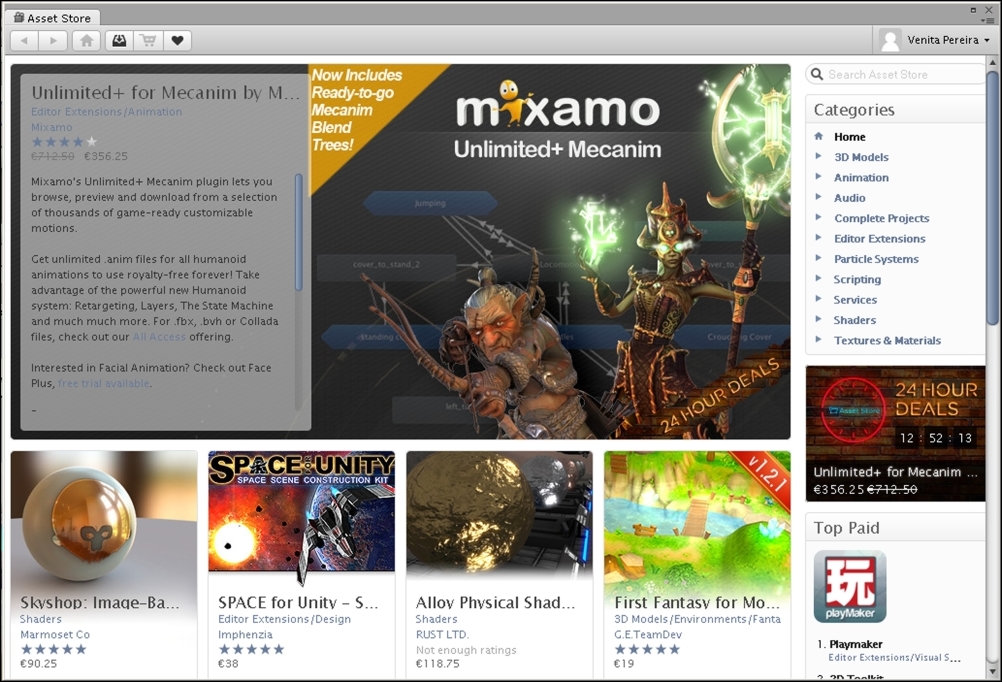
Asset Store is an online marketplace created by Unity for independent game developers to buy and sell reusable assets to make games, as shown in the following screenshot:
Any assets purchased or downloaded from Asset Store will be shown and can be accessed from Project Browser.
To load our assets from the Asset Store into the Project Browser, we need to click on the Download button on the chosen asset within Asset Store.
The Importing package pop-up box will appear within the Unity editor, allowing us to tick the assets we would like to import. Once we are done selecting, we simply click on the Import button to import the assets into our project.
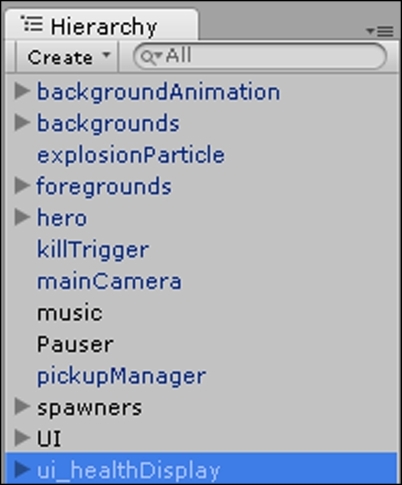
The Hierarchy tab lists all the GameObjects in the current scene. Scenes are made up of game objects, and game objects make use of assets. We can easily access any GameObject in the scene from the Hierarchy tab for quick editing.
The following screenshot displays the Hierarchy view with the game objects in black and prefabs in blue:
Parenting is a hierarchical concept that affects the visual pose of game objects in relation to another object's pose, for instance, the parent's pose. A child's translation, rotation, and scale will be relative to the parent. So, we only need to edit the parent's relative transform data and the children will inherit them. This is useful for animating multiple separate images by changing their position. For instance, if we have an arm and a hand image, then we make the arm the parent and the hand the child, once we do this, we only need to move the arm and the hand will move in relation to it.
When we click on Create, we are given a list of preconfigured GameObjects that we can create, as shown in the following screenshot:
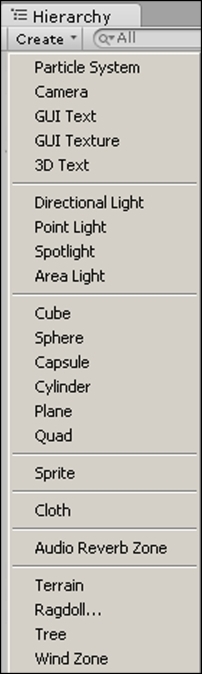
Although the list may appear daunting, we will not need to concern ourselves with many of these GameObjects as most of them are used for 3D games. The only GameObjects we will be using are the Particle System, Camera, GUI Text, and Sprites.
Game objects are the living things in our games, and the different components are what bring a game object to life in different ways. For example, the Audio Source component allows a game object to emit a sound, while a Script component allows a game object to behave intelligently or respond to user input.
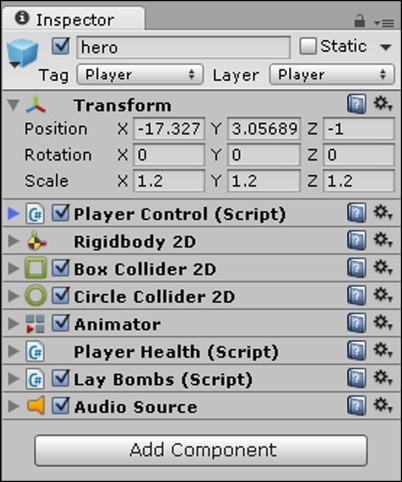
When we click on a GameObject within our scene, the Inspector provides detailed information about that object. It displays all the components that have been added to the selected GameObject, such as animations, colliders, scripts, and so on, as well as all the attributes within the components. This allows us to directly modify its fields and their respective values from the Inspector.
Tip
We can also change the values during runtime to test the effect in real time while running the game. However, this is only used to temporarily test the effect of the changes. Once we stop the game, the values will revert to their previous settings. Therefore, only the changes we make while not running the game are saved instantly.
We can reset any changes by right-clicking on the component and selecting reset.
By clicking on the red, green, and blue cubes in the top-left corner, we can set an icon to label our GameObject within Scene View, making it easier to find them.
Whenever we do not want a component active at any time, we can simply deselect the component by deselecting the box. We do this to temporarily turn it off without losing its settings, because had we deleted it, then we would have lost any changes made to the default settings.
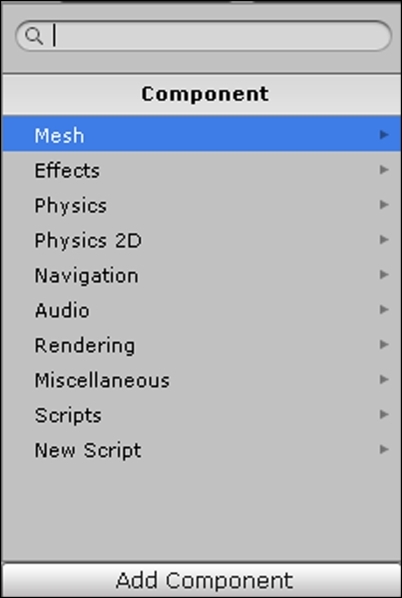
To add a component to the selected GameObject, we click on the Add Component button. When we click on Add Component, we are given a list of components that we can create, as shown in the following screenshot:
We can also remove a component by right-clicking on it within the Inspector and selecting Remove Component.