Book Image

Learning Unity 2D Game Development by Example

By : Venita Pereira
Book Image

Learning Unity 2D Game Development by Example

By: Venita Pereira

Overview of this book

<p>If you are looking for a guide to create 2D games using Unity, look no further. With this book, you will learn all the essentials of 2D game development by creating five real-world games in a step-by-step manner throughout the course of this book.</p> <p>Starting with a blank scene, you will learn all about the new Unity 2D toolset, which will enable you to bring your scene to life. You will create characters, make them move, create some enemies, and then write code to destroy them. After figuring out all the necessities of creating a game, this book will then assist you in making several different games: games with collision, parallax scrolling, Box2D, and more.</p> <p>By the end of this book, you will not only have created several small games, but you will also have the opportunity to put all your new-found knowledge into creating and deploying a larger, full game.</p>
Table of Contents (17 chapters)
Learning Unity 2D Game Development by Example
Credits
About the Author
About the Reviewers
www.PacktPub.com
Preface
Index

Movement controls


Now that we have our hero character's animations ready, we can detect input from the player in order to control the hero's movement.

We will play the animation that corresponds with the direction that the hero is moving. We will use the W, A, S, and D keys on our keyboard as our movement keys.

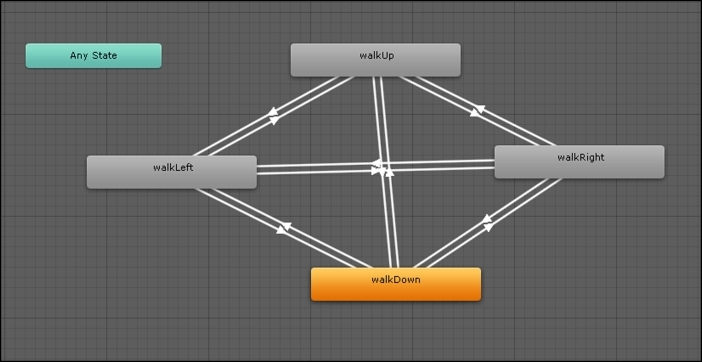
Before we can detect input in script and then output the corresponding animation, we first need to set the states and order the transitions between multiple animations using the Animator.

Movement Controls Animator

We assign the Animator component to the hero GameObject within the Inspector by going to Add Component | Miscellaneous | Animator. Then, within the Animator View (you can open this by going to Window | Animator), order the animation states we created by right-clicking and adding transitions with directions that match the following screenshot:

We add the following Boolean parameters to the Parameters box within the Animator View. To do this, we click on the plus sign, select...