
Importing resources and creating custom tabs in the Assets panel
Resources are the items that you import from external files; these can be created in any third-party software, such as Adobe Photoshop or Illustrator, and can comprise Smart Materials, Alpha Maps, Textures, and so on. On the other hand, tabs are used to access nested panels for quick access.
Importing resources
To import any resources in the Assets panel, use the following steps:
- Click on the File menu and select the Import resources… option:

Figure 2.4 – Import resources

Figure 2.5 – Add resources
- Select the resources (these are the same resources whose download link was given to you in Chapter 1, Getting Started with Adobe Substance 3D Painter). Select all the files from the resources folder except for any
.fbxfile and click Open.
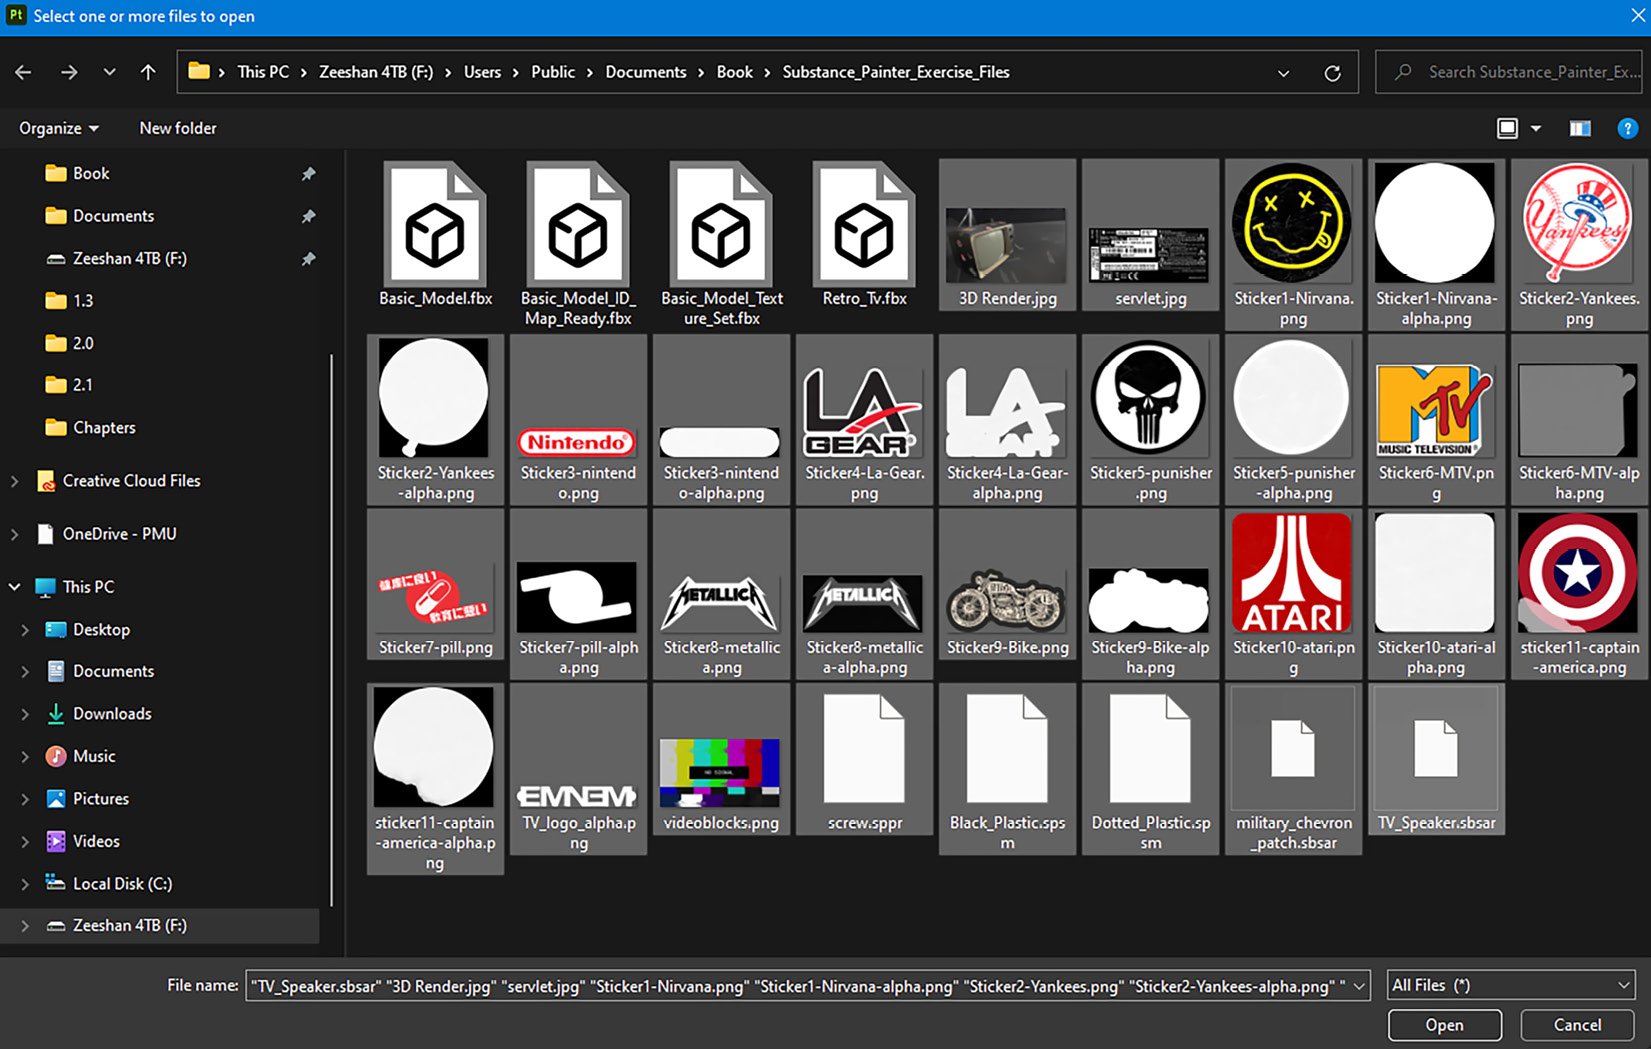
Figure 2.6 – Select resources
- Once you click Open, all your resources will be collected in the resources list; however, you will not be able to import them yet because the type of these resources must be defined first:
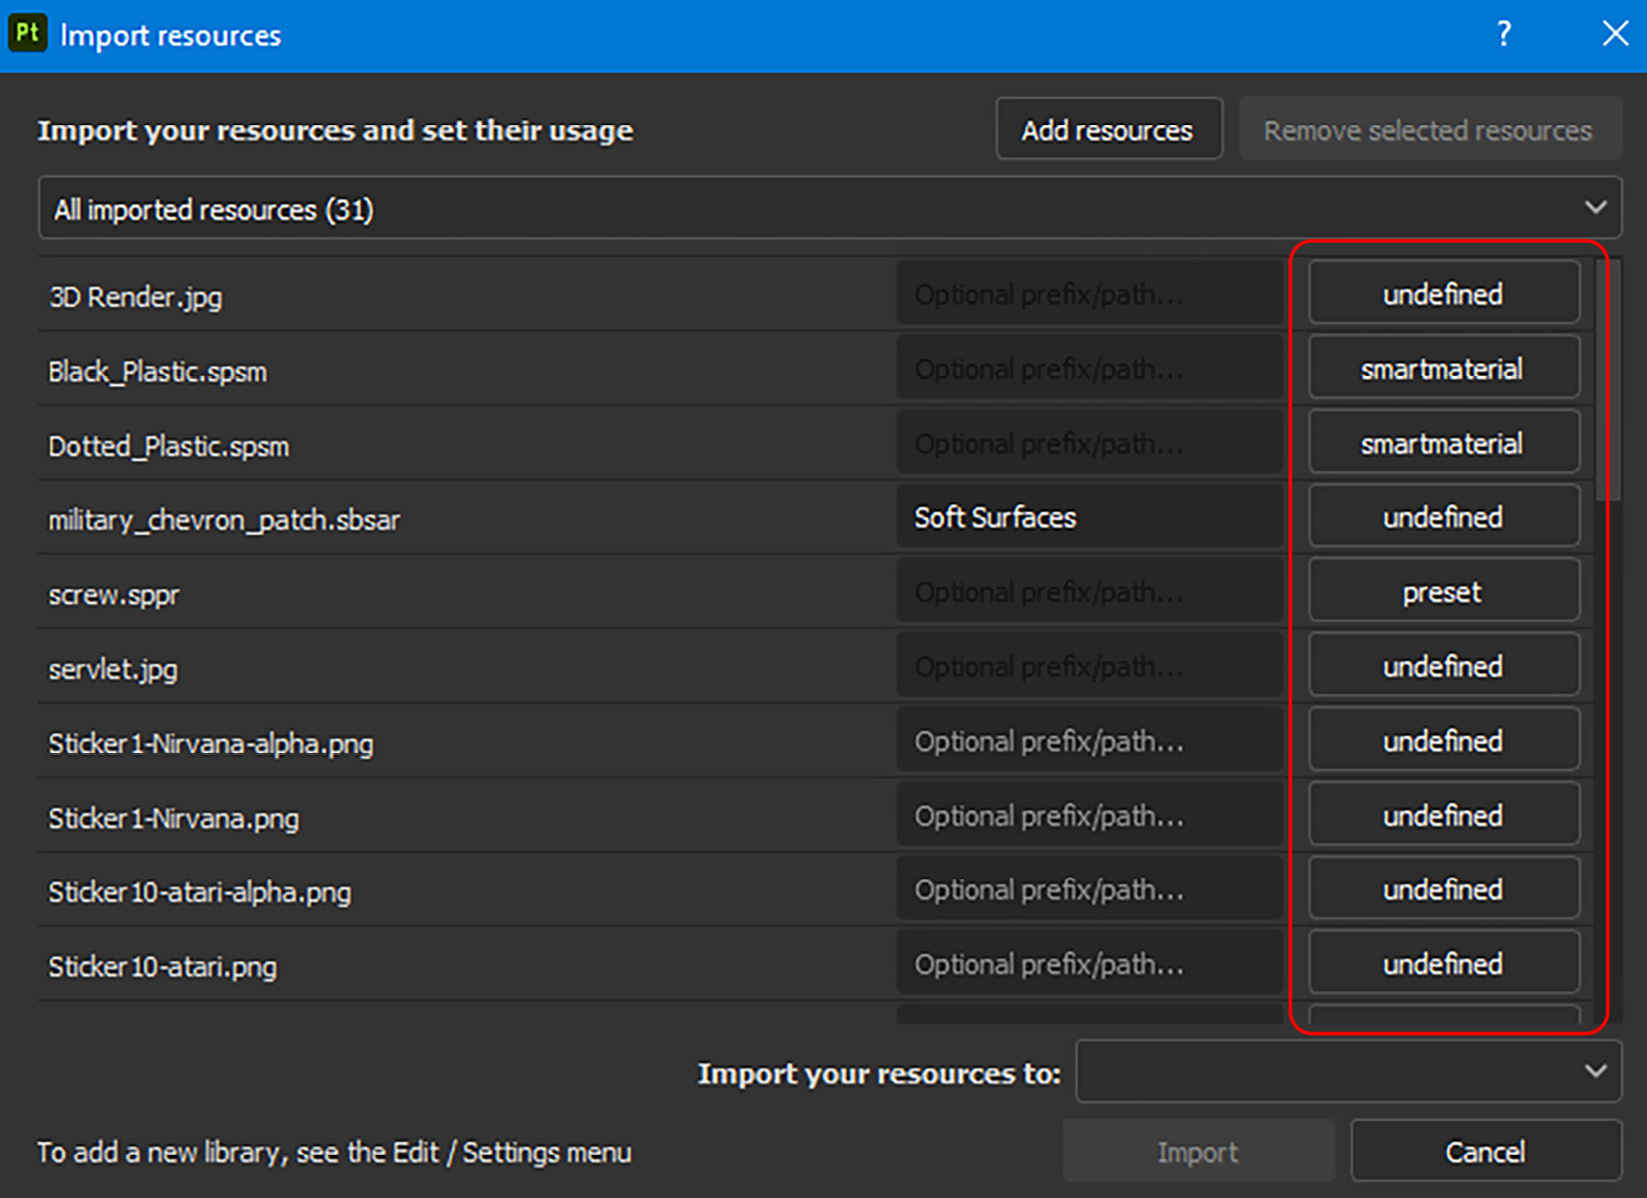
Figure 2.7 – Imported resources list
- Select the basematerial type for
military_chevron_patch.sbsarandTV_Speaker.sbsar. Define all the JPEG and PNG files without the wordalphaas texture, and define all the PNG files with the wordalphaas alpha. You will notice that Adobe Substance 3D Painter has already defined all the Substance Painter Smart Material (SPSM) files as smartmaterial because it is automatically programmed to detect files directly related to Painter.
Note
Texture
A texture is a two-dimensional picture that may be used in three dimensions. Textures might be grayscale, which means just one channel is utilized, or colorful, which means many channels are used. Materials are often made up of a variety of textures, each of which serves a distinct purpose, such as color, roughness, and metalness.
Alpha
Alpha is a mask that may be used to paint complicated shapes or details, such as a barcode, decals, stickers, or a logo.
- Next to the type of resource, you will find Prefix. This option helps you to create common prefixes in case you want to search for any asset. So, select all the resources with the Shift key and, for example, type
Retro. The result will be as follows:
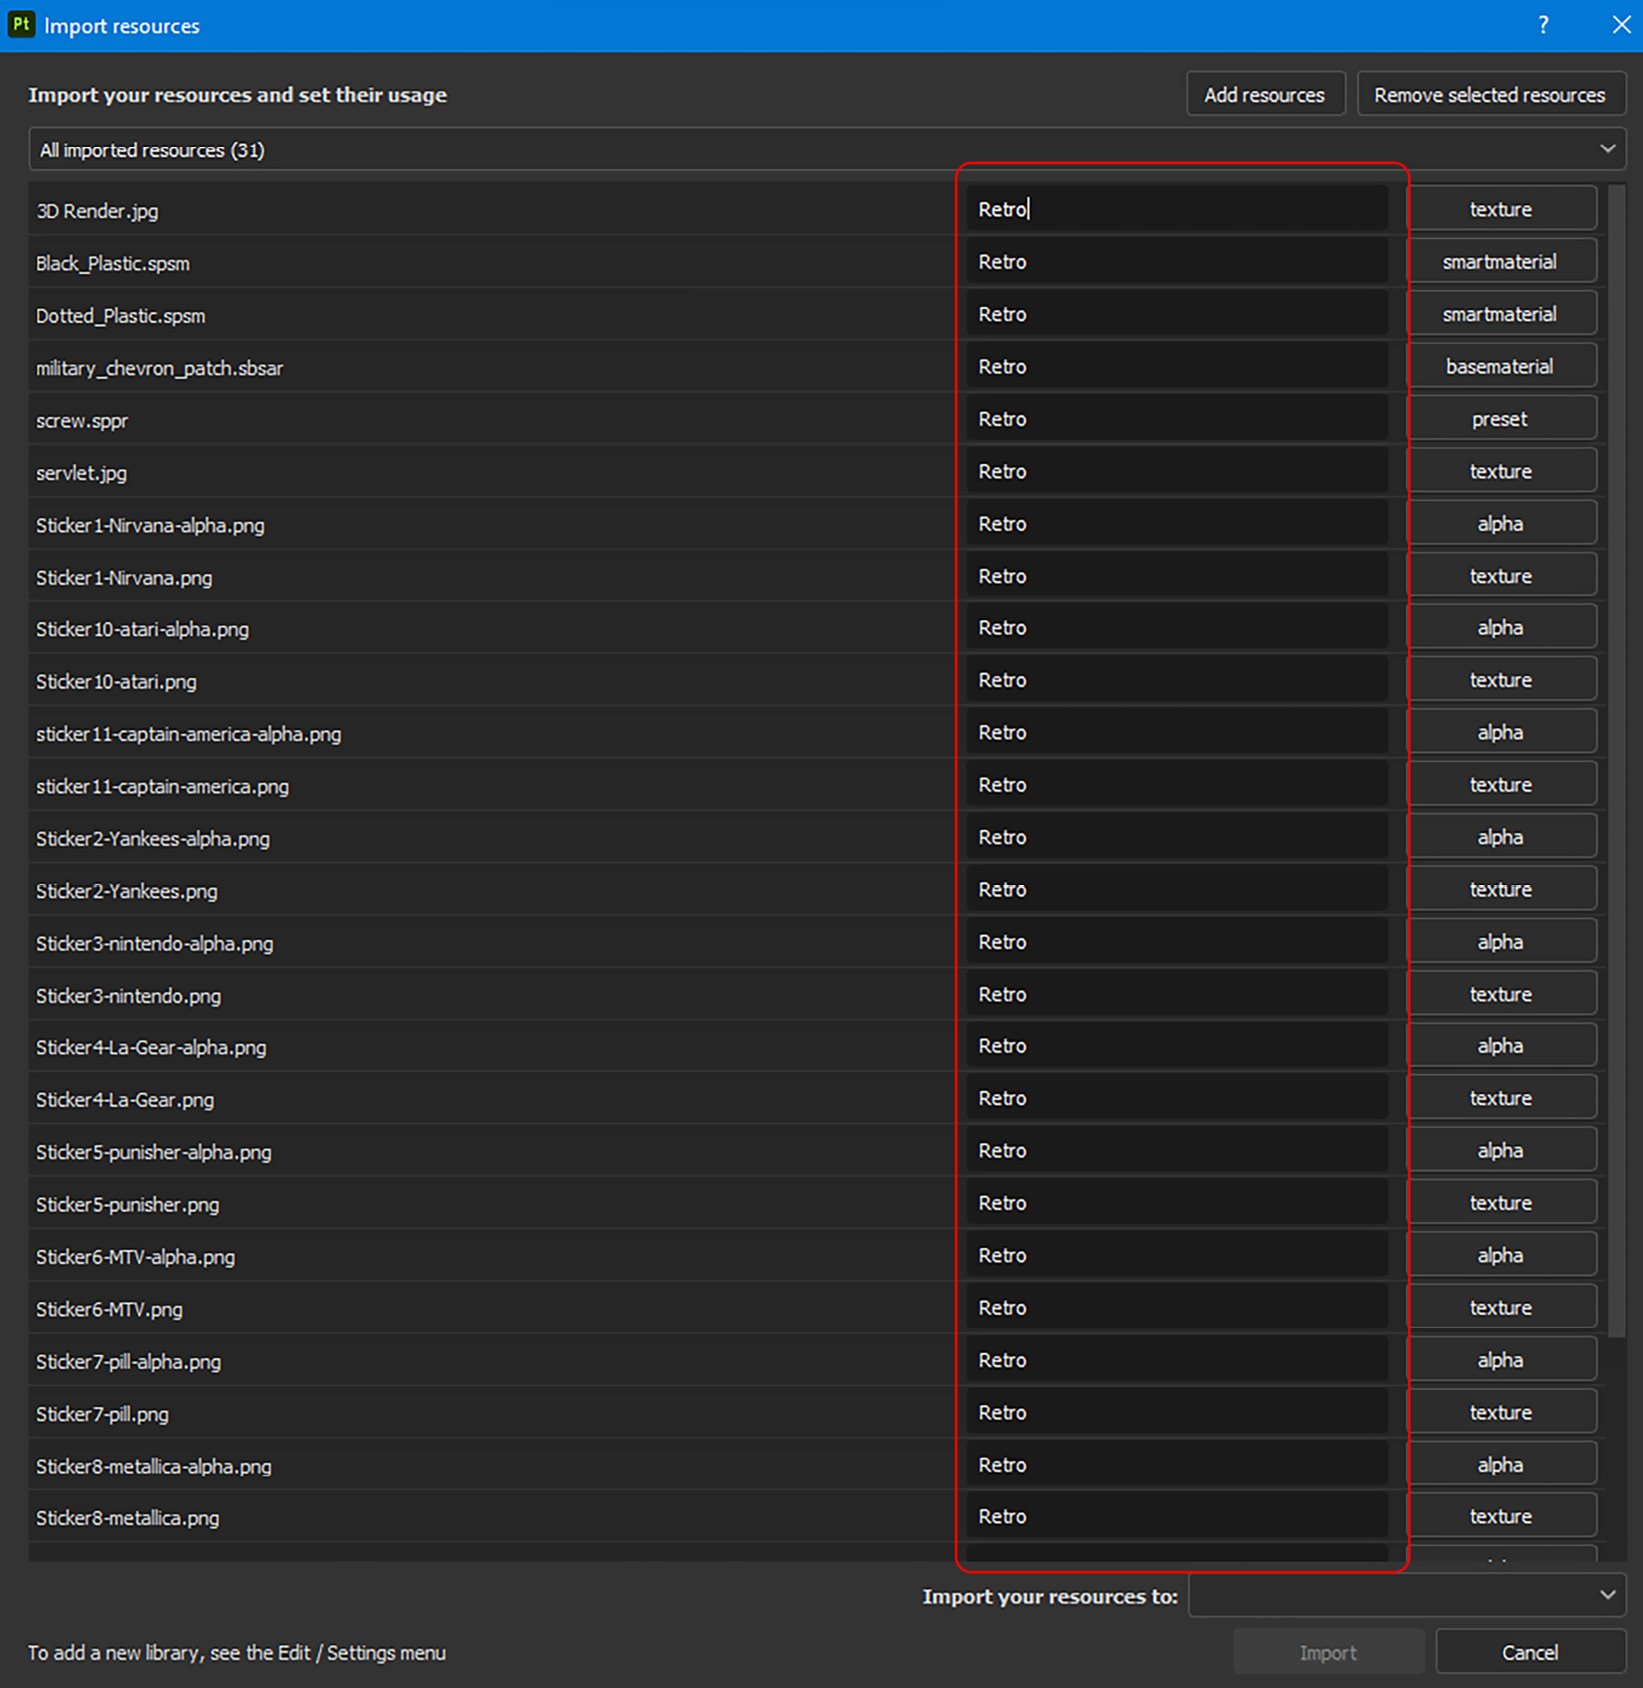
Figure 2.8 – Typing prefix
Now, whenever you search in the Assets panel with the word Retro, all these resources will show up. This will make your search more flexible, and you will be able to search for assets more quickly, especially if you have a lot of resources.
- Now you need to choose the project type from the Import your resources to: option, which is located at the bottom right of the panel:

Figure 2.9 – Project types
You will find three different options in the project type, as shown in Figure 2.9. These options can be explained as follows:
- current session: This type will import the resources to the current session of the project, and the resources will be available only for that session. Once the project is closed and then reopened, all the previously imported resources will be gone.
- project ‘PBR - Metallic Roughness Alpha-blend’: This type will import the resources to the project you are working on, and the resources will be available throughout the project. No matter how many times you close and reopen the project, the resources that you imported previously will be always available. However, you have to save the project before closing it. The
PBR - Metallic Roughnessportion is actually the name of your project until you save it, so if you are importing resources after you have already named and saved a file, it can look different than what we have here. - library ‘your_assets’: This type will import the resources to the assets library; therefore, these resources will be available for all the new and old projects, unless you remove them manually from the
your_assetsfolder.
- Select project ‘PBR - Metallic Roughness Alpha-blend’ and click Import:

Figure 2.10 – Import your resources to project ‘PBR-Metallic Roughness Alpha-blend’
- Once you will click on Import, all the resources will be imported into the Assets panel. These resources will be available under the Project library. Moreover, a search filter called Imported resources will also be generated automatically, as you can see in Figure 2.11. However, you don’t need that filter as you have already created the prefix. So, you can delete that filter by clicking on the cross next to it:
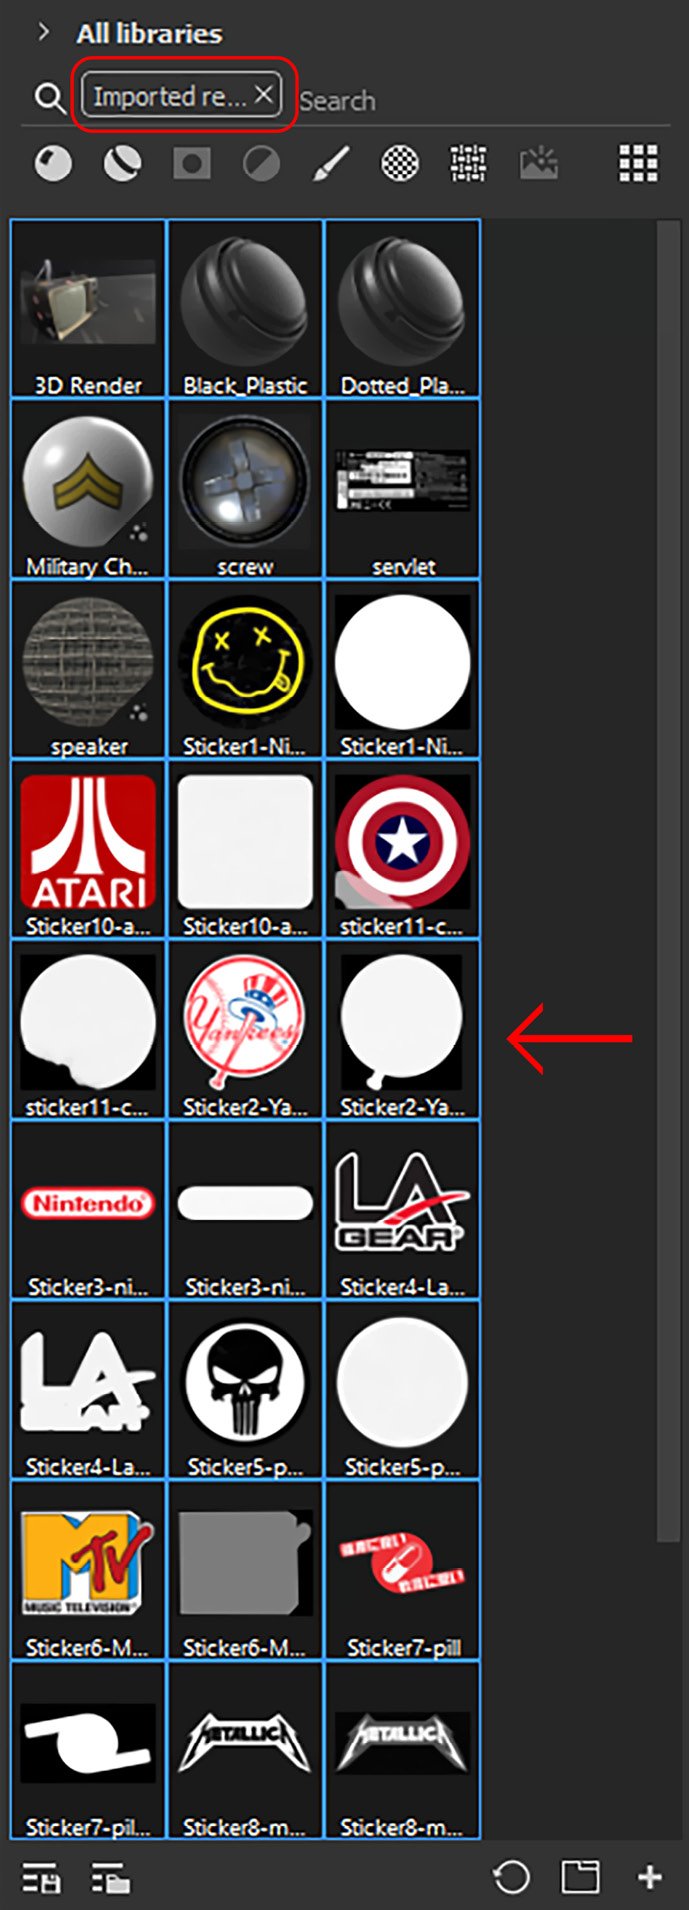
Figure 2.11 – Imported resources
Now, our resources are ready to use. Let us move on to creating custom tabs inside our Assets panel to help ourselves work faster.
Creating custom tabs inside the Assets panel
You can create custom tabs inside the Assets panel to work on your project faster and more efficiently. However, before you can create custom tabs, you must create a search keyword.
Creating a search keyword
You can create search keywords by using a filter or the Saved searches option.
Creating a search keyword using a filter
To create a search keyword using a filter, go through the following steps:
- Click on All libraries and choose Project. You will notice that your imported resources are there along with the textures that you previously baked:

Figure 2.12 – Project library
- It’s quite overwhelming sometimes when you have a lot of textures showing, especially the baked textures. So, to only see the imported resources, you can click on the small arrow next to the Project option and choose a filter. For our example, you can choose the Retro filter, which will show you all the resources assigned with the
Retroprefix:

Figure 2.13 – The Retro prefix filter
You can also perform the same operation by clicking the Filter by path option (1) at the bottom of the Assets panel, as shown in Figure 2.14:
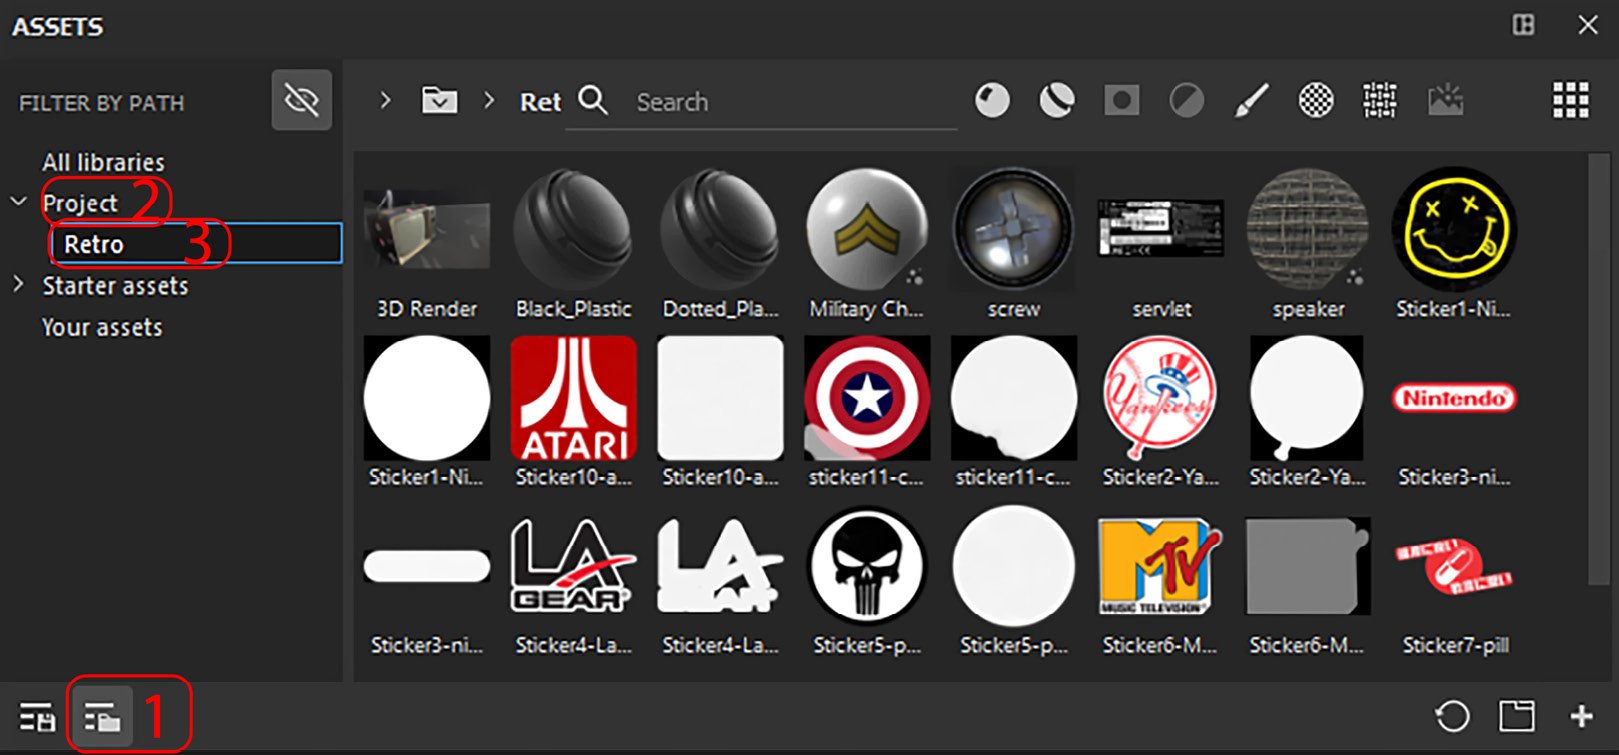
Figure 2.14 – The Filter by path option
- Then, click on Project (2) and choose the prefix you are looking for. In our case, we will select Retro (3). Now, you have successfully created a search keyword to represent a filter.
Creating a search keyword using Saved searches
You can also create a search keyword using Saved searches:
- You can also save searches in the Assets panel. Click on the Saved searches option at the bottom of the control panel (circled in Figure 2.15):

Figure 2.15 – Saved searches
- Then, type any search keyword, for example,
silver:
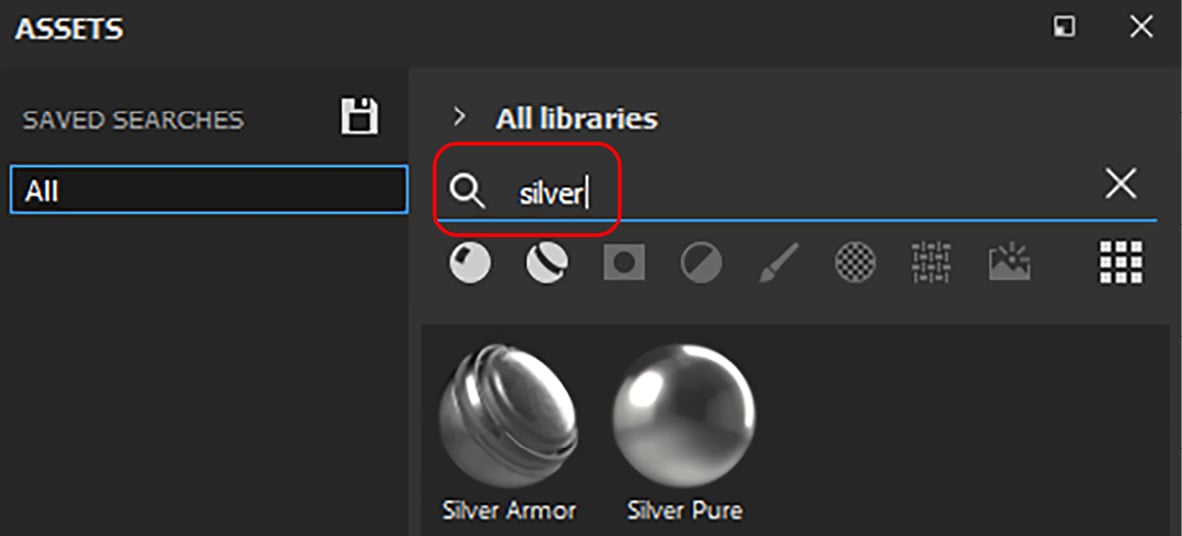
Figure 2.16 – Searching using typed keywords
- To save the keyword, click on the Save icon:
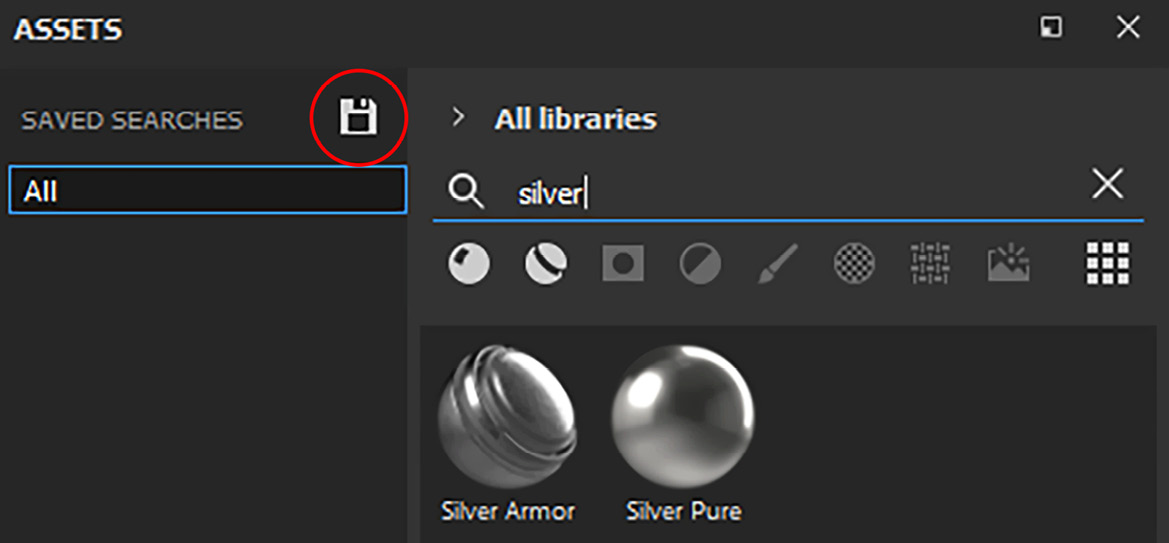
Figure 2.17 – Saving search keywords
- After saving the keyword, you will notice that the search keyword is saved in the list. Now you can come back to this option whenever you want to search for the same keyword:
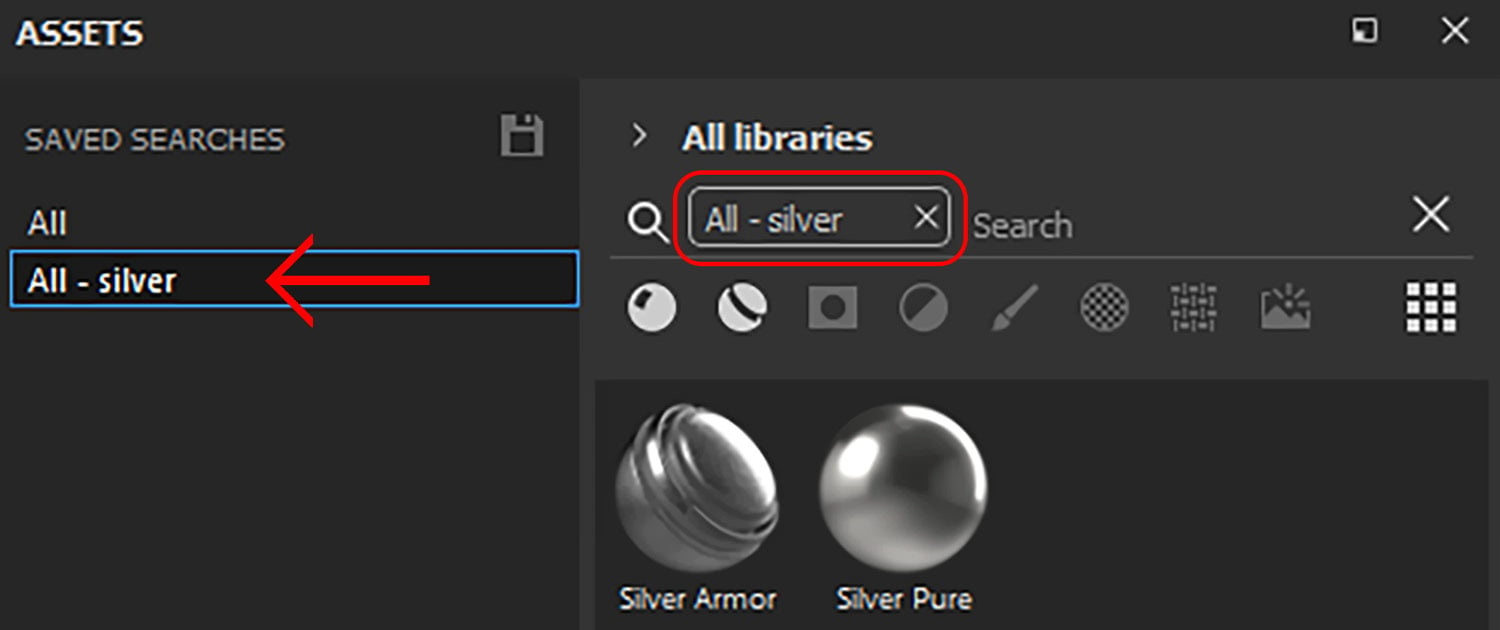
Figure 2.18 – Saved searches list
However, it’s quite time-consuming if you are going to search for filters using the Search path option, or the Saved searches option. To save time, it’s best to create a tab that will help you to switch between keywords much faster.
Creating a custom tab
Let’s see how to create custom tabs that will help you switch between keywords faster, and as a result, help you save time:
- Select the keyword silver that you saved and then click on the Open new query option at the bottom of the Assets panel, as highlighted in the following figure:
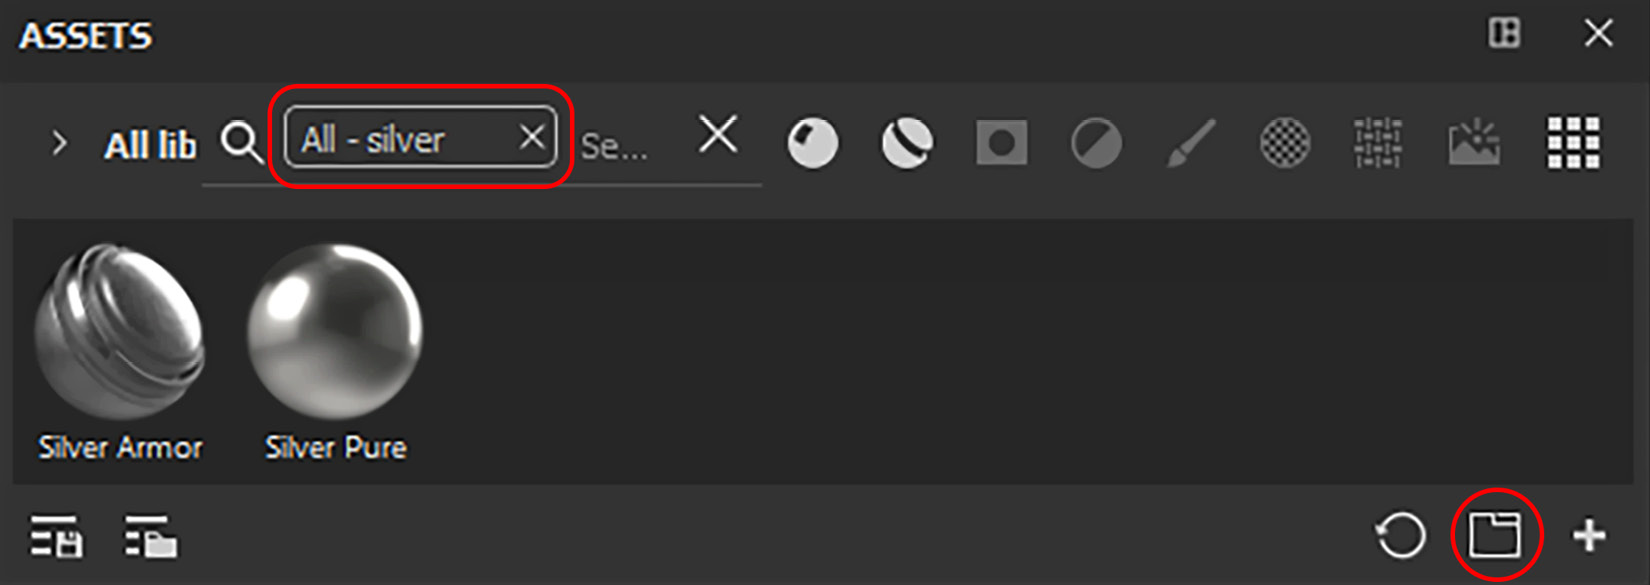
Figure 2.19 – Open new query option
- As soon you click the Open new query option, you will notice that a new tab with a ALL - SILVER keyword is created, as shown in Figure 2.20:
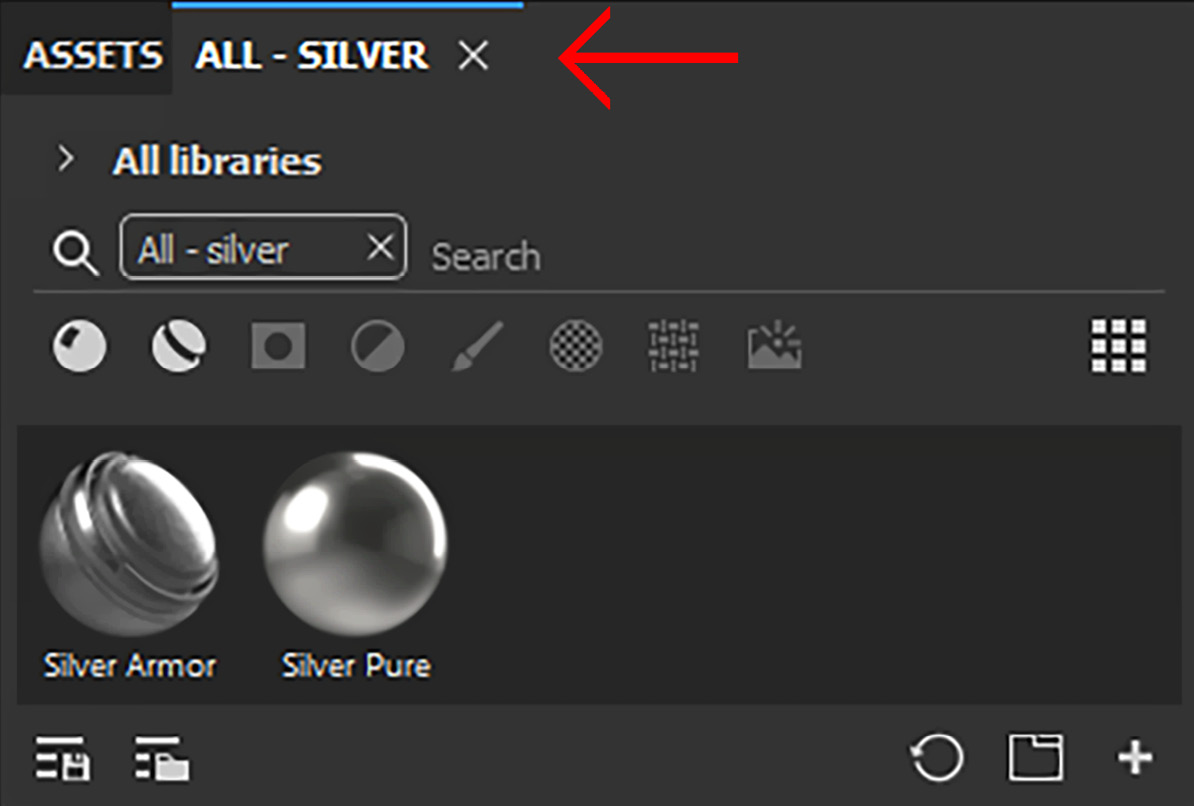
Figure 2.20 – Created SILVER tab
- Now you can go to the Assets tab and delete the filter from there, as shown in Figure 2.21, but do not delete it from the SILVER tab; otherwise, you will not be able to see the results.
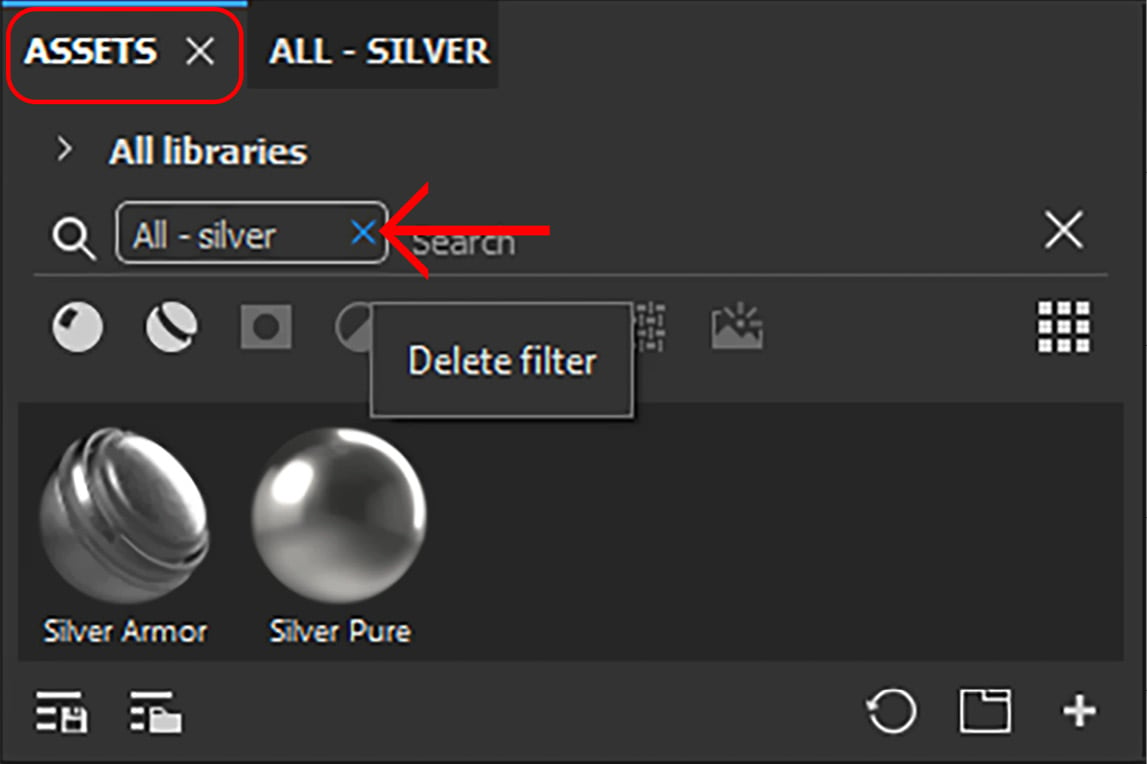
Figure 2.21 – Delete the filter from the Assets tab
- Now you can easily switch between your Assets panel and the SILVER panel. In this way, you can create as many tabs as you like, with the keywords of your choice, and easily access them:
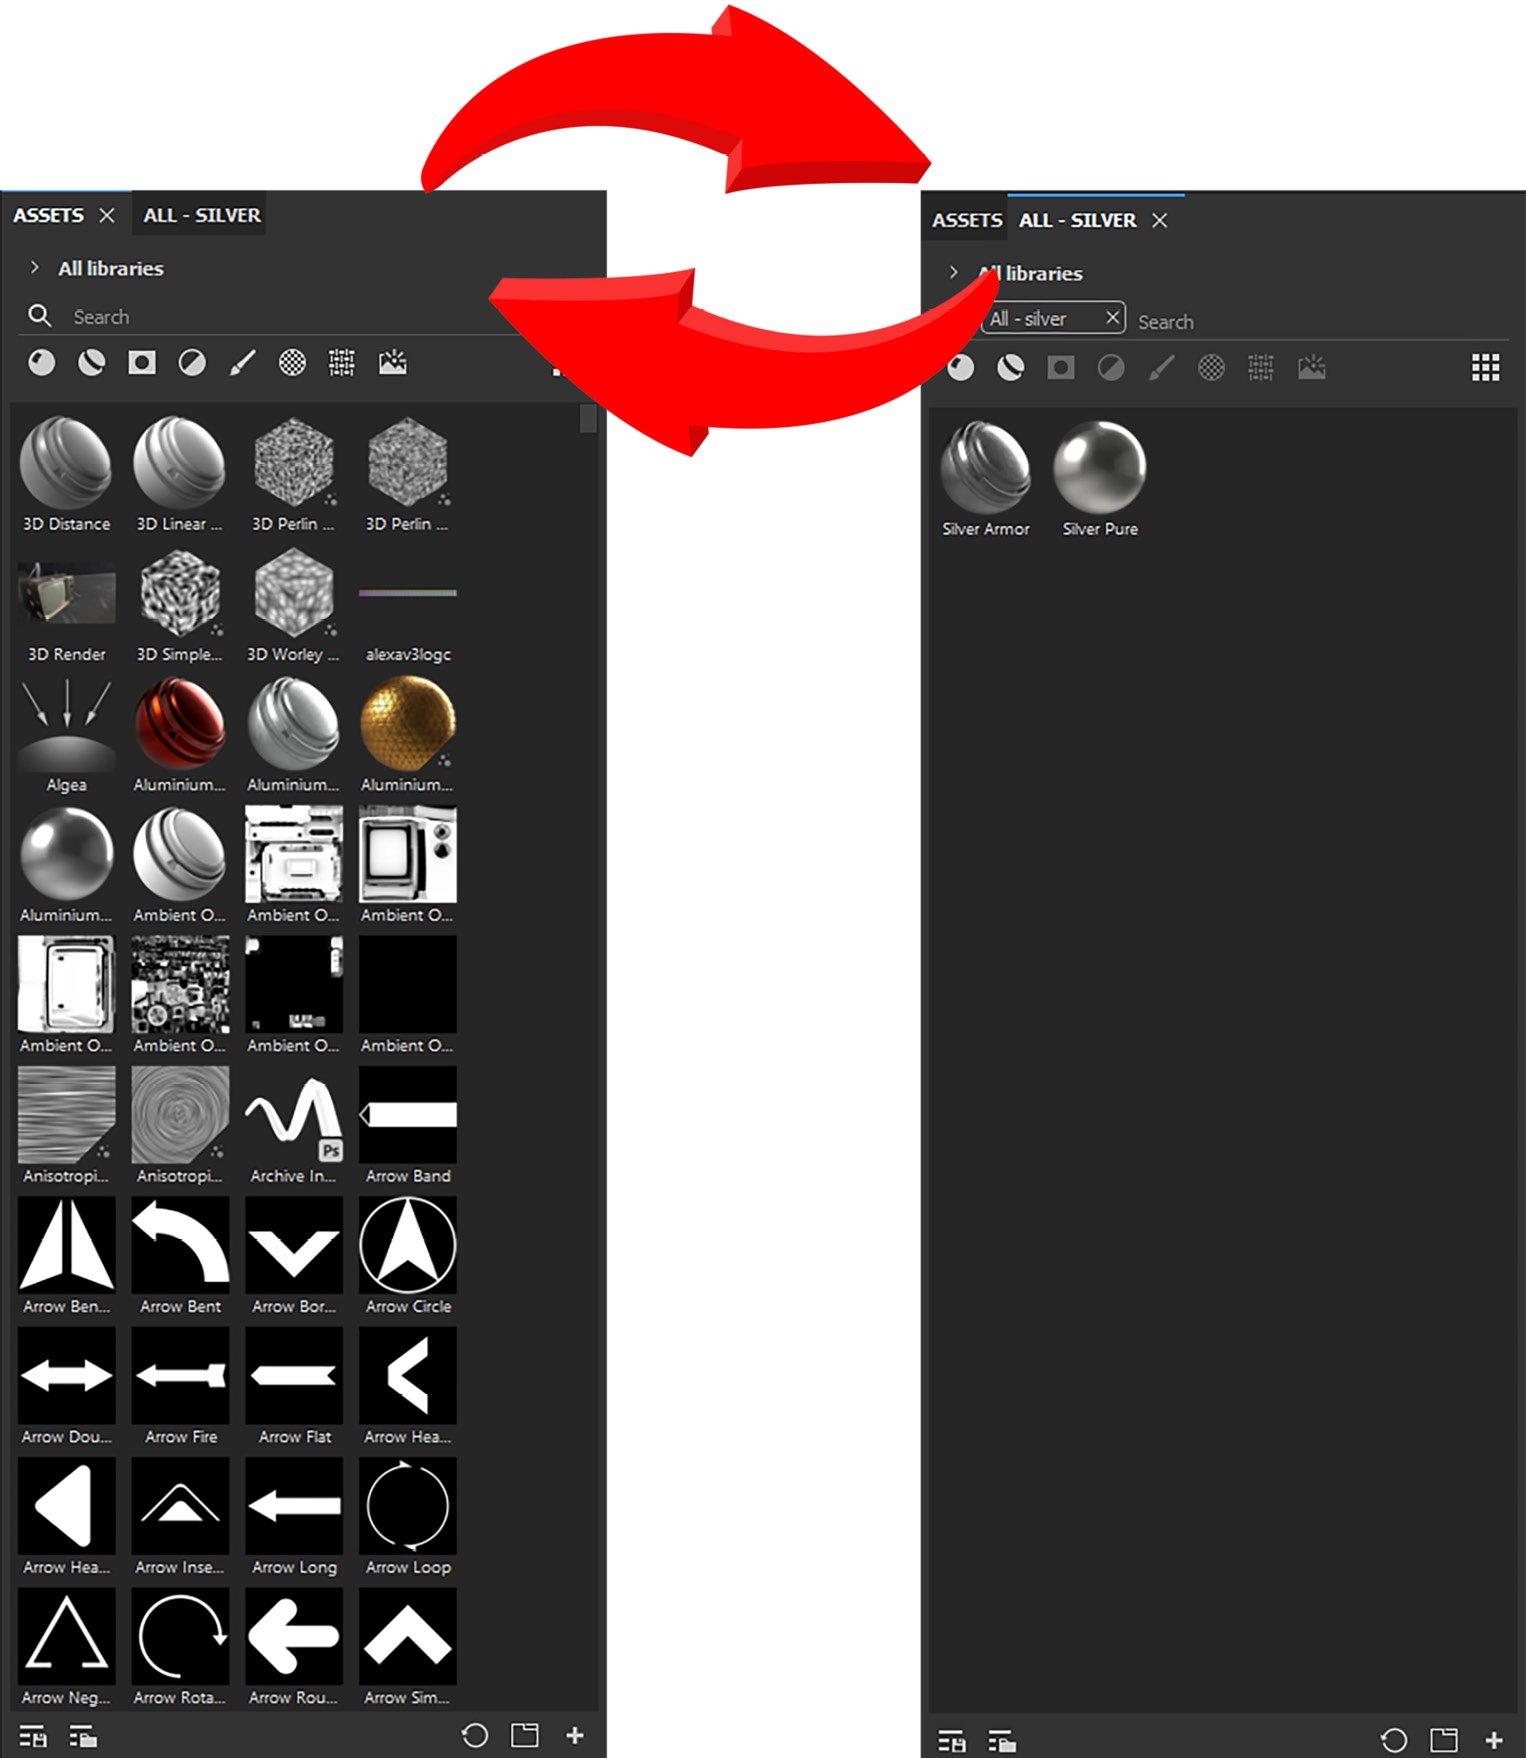
Figure 2.22 – Quick switch between tabs
- Now, go to the File menu and choose Save As and save the file in the
Substance_Painter_Exercise_Filesfolder asRetro_Television.spp. Bear in mind that yourPainterfile can be huge depending on mesh details:
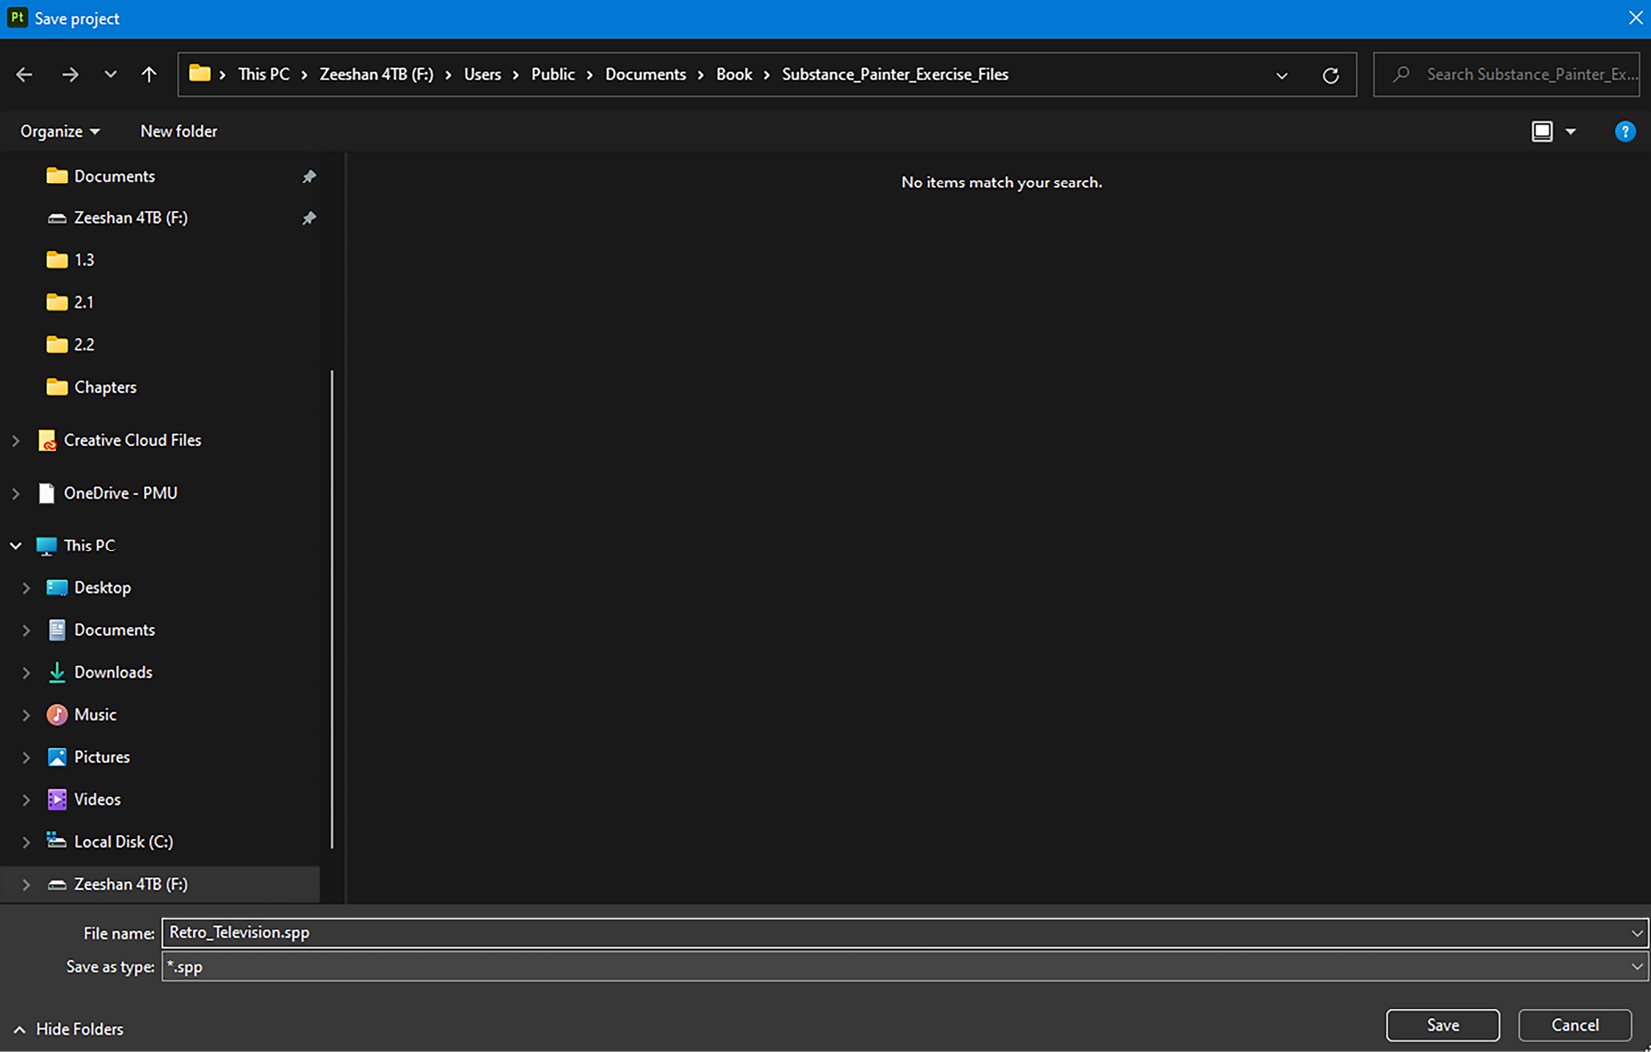
Figure 2.23 – Saving the project
As you have learned how to create your own custom tabs, we will now study different types of assets so you can comprehend their correct use. You may create more custom tabs based on your choice of assets.