
Applying assets to 3D meshes
There are many ways to apply assets to 3D meshes; this section will cover some of those methods and discuss them in detail.
Using normal maps to apply assets
Normal mapping is a texture mapping technique used in 3D computer graphics to simulate the lighting of bumps and dents. To apply a normal map in Adobe Substance 3D Painter, you need to do the following:
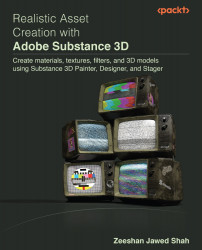
- Select the texture set from TEXTURE SET LIST; for this project, let’s choose
TV_Front_Casing:
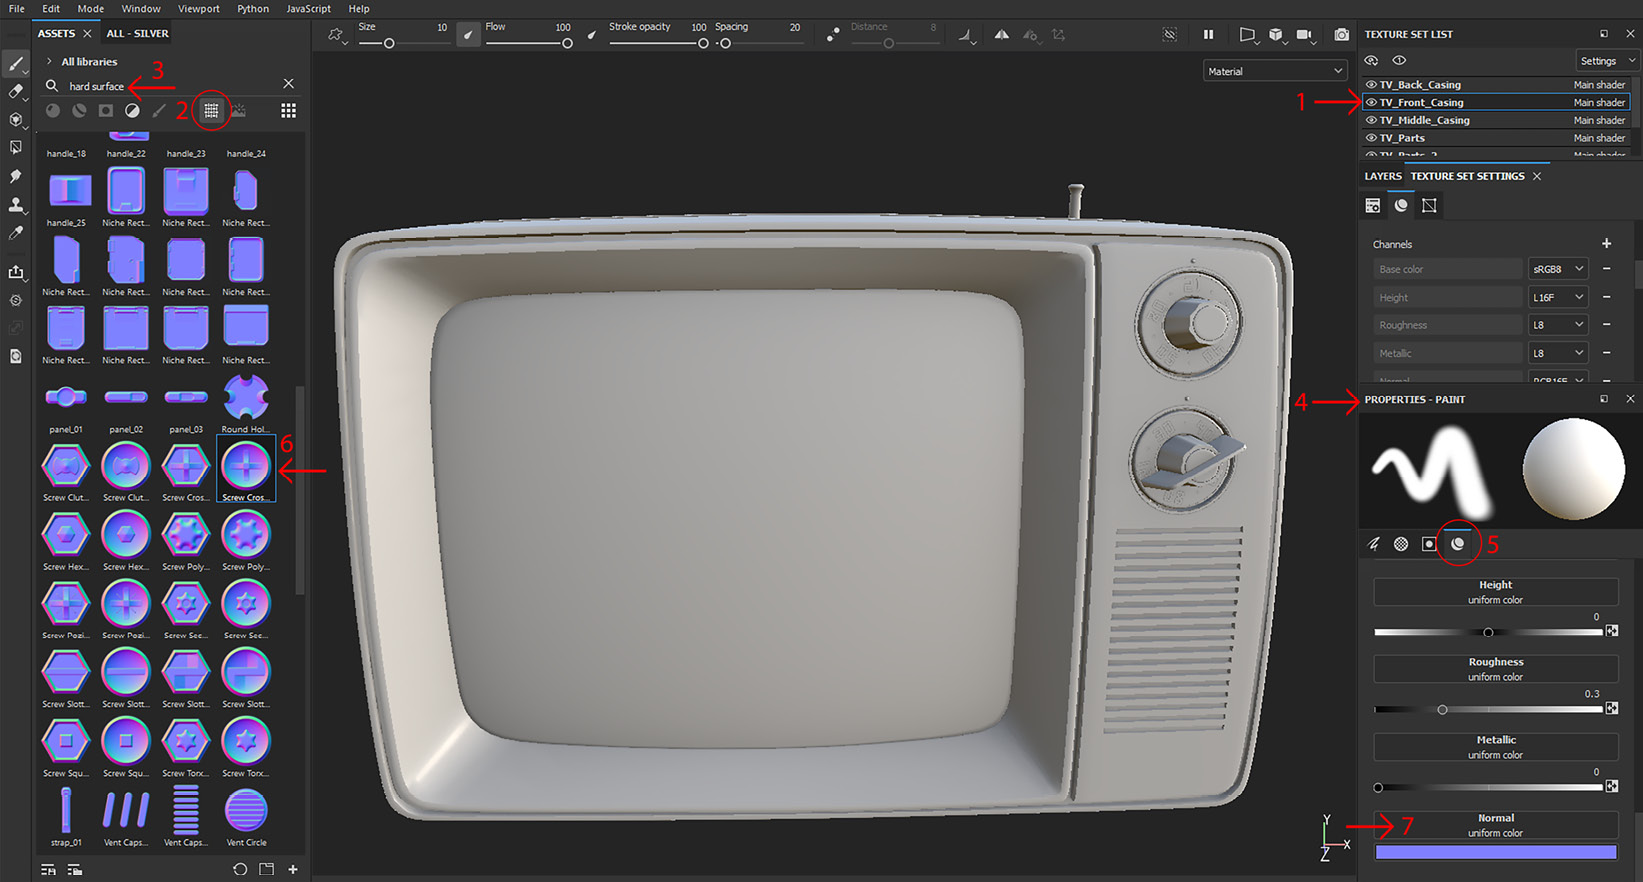
Figure 2.25 – Applying a normal map
- After selecting the texture set, click on the Textures asset in the Assets panel.
- Then type the keyword
hard surface. - Once the hard surfaces are shown, then select a basic brush from the brushes menu in the Assets panel, and go to the Paint property on the right side.
- Click the Material tab under PROPERTIES - PAINT. You should see the Normal map further down.
- Drag the Screw Cross Round normal map from the left panel to the Normal map area on the right panel.
- Screw Cross Round is loaded in your Normal map.
Now, you can take the brush and click on the front of the TV screen using the left mouse button. You need to only tap on the TV screen; do not drag over the screen; it will create unwanted results.
Changing the Brush attributes
To increase the size of the brush, you can press ], and to decrease the size, you can press [ on your keyboard; however, these shortcuts might not work if you are using a different keyboard layout such as the Swiss keyboard; therefore, you can change the shortcuts.
Also, you can press Ctrl (Windows) or Command (Mac), keep the right mouse button pressed, and drag the mouse left or right to change the size of the brush, and up or down to change the softness of the brush. You can also rotate the brush by keeping Ctrl (Windows) or Command (Mac) pressed and dragging the mouse up or down while the mouse’s left button is pressed.
Moreover, you can change the flow of the brush by keeping Ctrl (Windows) or Command (Mac) pressed and dragging the mouse left or right while the left mouse button is pressed.

Figure 2.26 – Screw stamped on the front screen of the television
However, you will notice that the screw is drawn in a white color. If you want to change the brush color, then choose the STENCIL tab in the PROPERTIES - PAINT panel and choose a different color under Base color:
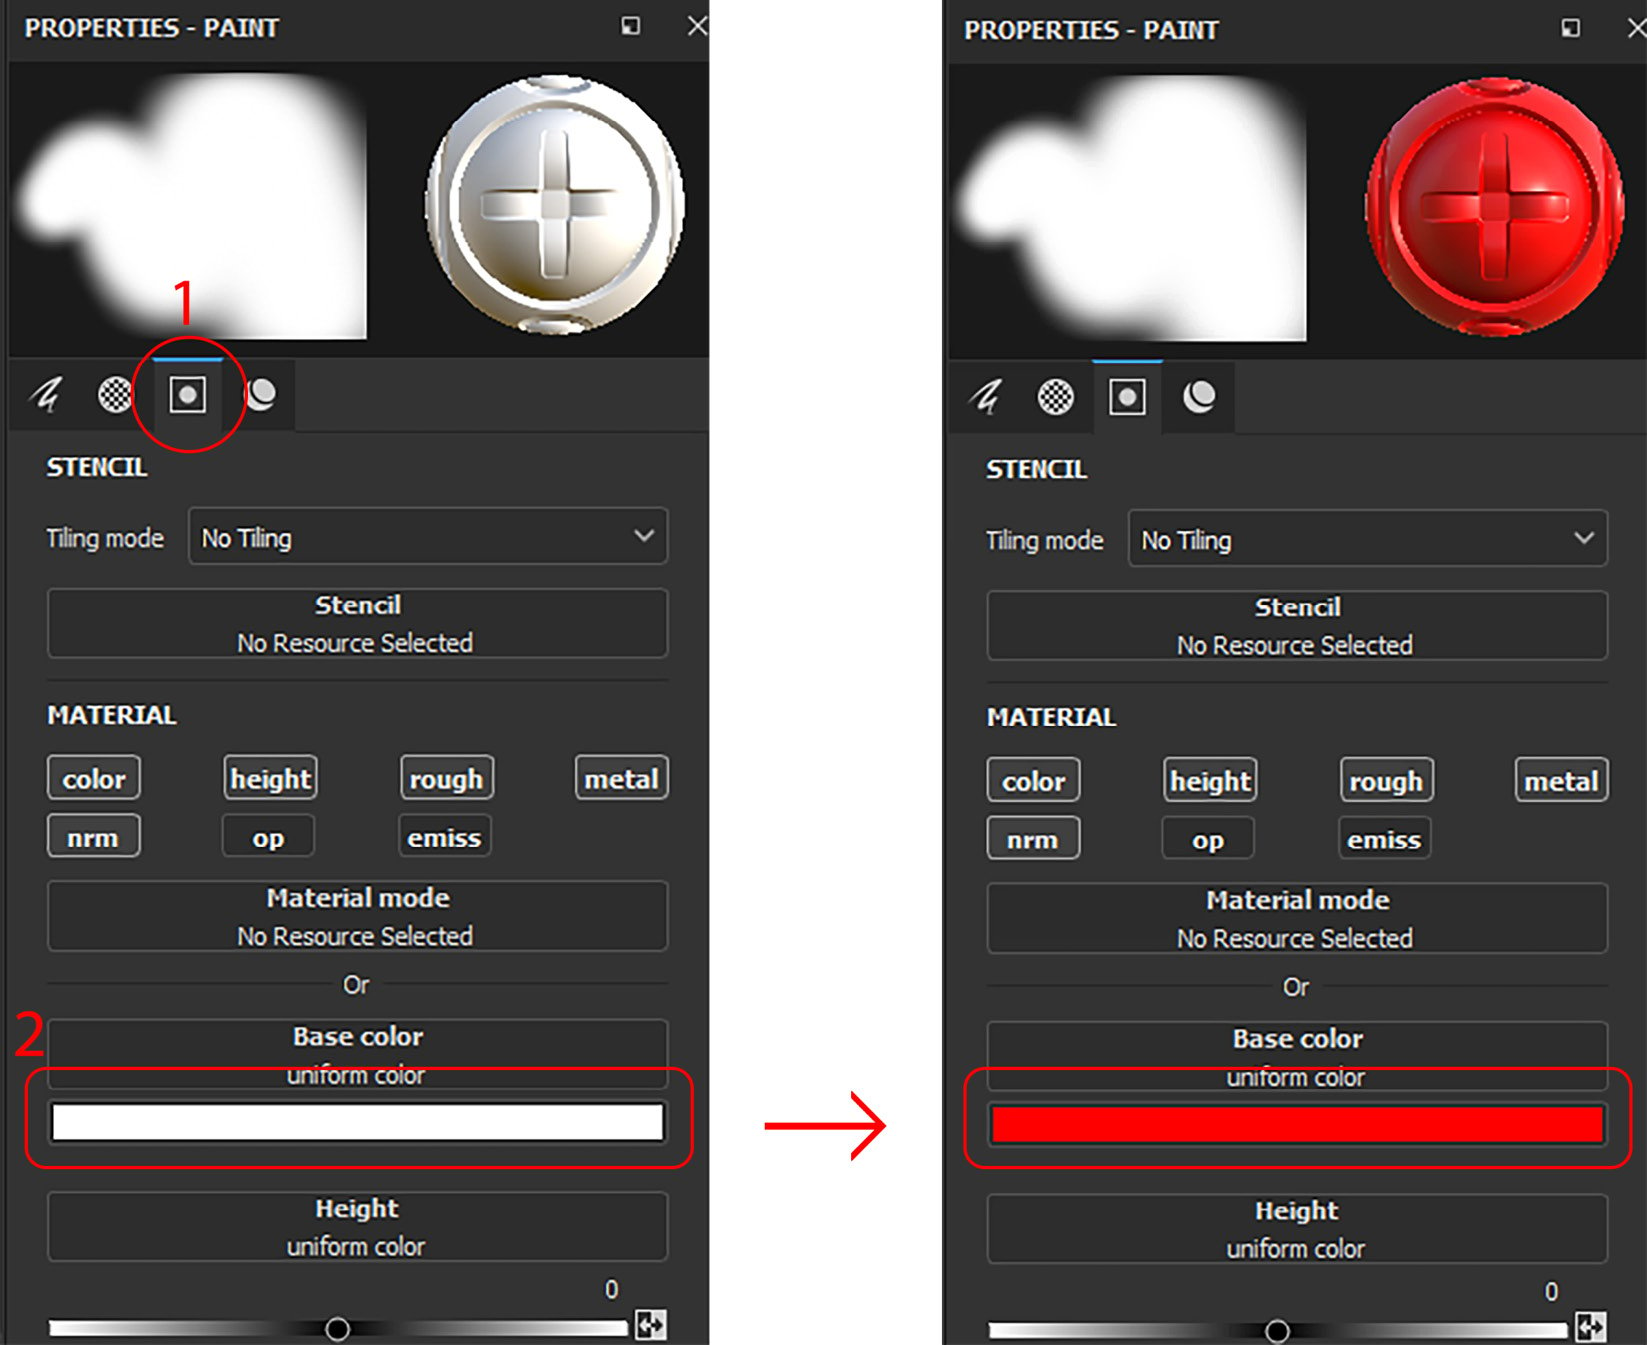
Figure 2.27 – Changing brush base color
Now, if you click with the brush using the left mouse button on the TV screen, you will get a red screw:
Figure 2.28 – Red screw
Suppose you do not want color at all. All you have to do is follow these steps:
- Deselect the color option under the STENCIL tab.
- Now, click on the TV screen using the left mouse button; you will not notice any color on the screw:
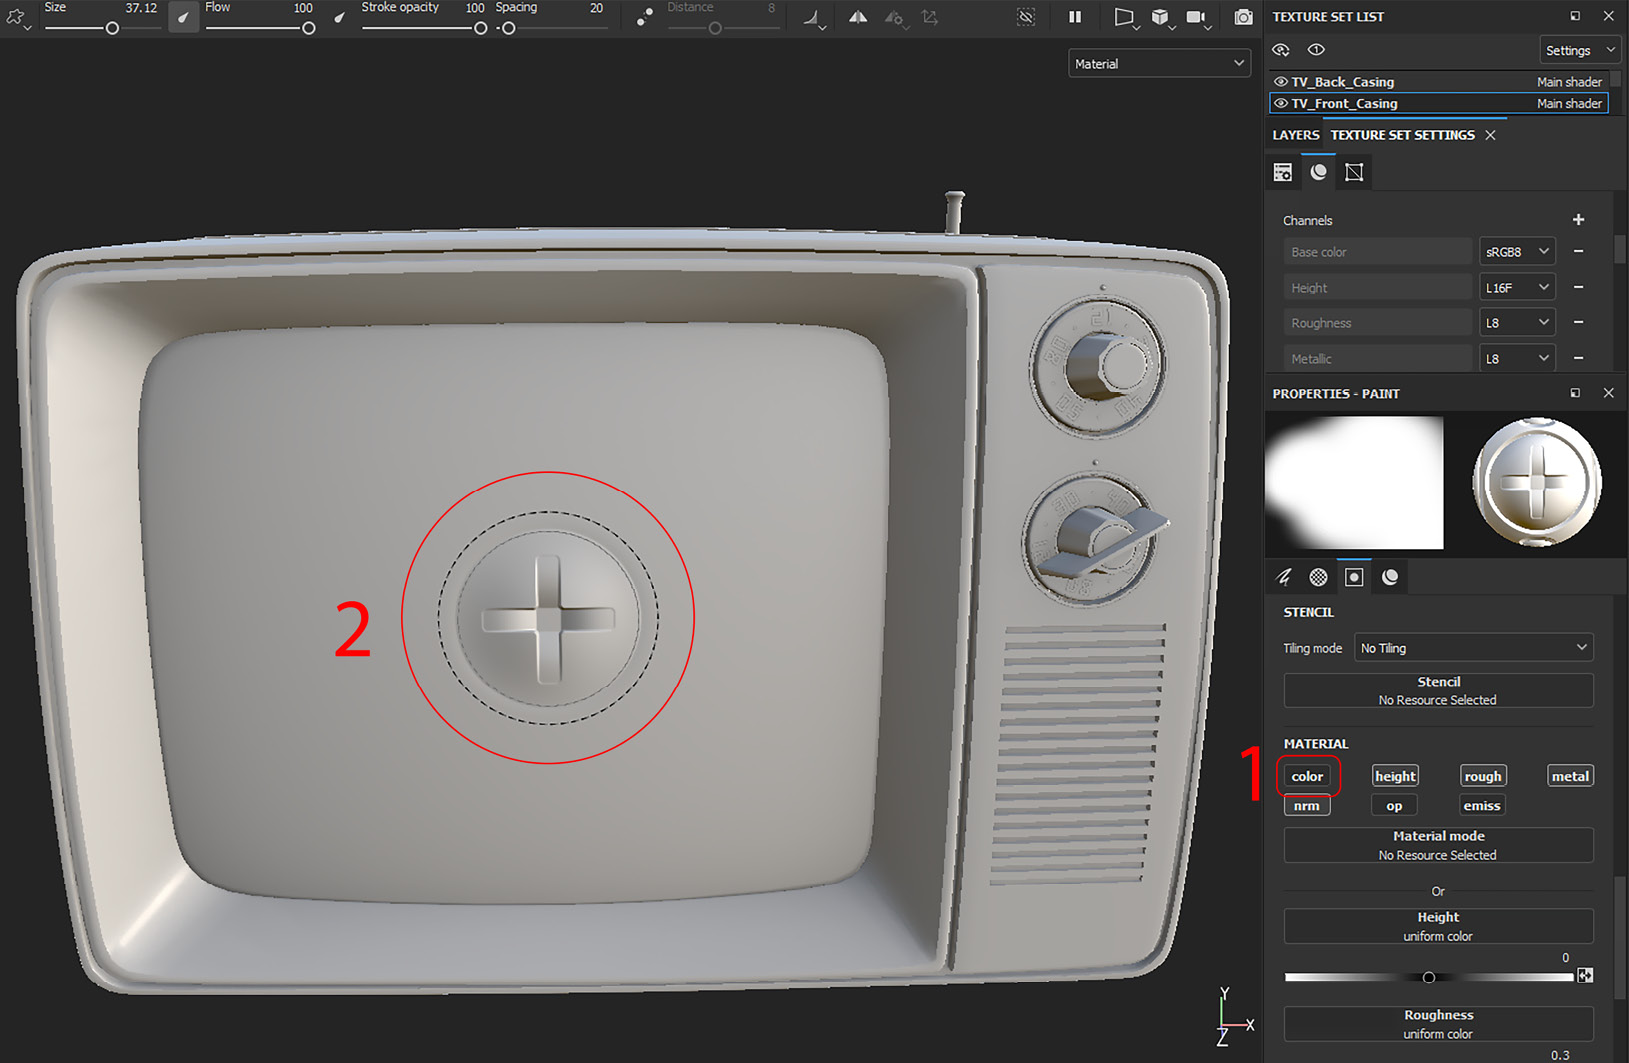
Figure 2.29 – Painting without color
Now let’s create the same Screw Shape brushstroke but with the material. Go to the previously created SILVER tab and drag Silver Pure to Material mode in the Paint properties, as shown in Figure 2.30:
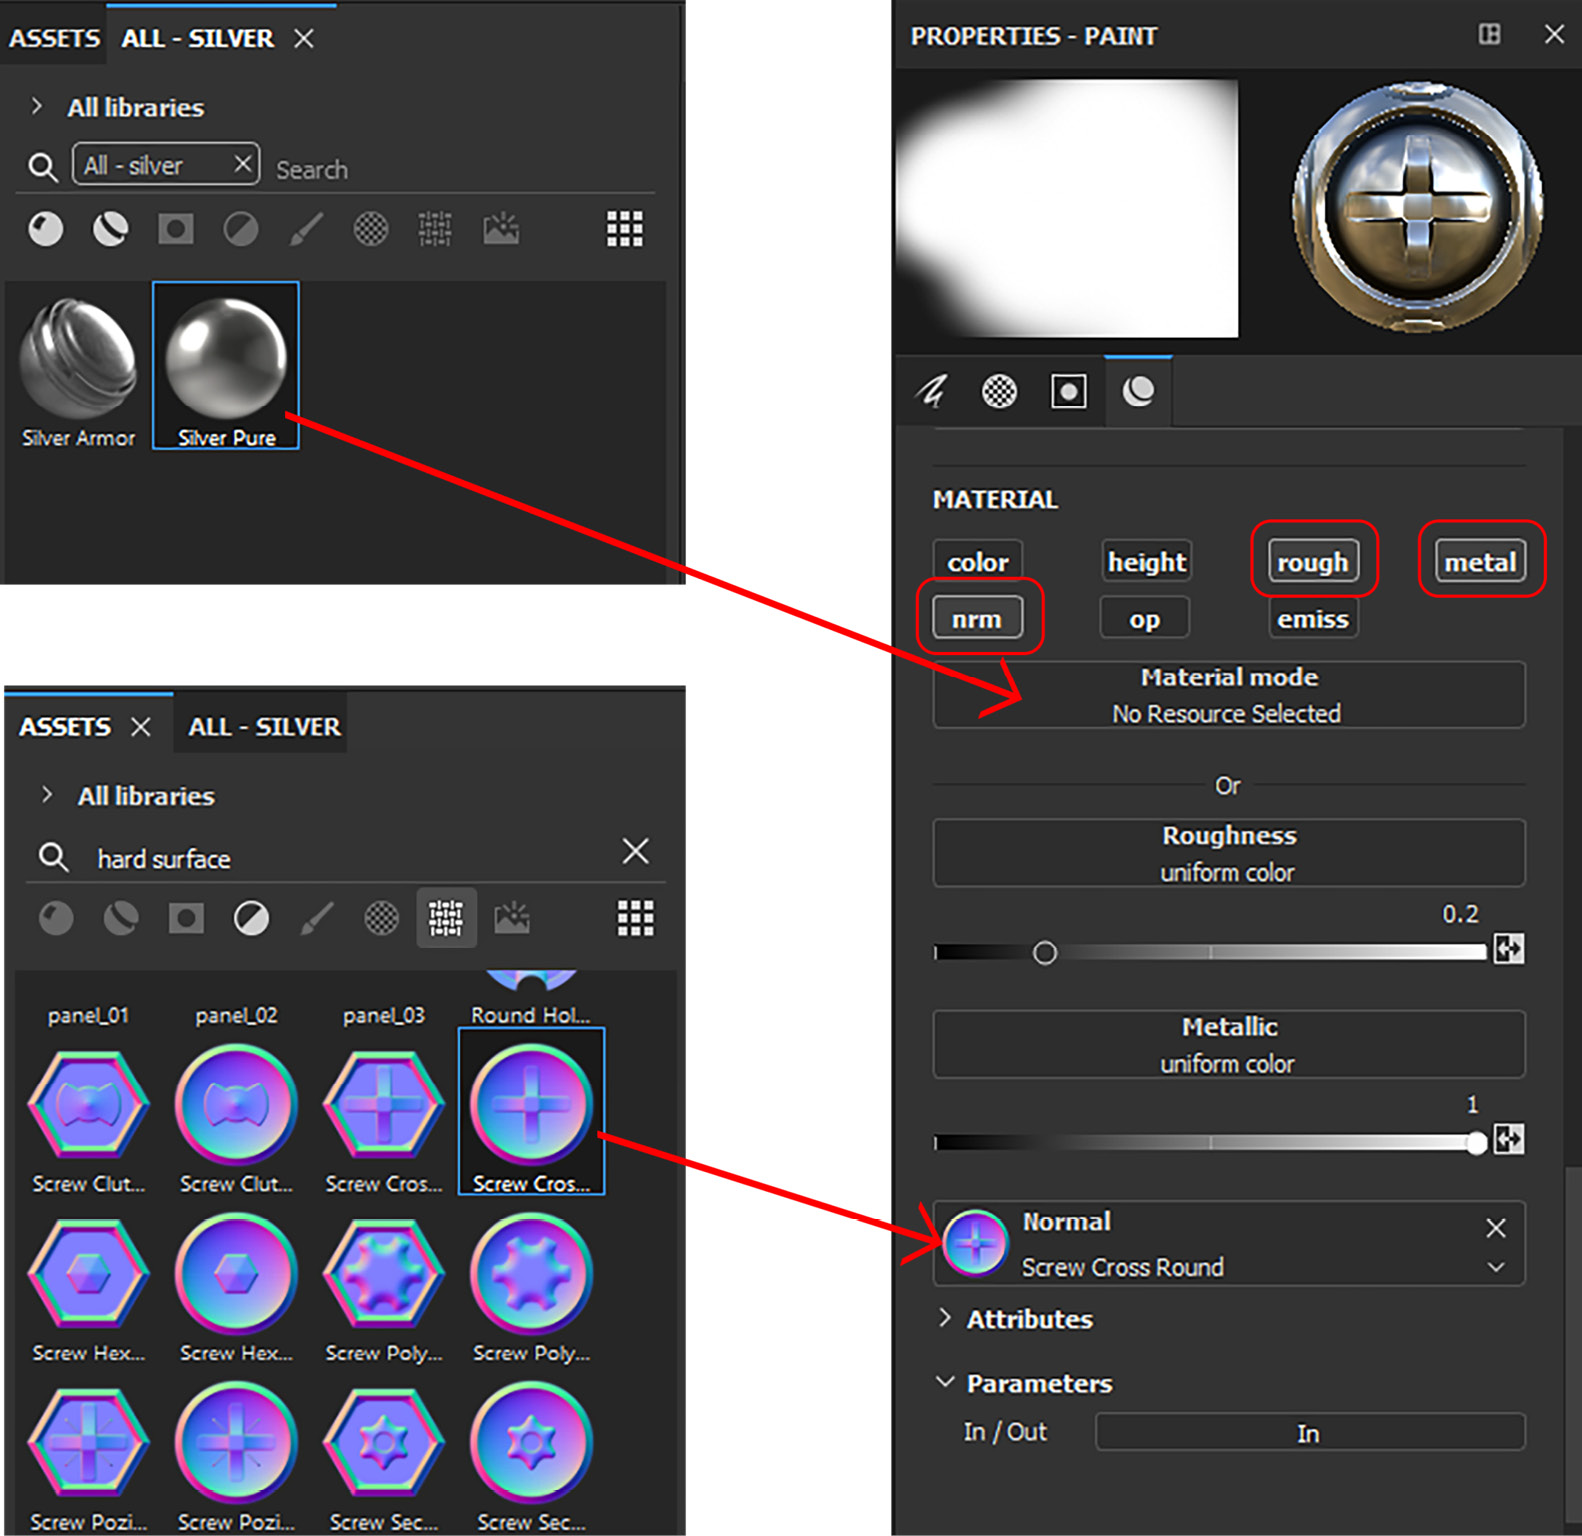
Figure 2.30 – Creating Silver Screw
Make sure your normal (nrm) option is selected under MATERIAL and drag Screw Cross Round across to the Normal map, as shown in Figure 2.30.
Using alpha maps to apply assets
Previously, you might have noticed that the edges of the painted screw were blurred or feathered; this was because the alpha that the brush was using had soft edges. To create a solid screw, go to the ALPHA tab under PROPERTIES - PAINT.
In case you don’t have any solid round alpha inside Adobe Substance 3D Painter, you can use the alpha that we imported. So, go to the Assets panel and choose Project library and then choose Retro. Then, drag any solid round alpha from the Assets panel to the ALPHA section on the right Properties panel and replace it, as shown in Figure 2.31:

Figure 2.31 – Alpha
Now, click on the front screen of the TV with the left mouse button, and you will get a solid silver screw:
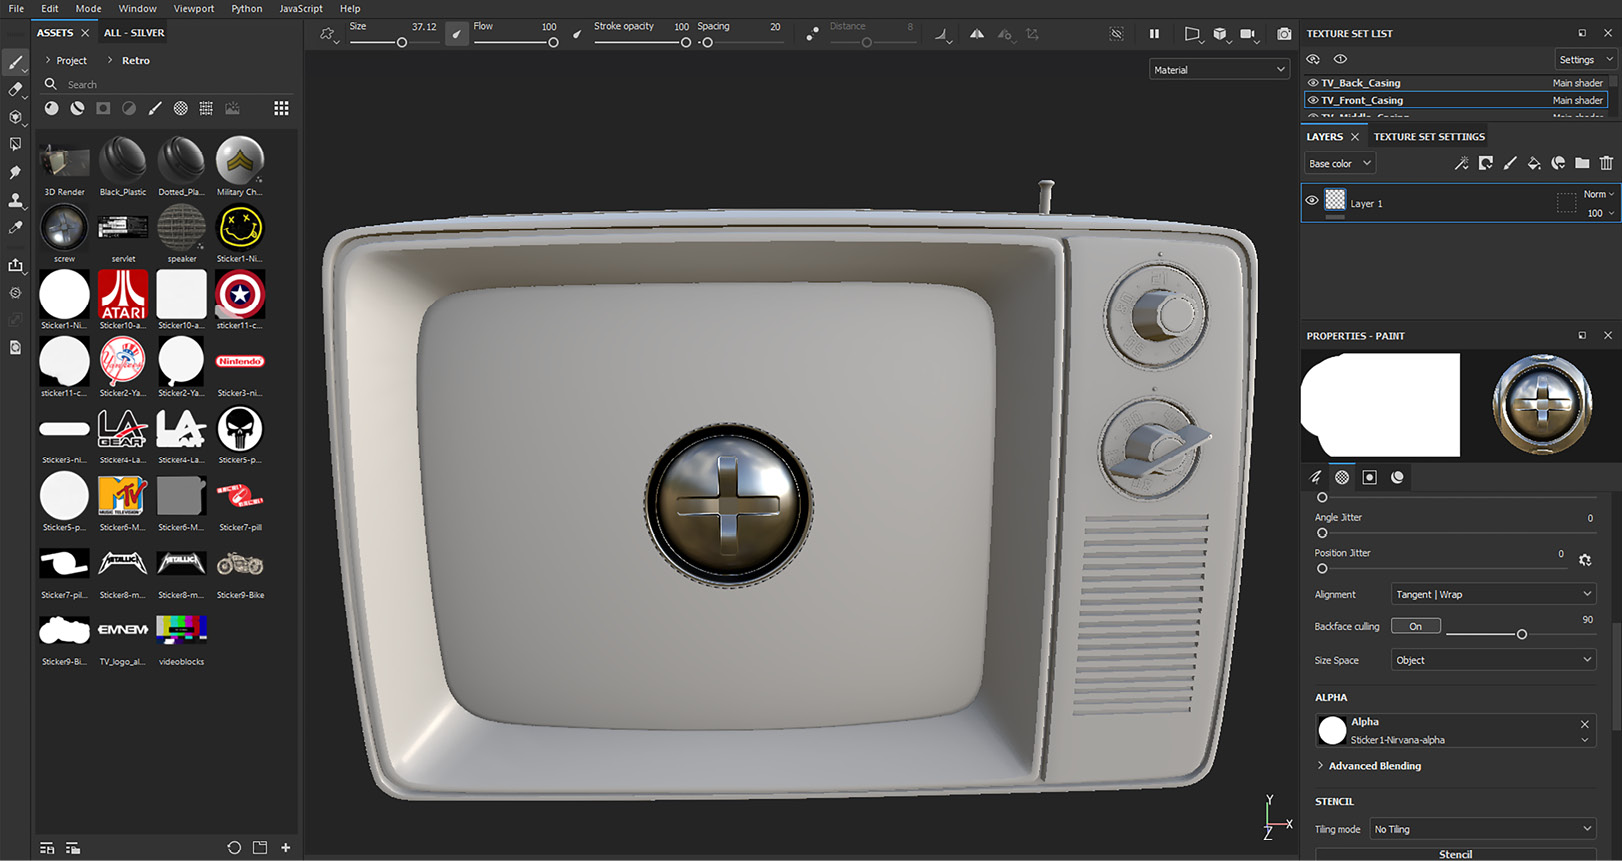
Figure 2.32 – Solid silver screw
Every material, normal map, alpha, and so on, has different parameters. For example, if you go to the Normal map in Attributes, as shown in Figure 2.33, you will find In/Out, which creates normal maps by flipping the tangents:
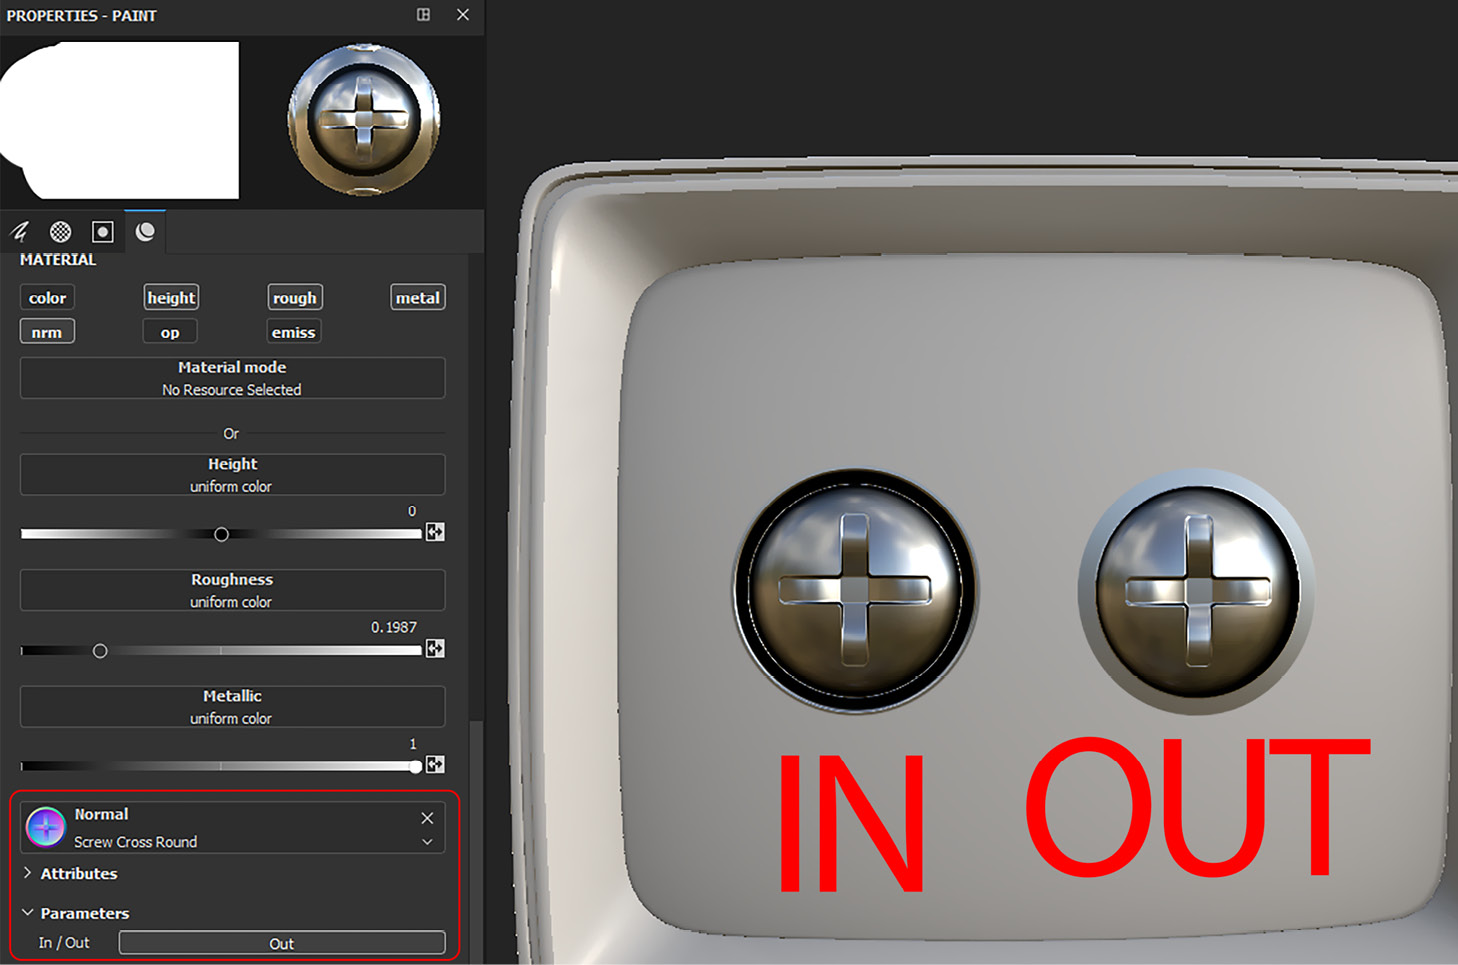
Figure 2.33 – Parameters
Undo the previous screw brush strokes, so we can perform some other experiments.
You can also increase the height of the normal map, but first, make sure the height map option is selected:
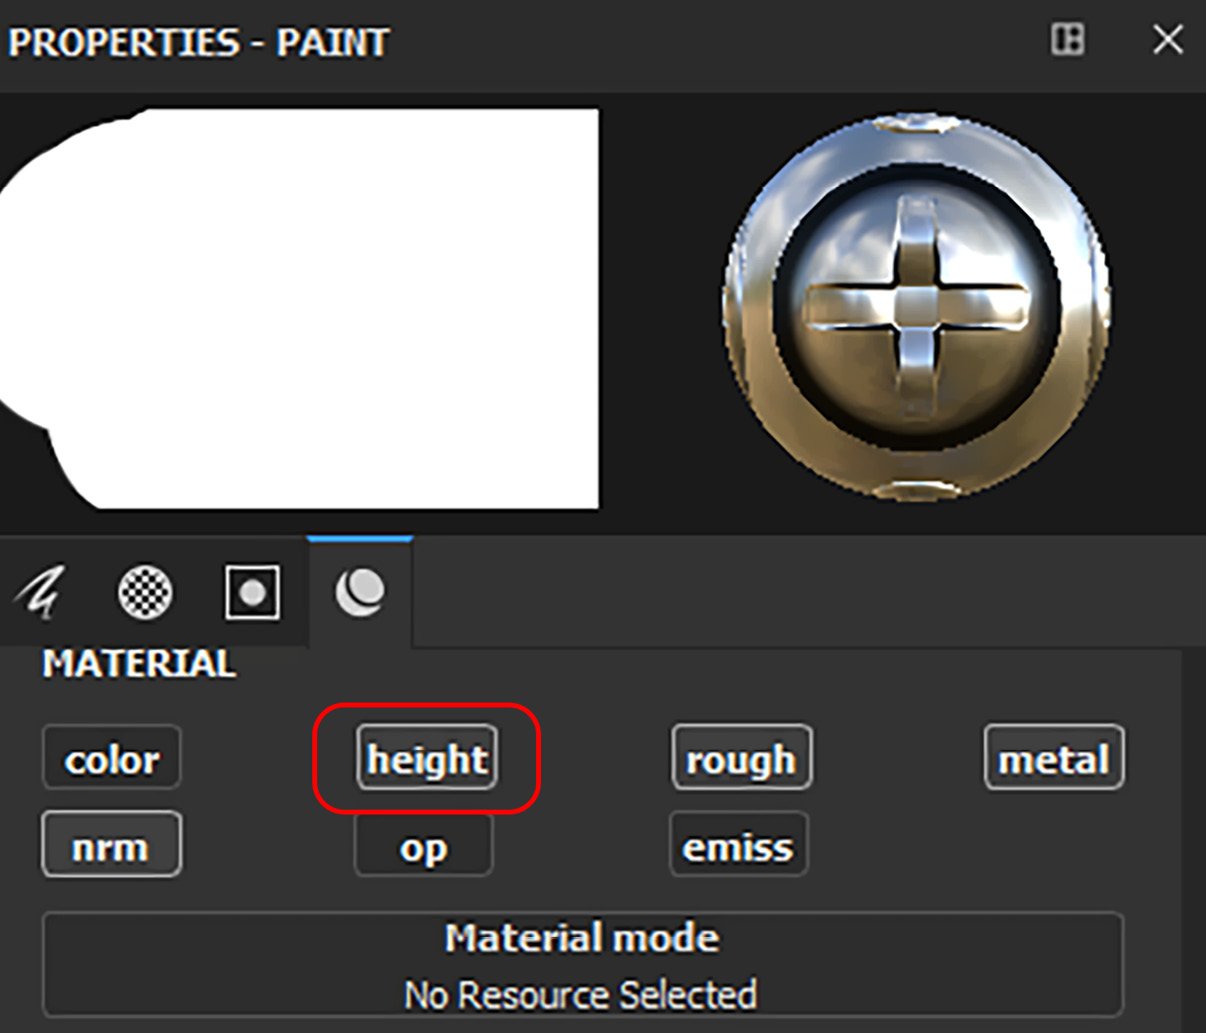
Figure 2.34 – Height map
To increase the height of the normal map, you can move the slider to the white area, and if you want to reduce it, then move the slider to the black area. White means 100% positive height, and black means 100% negative height. You can also invert the height by clicking the invert height map button:

Figure 2.35 – Positive and negative height
Now, click on the TV screen with positive and negative heights and see the results:
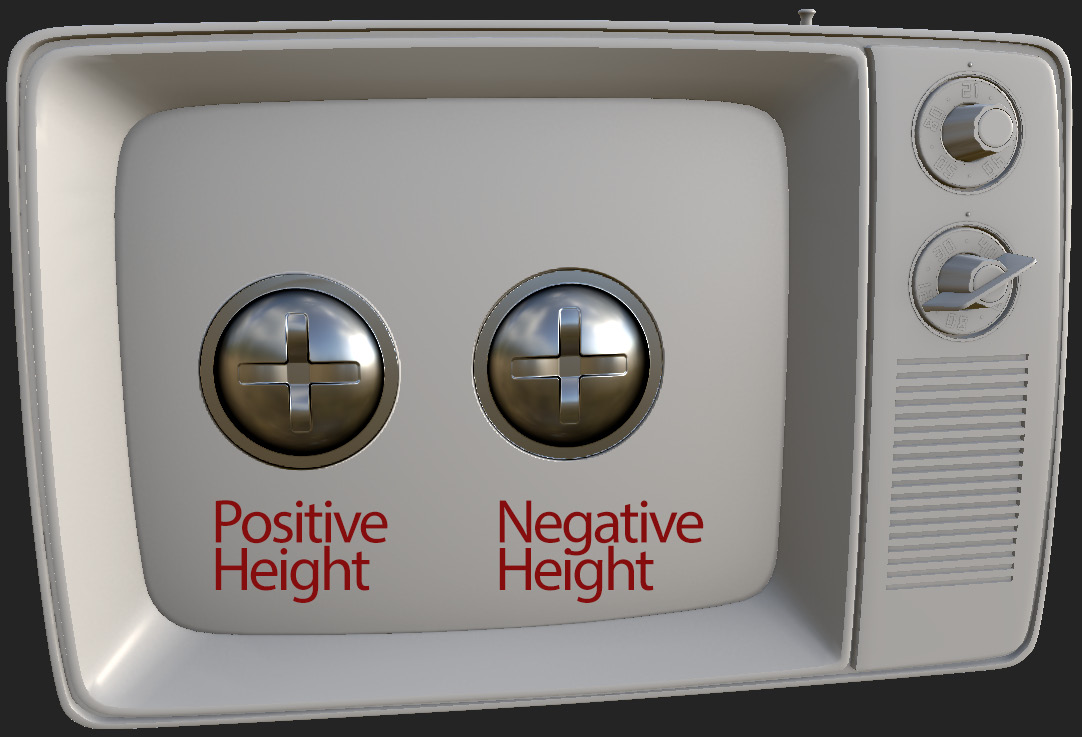
Figure 2.36 – Positive and negative heights
Now, you can undo and remove the screw or use the Eraser option from the left toolbar to erase it. And practice using the brush with different Alpha, Material, Height, Roughness, Metal, Emission, Opacity, and Color combinations.