

Manage Outlook
Do you feel at times that Outlook is managing you? If you answered yes, then it’s time to take back control and start managing your Outlook environment. It is estimated that over 316.5 billion emails will have been sent and received in 2021. With this many emails passing through our inboxes, it is time to take control of your email. By using the techniques used in this book, you will be well on your way to having an organized, efficient time management system.
Let’s start by looking at the Options menu in the File tab. These options allow you to control and customize Outlook for the way you want to work. Once you click on File, you are in the backstage view. Microsoft’s definition of this view is that “it is everything that you do to a file that you don't do in the file.”

Figure 1.1 – Outlook tabs
Info
First, let’s look at the Info tab located on the left side of the screen and represented below the left-facing arrow in the following figure (clicking on the arrow will display the Outlook tabs). Use the drop-down arrow by the Microsoft Exchange box at the top of this screen to specify which account you want the information to appear for, and you can select the account you desire from this list if you have various accounts set up. In this example, my account is a Microsoft Exchange account, which is the name for this account in the following figure. You can have a different name here than Microsoft Exchange if you are not using Exchange. Accounts will be discussed in detail in Chapter 3, Managing Email Accounts.
To set up a new email account that you have already created from Gmail or another account, click on +Add Account, and you will be prompted to add a new email account to the Outlook environment. If you are working in your Microsoft 365 account, you can type in the email address of the email that you would like to track in Outlook, such as your Gmail account.
Because Microsoft Exchange synchronizes email with Outlook, everything will process automatically, and answer the prompts as requested. Once you complete this, you will see a dialog box, indicating that the account was set up successfully. If you have errors or have been given specific instructions for the setup, click on Advanced Options, and you will be able to customize the installation.
You can add up to 10 email accounts in Outlook with this method, and if you need more than 10 accounts, that will be discussed in Chapter 3, Managing Email Accounts.
Once you have completed the installation, your email account will be added to the navigation pane on the left side of the screen. An email will also be sent to this email account, testing the settings for your account.
Settings in Info
The other settings that you see on this Info tab will be discussed throughout this book, and the following table provides a reference for what these buttons are used for and also the chapters that will discuss them in more detail.
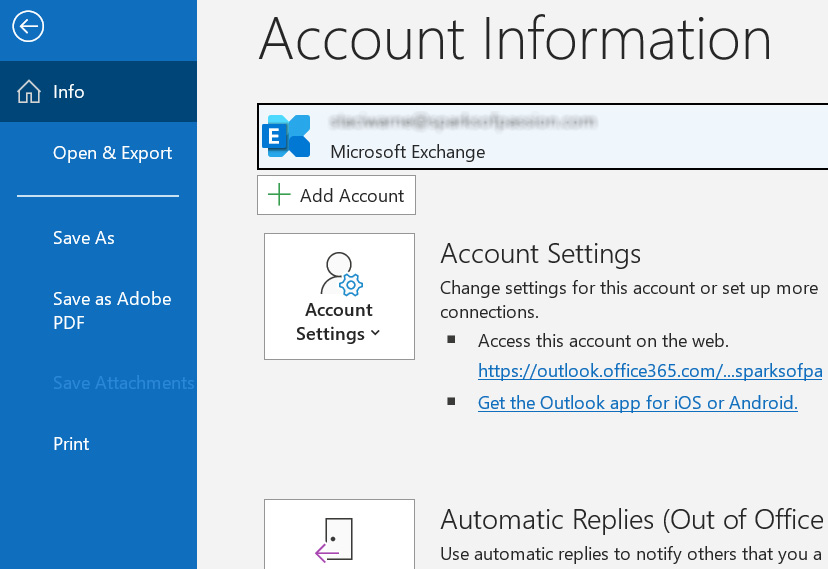
Figure 1.2 – The Info tab
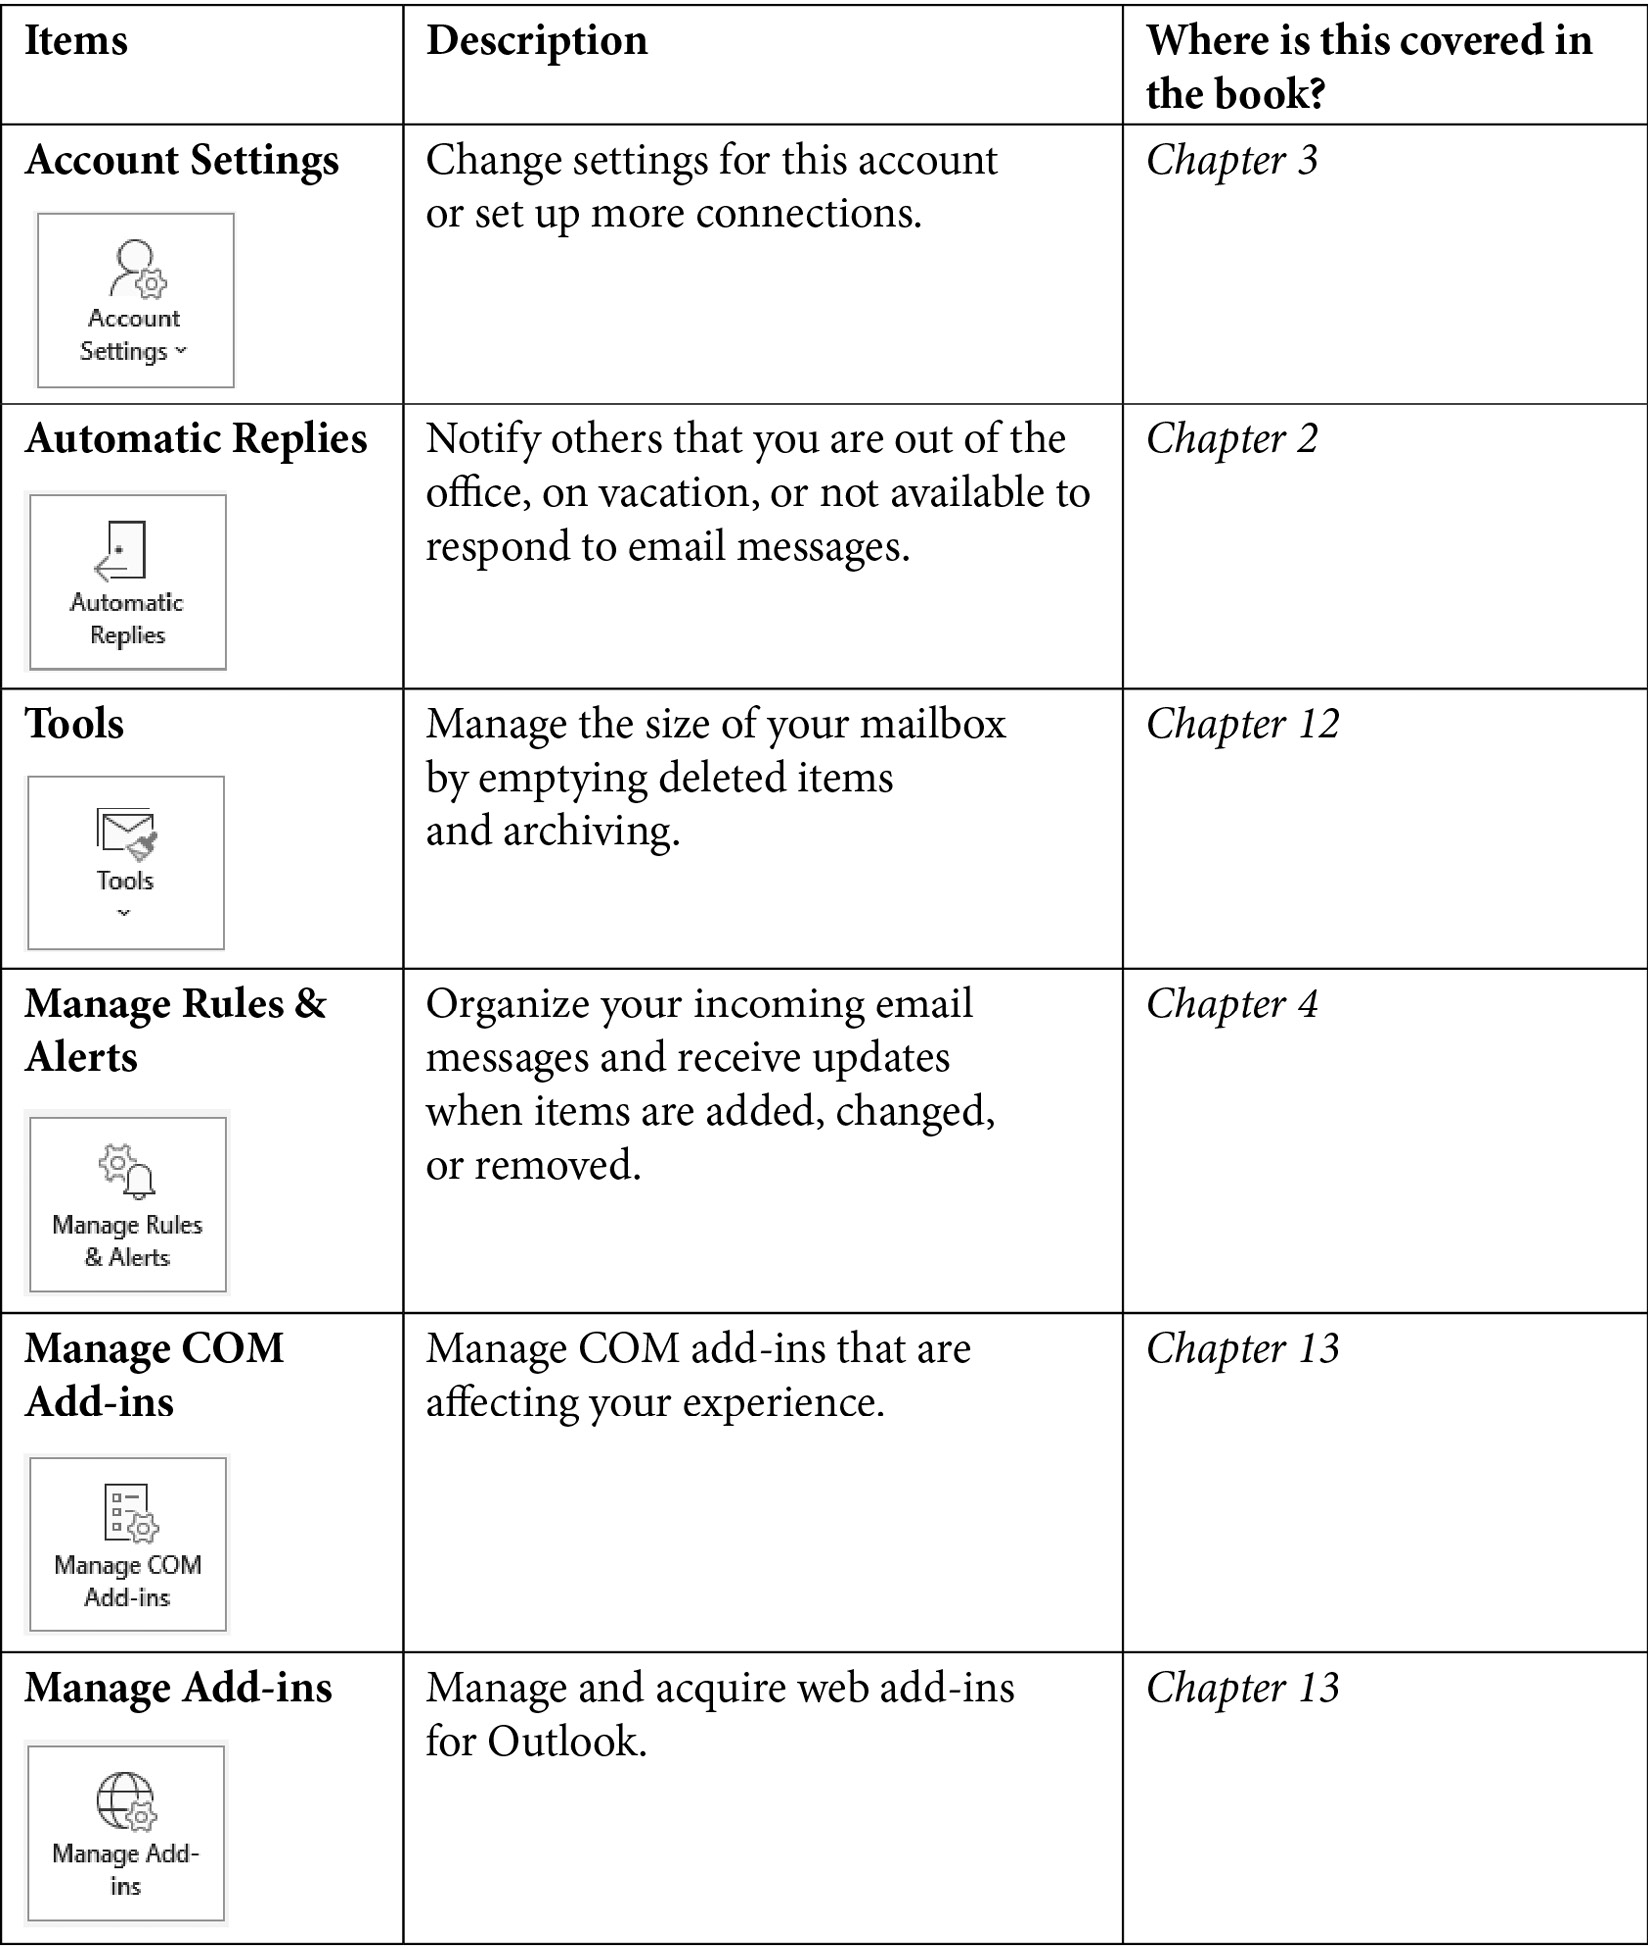
Table 1.1 – Account information on the Info tab
At the bottom of the navigation pane, on the left side of your screen, are a few more menu items that you will find quite important to customizing your experience inside Outlook. Let’s look at the Office Account.
Office Account
Use this Office Account tab to look at information related to your account. You will find this screen self-explanatory, but if you want to set a new office background or theme, this is the screen from which you can access it. On the right side of the screen in the Product Information section, you can identify which version of Outlook is on your computer and what you are in now.
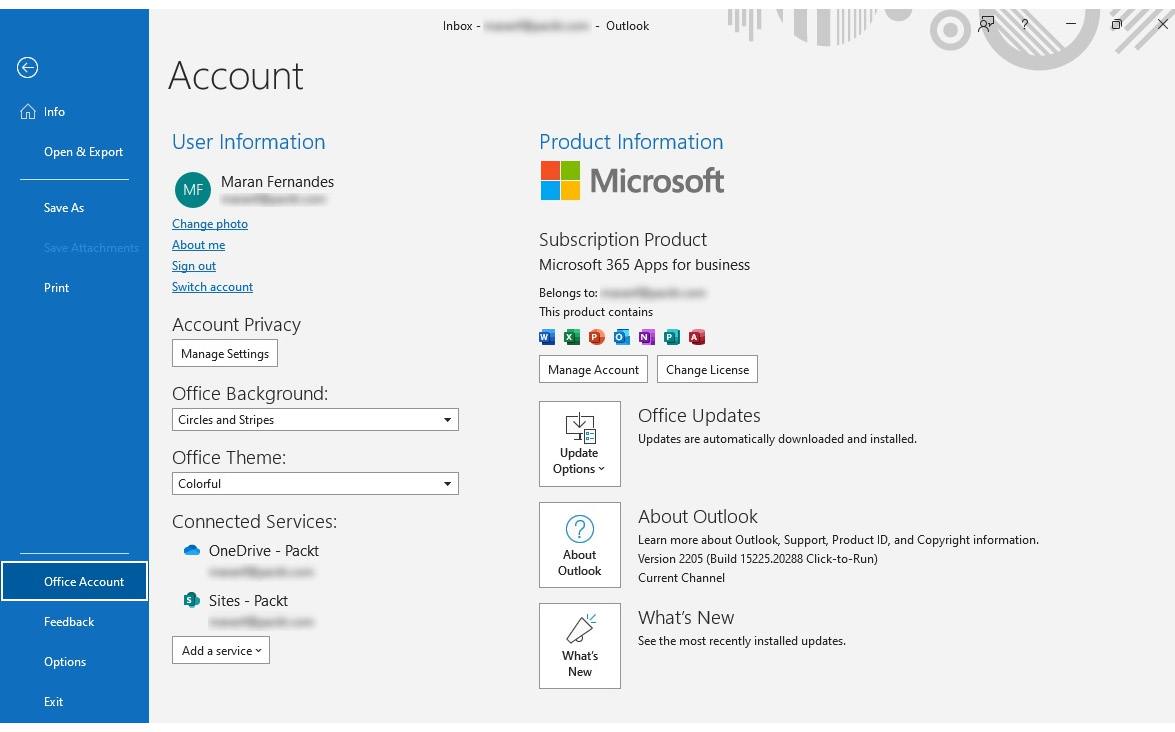
Figure 1.3 – The Office account
Feedback
Microsoft wants to hear from you to help make the application better. You now have an option to give feedback. Use this screen to report what you like and do not like about the application. There is even a button on here to suggest a feature that you would like added to Outlook. This menu is self-explanatory as well, so we will not be covering it in detail in this book.
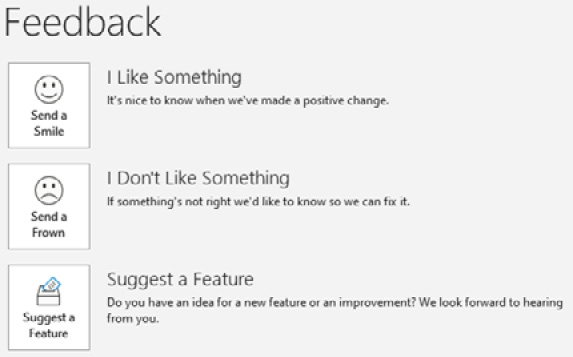
Figure 1.4 – Feedback
Other options
Several options can be set to affect how Outlook settings will behave. All these settings have a default setting (preset settings from the installation of Outlook). For example, you can control a setting to show three different time zones on your calendar so that you know what time it is in another location when setting up a meeting. The default is to only have the time showing for where you are located in the world. Another example is to set up the AutoComplete feature, detailed in Chapter 2, Sending and Receiving Emails, so that when you type a couple of letters, the complete name of your corporation will be typed. These settings can save you a lot of time and, in turn, will make you so much more productive.
To view these options in Outlook, click File | Options.
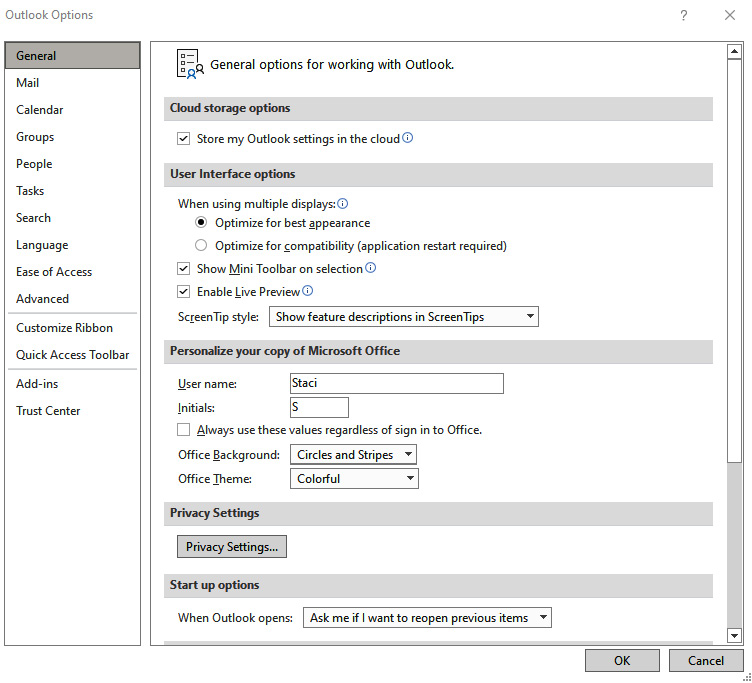
Figure 1.5 – The Options dialog box
There are hundreds of items that you can manipulate in this Outlook Options dialog box, and you have a navigation pane on the left to select a category. The following table lists a few of the recommended adjustments you can make:
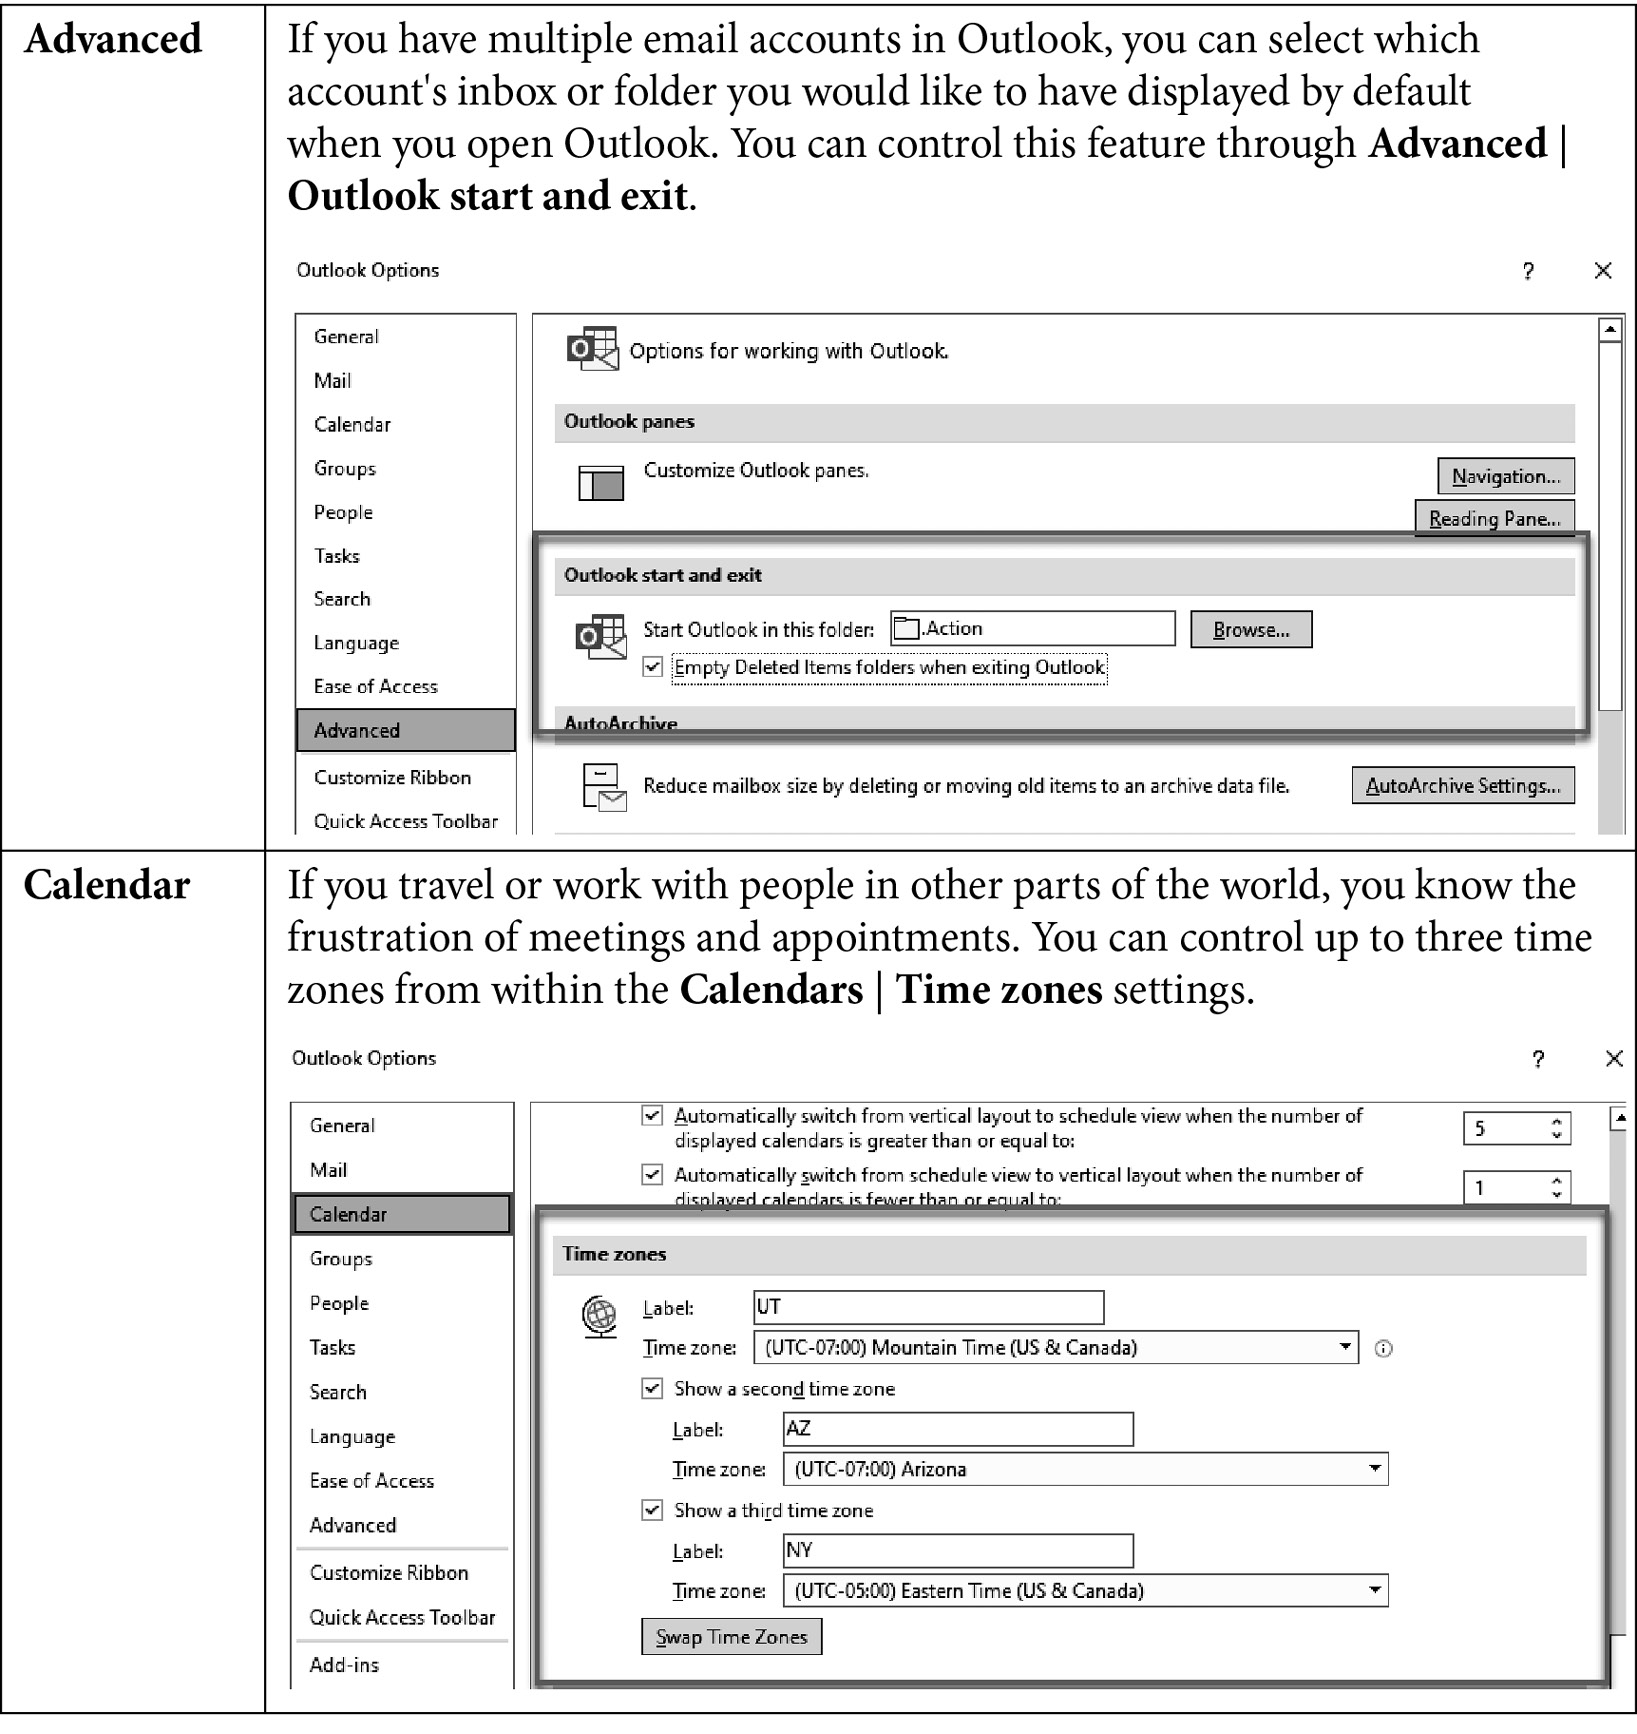

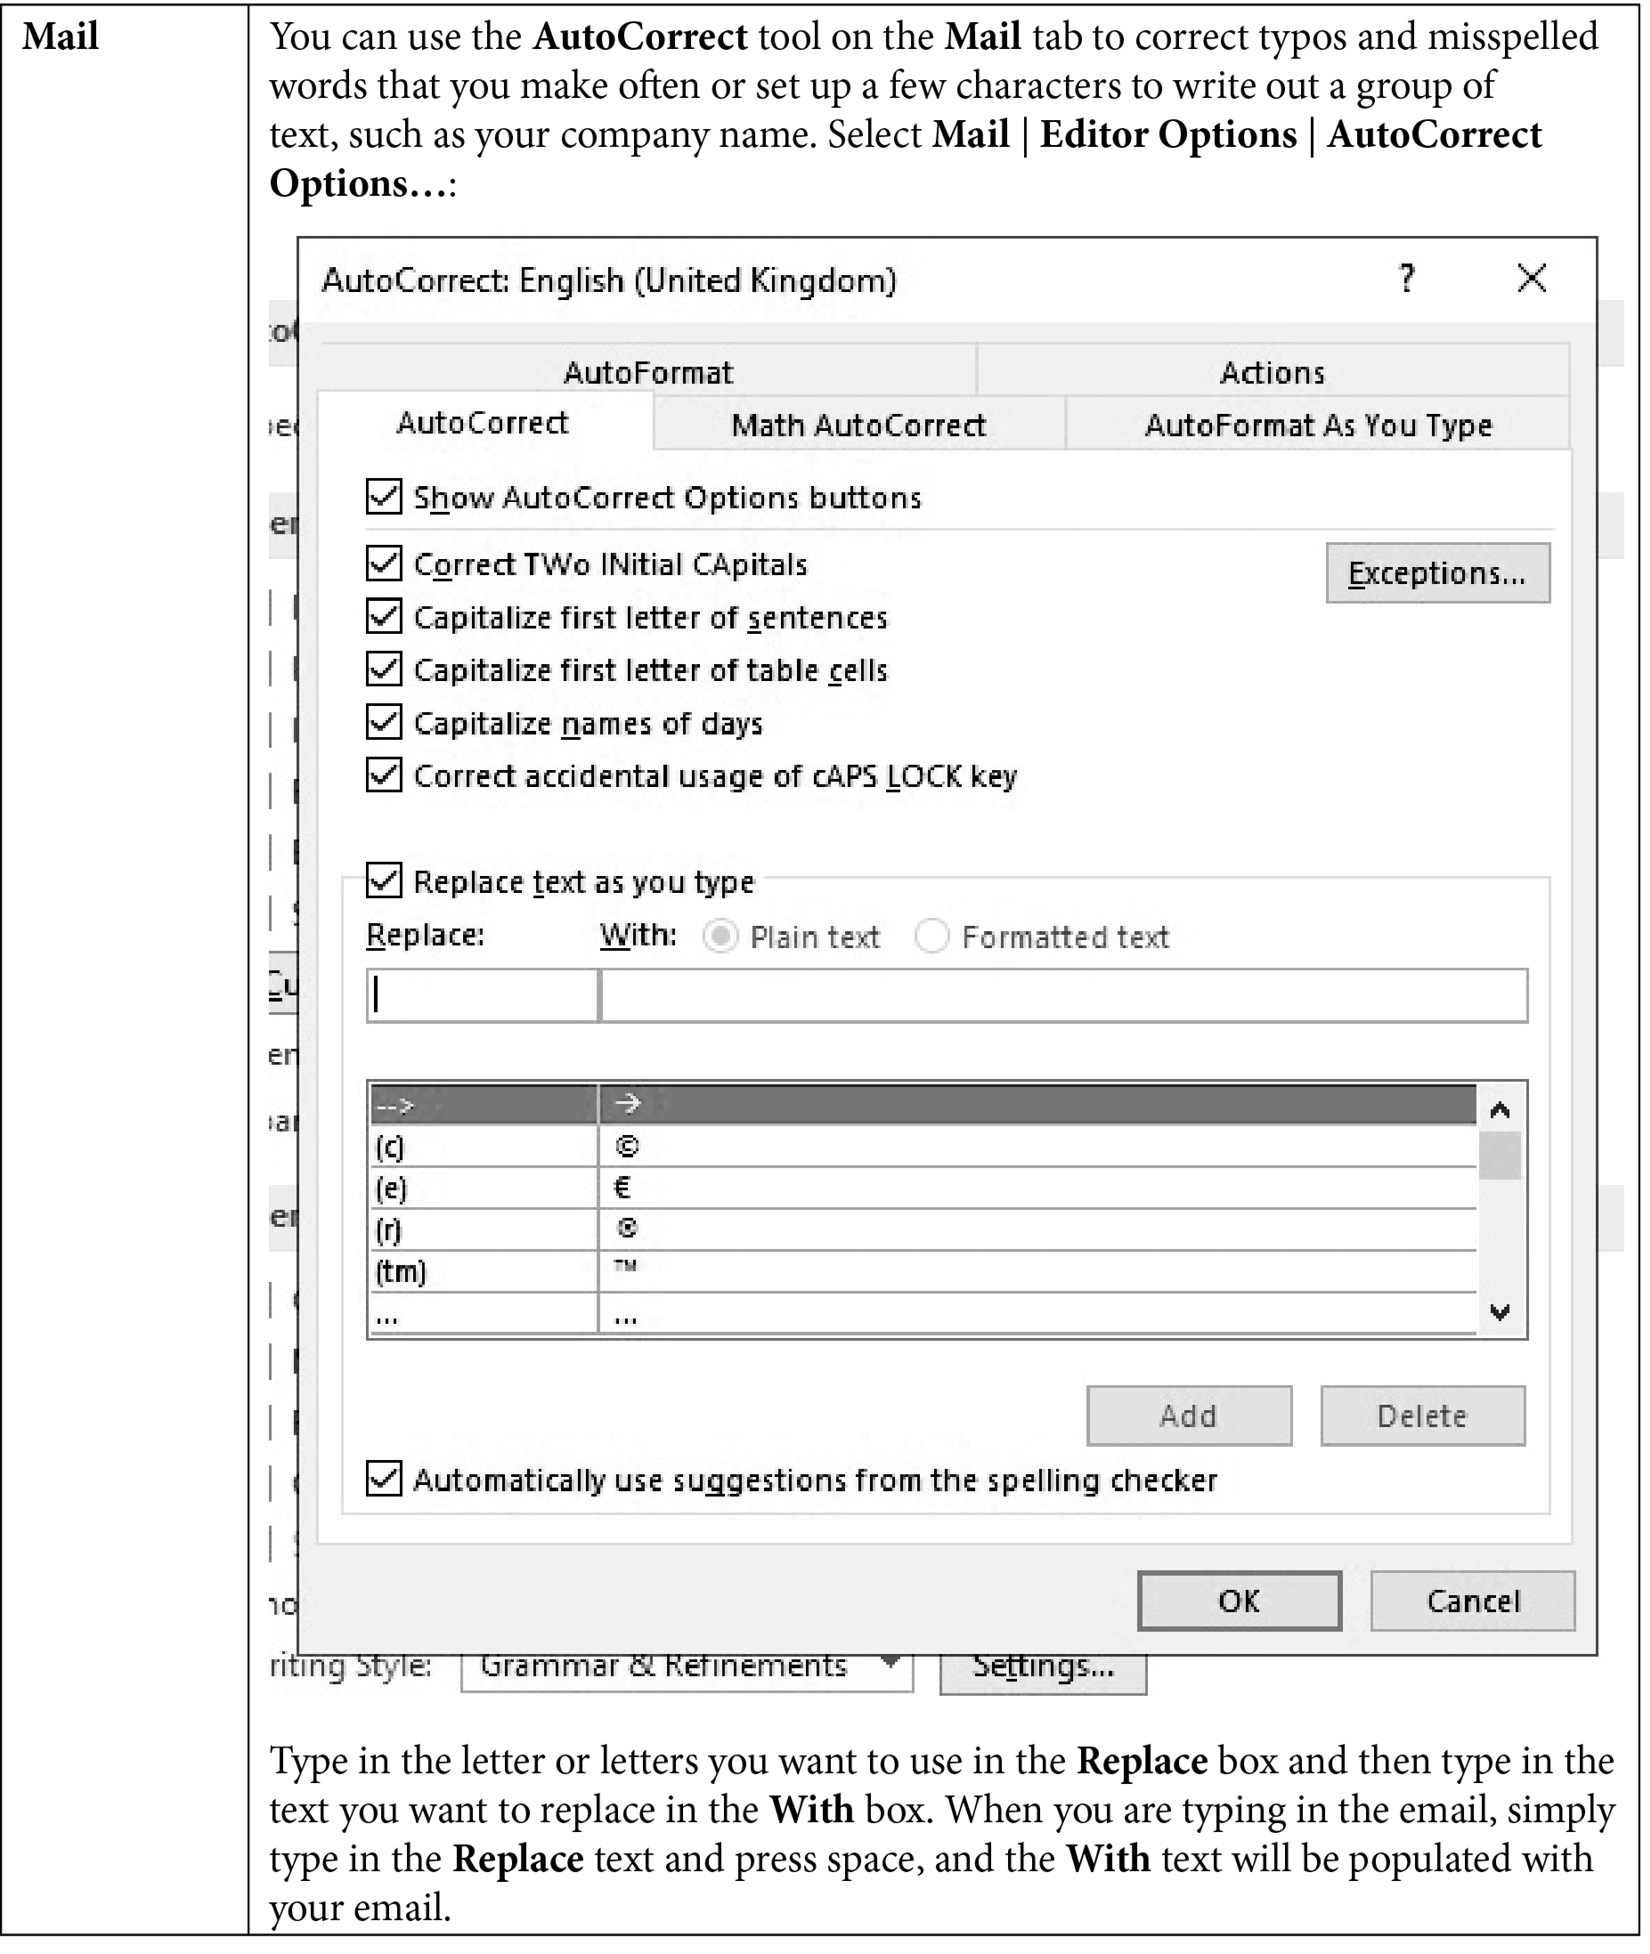
Table 1.2 – The Outlook options available
This is a very small list, and you are encouraged to spend some time looking over all the possibilities you can adjust. These options are categorized by Mail, Calendar, Groups, People, Tasks, Search, Language, Ease of Access, and Advanced. We will continue to discuss several of these options throughout this book, but we will not cover them all. When you find yourself having troubles or wish you could change the feel or effects inside of Outlook, you will usually find a solution to your troubles in this Options dialog box.