

Creating new shapes with Edit Points
There are many default shapes available in PowerPoint, but it does not mean they will always fit your needs. This is when the Edit Points tool can come to your rescue! Even though it has been available for over 20 years, many users are still unaware it exists. There are two ways of accessing Edit Points:
- The first way to access Edit Points is to select a shape (1), click on the Shape Format tab, and go to Edit Shape | Edit Points (Figure 6.18):
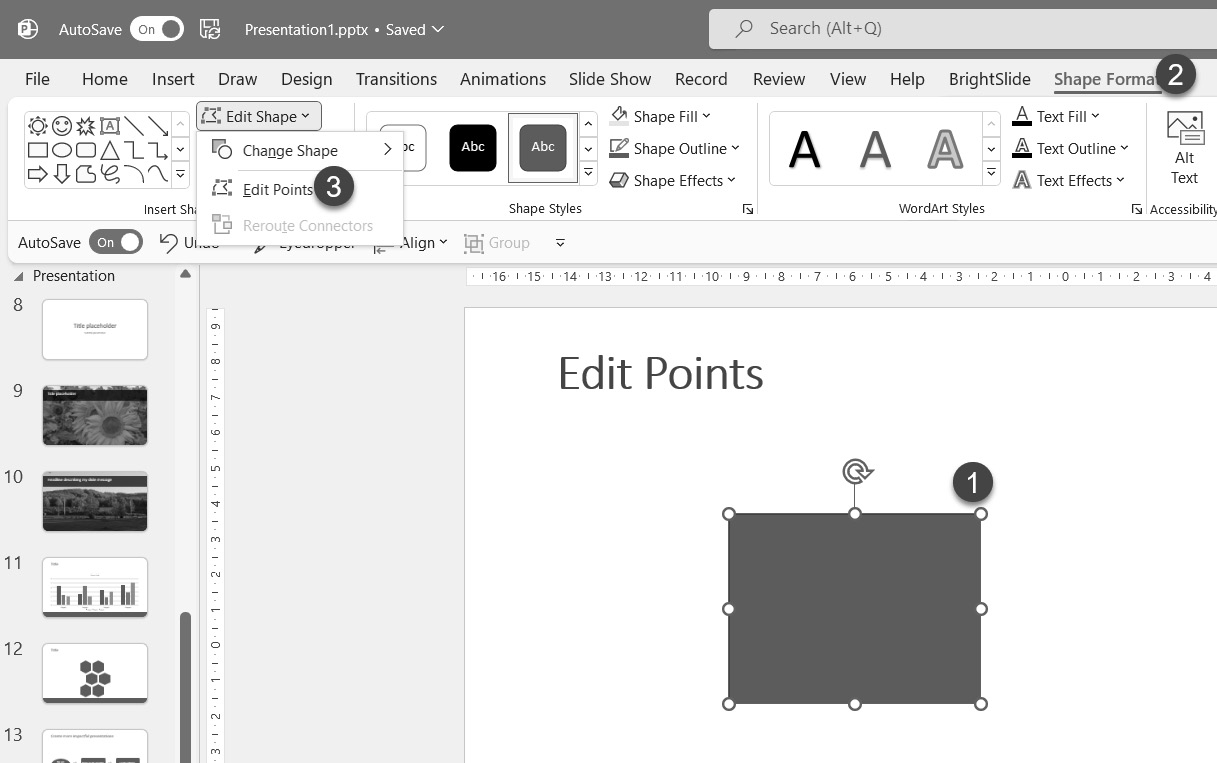
Figure 6.18 – Accessing Edit Points through the Shape Format tab
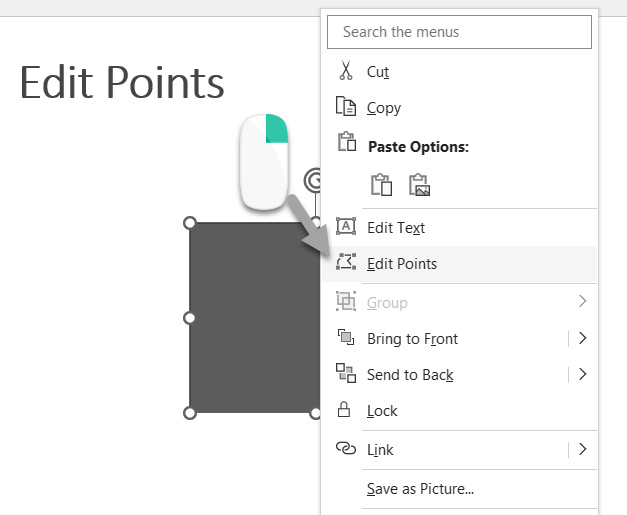
Figure 6.19 – Accessing Edit Points with a right-click on the shape
Whichever method you choose, your shape will now show black dots where two line segments meet or where a curve ends, depending on the shape you have on your slide. Those dots are called vertexes...