

Leveraging the Morph transition
When Microsoft introduced the Morph transition, it was an amazing game-changer for presentation creators! It was finally possible to create real movement during a transition to another slide without having to spend hours tweaking animation effects or using automatic transitions. In short, Morph allows you to smoothly move objects from one slide to the other.
Let’s see the steps to help you create your first Morph transition with the help of Figure 8.4:
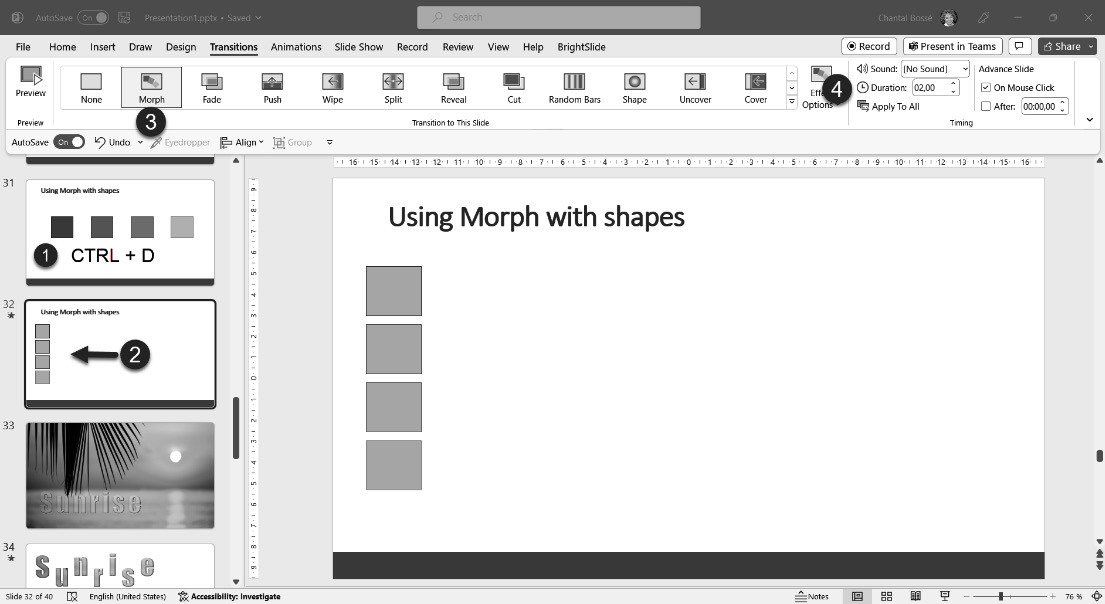
Figure 8.4 – Creating a movement effect with the Morph transition
- Create a slide similar to slide 31 in the previous example, using four squares of different colors. Then duplicate the slide – using Ctrl + D (1) on your keyboard. This step is essential to make the transition work because PowerPoint needs to have the same object names to calculate where the shapes start and where they finish. You can also copy and paste objects from one slide to...