
The following steps will help you to select and browse through objects:
If not already done, open the
Forest.crysample map in the CryENGINE 3 Free SDK.Enable or Disable object helpers using the shortcut Shift + Space bar or use the toggle in the viewport shown in the following screenshot:

You can now simply point and click on objects to select them, or if you'd like to be more accurate, you can hold the Space bar to get a small box selection helper around the object's pivot.
Select an object.

You should now see your gizmo attached to the object's pivot point also known as origin. The gizmo represents the three dimensions of space used within the world otherwise known as axis. Most game engines use Cartesian coordinates which consist of three axes X, Y, and Z.
X is red and represents left and right in the CryENGINE
Y is green and represents front and back
Z is blue and it represents up and down
Click-and-drag on any of the axes to move the object along that axis.
Change the direction in which you are able to move the object using the constrain to axis tools in the main toolbar. There are six settings; the first three correspond to each axis, and the fourth XY will lock the object so it will not move up or down. The final two are the snap to terrain and snap to terrain and objects.
Experiment by changing these values. To finalize the placement of the object you selected, it will likely be easiest to use snap to terrain highlighted in the following screenshot:

An extremely powerful yet underused snapping ability is the shortcut Ctrl + Shift + click. This will snap the object to the first physical surface under the mouse cursor.
Try this by holding Ctrl + Shift, and then click in the Viewport where you would like to snap the object.
Notice that when you selected the object, particular properties appeared in the RollupBar. The RollupBar is where entity parameters, settings, and controls are listed and accessed. These parameters will depend on the type of objects you have selected, but it should be known that this is the primary way to adjust any aspect of entities within the Sandbox.
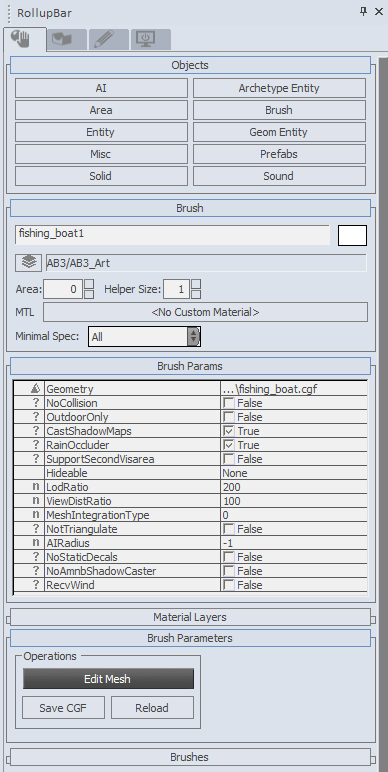
The top of the RollupBar is split into four very different panels, which are accessed from their corresponding tabs. They are as follows:
The first tab contains the object and entity creation tools for the editor, as well as being the tab that will display all entity-specific information and dialogs.
The second tab is the overall environmental, vegetation, and terrain editing tools. It should be noted that these tools are usually used to modify the specific level you have loaded in Sandbox.
The third tab contains the display options.
The fourth and final tab is the layer organizational tool tab.
Finalize the placement of your object and experiment by selecting and moving different entities within the sample level.
You have just learned, arguably, the most important ability within Sandbox and that is the ability to move and shape the levels and worlds.
One of the greatest strengths that this gives us now is the ability to iterate quickly and with a full preview of what the placement will look like in the game, including full physics and gameplay using the switch to game function.