

Investigating annotations in Godot 4
In this recipe, we will first look at @export and some of the variations associated with that annotation and then show how to use @onready.
Getting ready
For this recipe, open Godot 4 and start a new project called Chapter 2.
How to do it…
To investigate annotations, we will use each in a script by doing the following:
- Open a new project in Godot.
- In the Scene tab, click 2D Scene.
- Click on the paper icon above Node2D and to the right of the filter Search box or in the Inspector tab under Node | Script. Click <empty>, then select New Script, and name the script
Annotations. - Click on Script at the top of the editor to look at the new script we added.
@exportis the same asexportin Godot 3.x, so we will add a score to the node so we can see it in the Inspector tab:1 extends Node2D 2 3 @export var score = 0
- As you saw from the auto-completion, there are new
@exportoptions available now. Let’s add@export_range()to line 4:4 @export_range(0, 100, .1) var input_range
Note
This gives a range from 0 to 100 in increments of .1 to the input_range variable, which you can change in the Inspector tab.
- We can show named
enumvalues in the Inspector tab by adding the following to lines 5 and 6:5 enum WeatherEnum {Sunny, Rainy, Cloudy = -1} 6 @export var weather: WeatherEnum - On line 7, let’s add a file to show up on the Inspector tab using
@export_file:7 @export_file("*.txt") var file - Click on Node2D in the Scene tab. Then, click on + under Scene in the Scene tab to bring up the Create New Node window.
- Then, type
camer2din the Search box. Select and add Camera2D to Node2D. - The
onreadykeyword is now@onready. We will add a Camera2D node and use@onreadywith the camera on line 7:8 @onready var camera = $Camera2d
- Click on Node2D at the top of the tree in the Scene tab to see everything we used with
@exportin the Inspector tab.
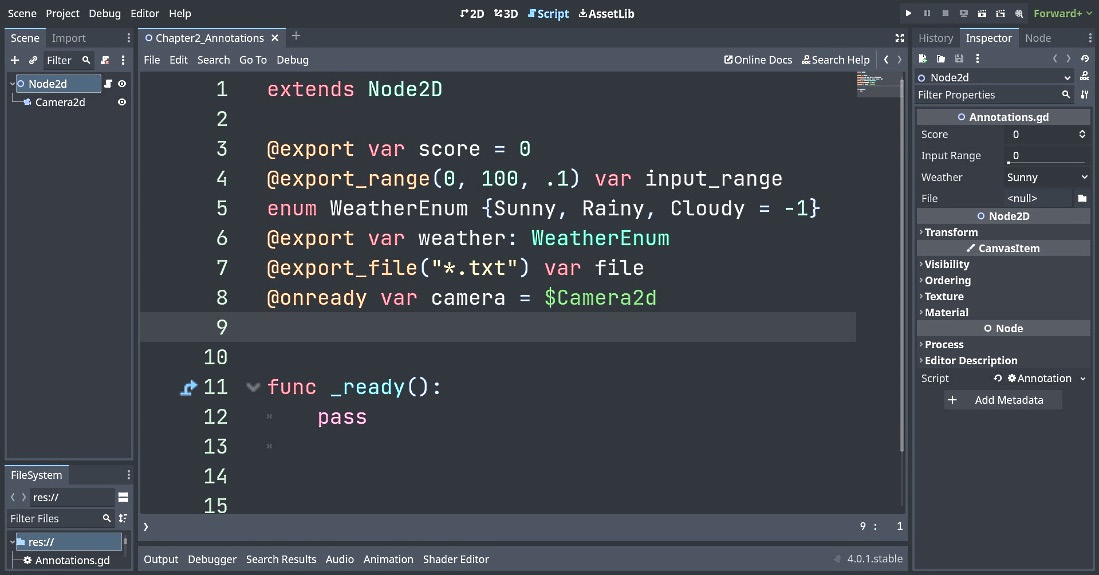
Figure 2.1 – Annotations.gd
How it works…
We added a score variable so we can could see it in the Inspector tab using @export instead of the export keyword.
We added @export_range(0, 100, .1) var input_range to show a range of 0 to 100 that snapped the value in .10 increments. You could also just use @export_range (0, 100) var input_range or @export_range (0, 100) var input_range: float.
We created an enum and then we used @export var weather: WeatherEnum to put the enum into the weather variable so we could see it in the Inspector tab. You could also do @export_enum(Sunny, Rainy, Cloudy) var weather.
We used the @export_file("*.txt") var file to show how a file is seen in the Inspector tab.
We added a Camera2D node to Node2D so we could use @onready with it. First, we just used @onready var camera = $Camera2d to add the Camera2D node to the camera variable.