
modo's interface is divided into different workspaces, each one contained in a tab. You can see the tabs displayed at the top of the interface. Each of the tabs refers to different kinds of things you can do with modo in a themed interface. For example, in the Animate tab, you will find all the tools and panels you will need for animating things. The same goes for every other tab, so depending on what phase of the production you are at, you will by using at least one of these tabs. Let's take a look at the two basic tabs we will be using through out this book: Model and Render. As this book is for beginners, we will only be dealing with the Model and Render tabs in future chapters. The rest of the tabs cover more advanced tasks such as UV mapping, character rigging, and texture painting.

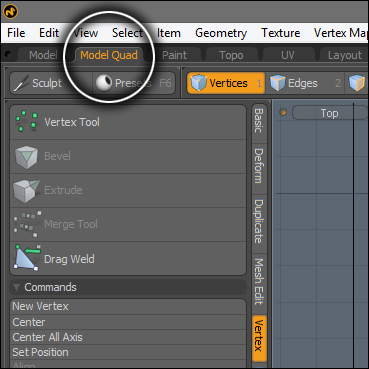
Under this tab, you will find all the tools available for the modeling phase. In fact, there are two tabs for modeling: Model and Model Quad. We're going to use the Model Quad tab just because it gives us more information (and we can still maximize the visor to make it look like the regular Model tab). Notice the only difference between the two is the visor workspace, where there is only one big visor in the Model tab and a standard quad visor in the Model Quad tab.
This layout is divided into three main spaces:
Tools panel: Here you can choose all the different tools to generate geometry, modify it, and so on. It is also divided into tabs (vertical tabs in this case). Don't be impressed by this "tabs-into-tabs" thing. You will notice later that this is a very practical approach to help your workflow.
Visors quad: This is self-explanatory. This is the main workspace with four customizable visors. This is where you will be doing things most of the time.
Properties panel: This is divided into tabs as the Tools panel is, but this one gives you information about organizing the scene. Depending on what tab you are using, you will be controlling the different layers of the scene or the materials, lights, settings, and so on.
Under the Render tab, you will see a slightly different layout aimed to work better in the rendering phase, as shown in the following screenshot:
It's basically divided into three columns, showing the following:
Two viewports: The upper viewport is for the preview render and the bottom one to use it as a working viewport. This bottom viewport has tabs to access additional useful editors.
Two panels: The upper panel is for controlling the items of the scene and the bottom one to work with the materials.
Properties panel: This is where you can control the details about the things you choose in the middle column.