Book Image

Creating an RTS Game in Unity 2023

By : Bruno Cicanci
4.5 (2)
Book Image

Creating an RTS Game in Unity 2023

4.5 (2)
By: Bruno Cicanci

Overview of this book

Building a successful real-time strategy game is challenging, because of both the complex mechanics and the need to strike a balance between different elements, ensuring that players enjoy creating and executing strategies against the game's AI. Creating an RTS Game in Unity 2023 will teach you how to install and set up the Unity game engine, create a new 3D project, and build a level editor to make it easier to modify and add maps to a game. The RTS game will start to take shape while you learn to implement different core systems such as melee and ranged battles, unit spawners, camera controls, dynamic mapping generation, basic enemy AI, and the pathfinder algorithm. You'll also get to grips with implementing command units to perform actions, crafting and producing resources, basic physics and collision detection, and building an RTS game from scratch using C# and the latest features of the Unity game engine. By the end of this book, you’ll be able to make professional and high-quality end-to-end RTS games using the best practices and techniques from the gaming industry.
Table of Contents (23 chapters)
1
Part 1: Foundations of RTS Games
6
Part 2: The Combat Units
11
Part 3: The Battlefield
15
Part 4: The Gameplay

Using Visual Studio Code as the default IDE

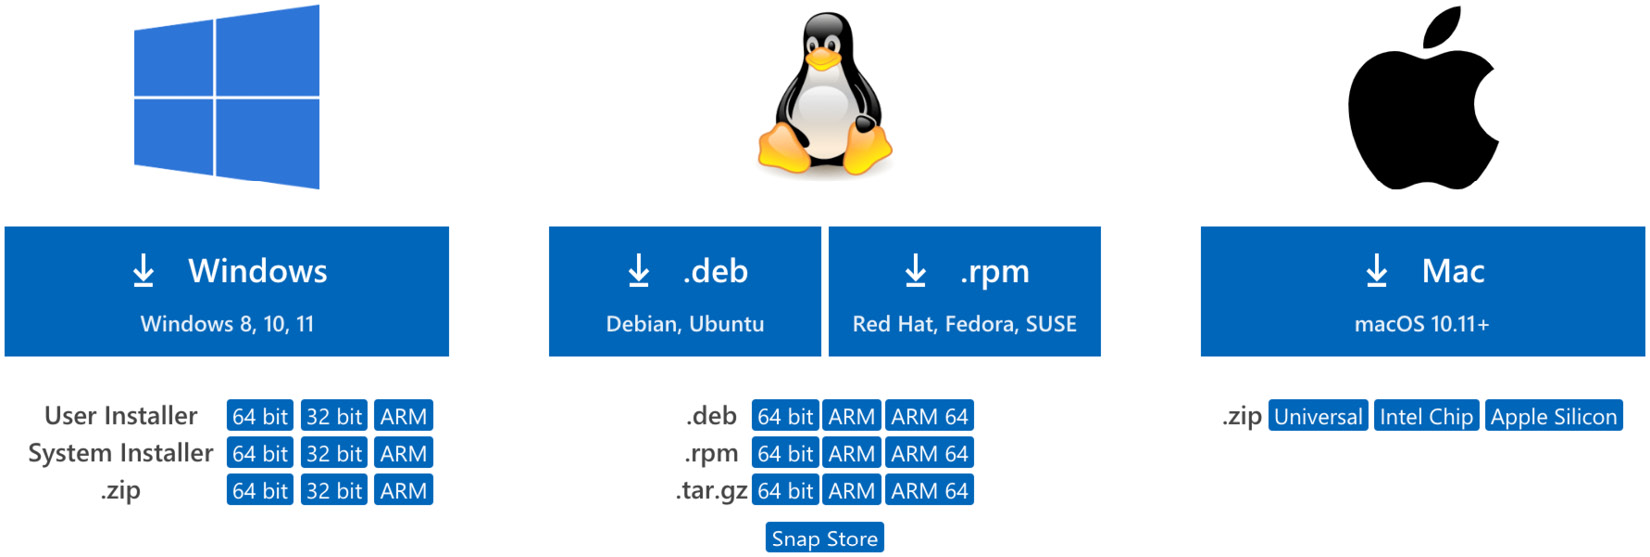
Visual Studio Code is a lightweight but powerful IDE that provides extensions to expand the supported programming languages and technologies you want to use. It is available for Windows, macOS, and Linux. Go to https://code.visualstudio.com/ and click on the Download button. Select the option that matches your operating system:

Figure 2.4 – Visual Studio Code download

Figure 2.4 – Visual Studio Code download

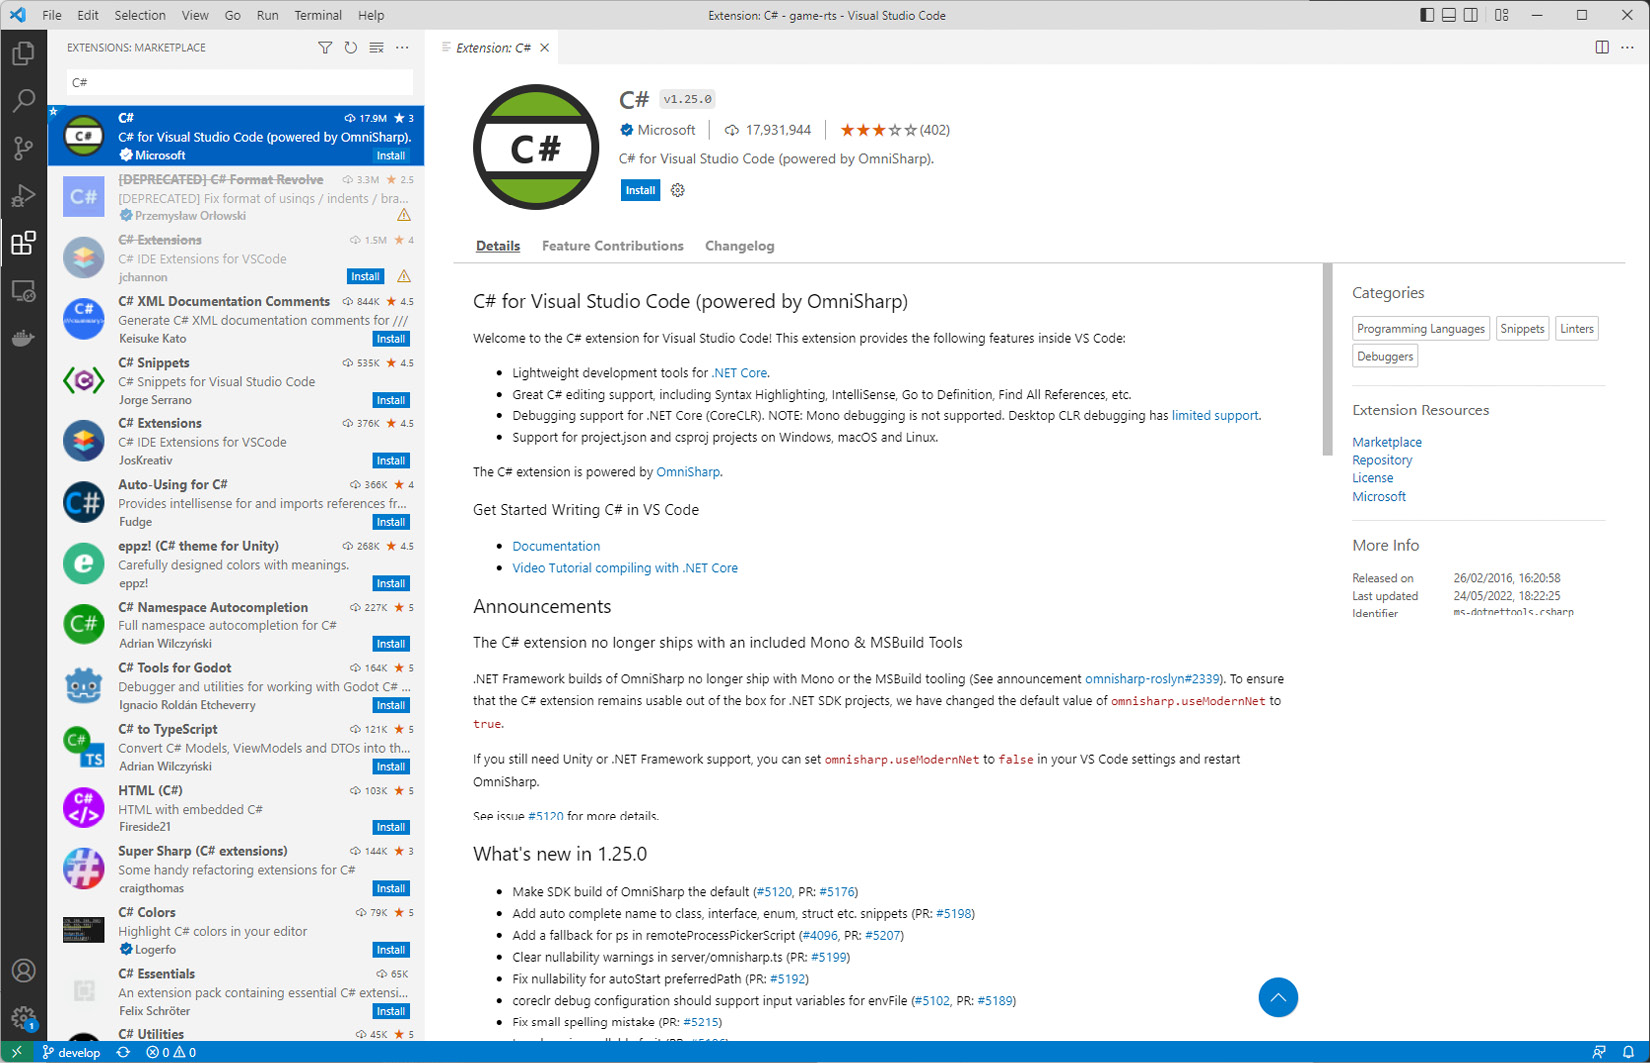
Once downloaded, unzip the file and double-click it to launch the IDE. On the left-hand side of the screen, select Extensions and search for C#, as shown in the following screenshot. Click Install to add C# support to Visual Studio Code:

Figure 2.5 – Visual Studio Code C# extension

Figure 2.5 – Visual Studio Code C# extension

Now that Visual Studio Code has been installed and configured, we can create a new Unity project and set it up as the default IDE.

Launch Unity Hub and click on the New Project button in the top-right corner. Then, select...