

How to deal with plugins
At this point, you’re almost ready to start playing around with your scene. But first, we might want to check out some plugins so that we’re good to go. Unreal is improved by various plugins that allow you to perform amazing feats. Some of these plugins come with Unreal itself, while others can be obtained for free or purchased from the official marketplace. For architectural visualization purposes, it is necessary to activate some plugins as they simplify many aspects. Most of them are enabled by default, but only if you start from one of the architectural visualization templates. In this section, we will explore how to enable a plugin and which ones are the most beneficial for architectural visualization, as well as how to locate and install plugins from the marketplace.
Enabling plugins
To activate a plugin, click on the Edit button on the menu bar and select Plugins; a pop-up window will appear. On the left-hand side, you can filter the plugins by category. Simply click the checkbox next to the plugin you want to enable and restart your system when prompted. If you need to activate multiple plugins, it is recommended to enable them all at once before restarting:
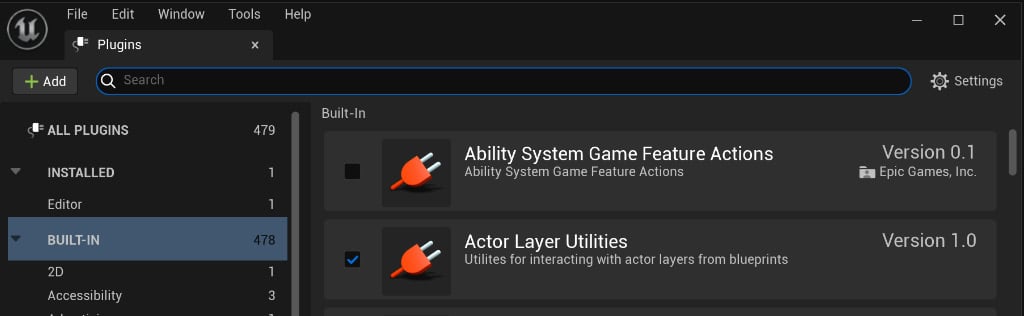
Figure 1.6: Enabling plugins
Note that plugins slow down your game when you’re loading it, so don’t enable them if they’re not necessary, and disable them if they are no longer needed.
For Archvis usage, we’re going to need the following:
- Datasmith content.
- Datasmith importer/CAD importer/C4D/glTF importer: The exact one depends on the modeling software you are using and the material your clients provide. We will return to this topic later.
- Movie Render Queue.
- Movie Render Queue Additional Passes.
Typically, if you start from the Archvis template, all these plugins will be enabled by default. If you have selected a different template to start with, you will need to activate the corresponding plugins to use the associated features.
Installing external plugins
You can locate officially released plugins on the marketplace, while those that are still in development or have not been officially released can often be found on GitHub. It is recommended to only use the marketplace initially. To access it, open the Epic Games Launcher and go to the Marketplace section, or simply navigate to the marketplace website by going to https://www.unrealengine.com/marketplace/en-US/store. Search for the plugin you need; before making a purchase, ensure that it is available for the Unreal version you are currently using for your project. Once you have confirmed this, click Install to Engine:
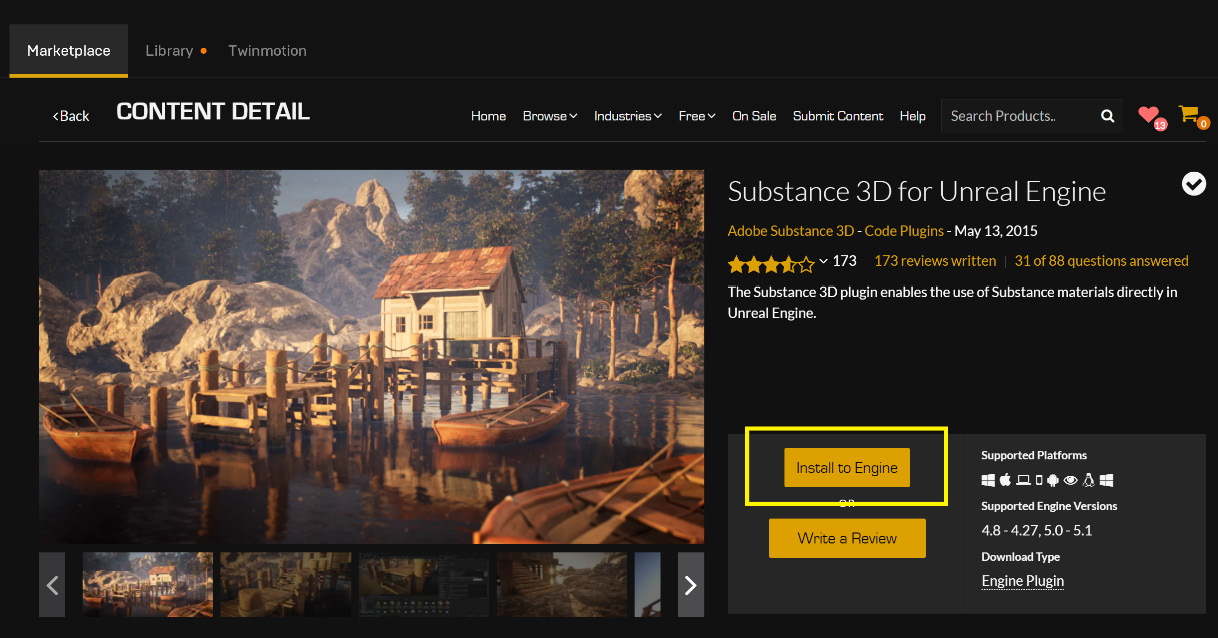
Figure 1.7: Installing a plugin
Then, select the version you wish to install. At this point, you’re good to go:

Figure 1.8: Choosing the version of Unreal for the plugin
After installation, don’t forget to activate the plugin inside your project.
Useful plugins
The following are some of the more useful plugins for Archvis:
- Quixel Bridge: This is installed and activated by default. Nevertheless, if you also download the standalone version from https://quixel.com/bridge, it can help you navigate the assets and pick your favorites before you jump into UE5.
- Substance 3D: This is very useful for texturing as the substance materials have their own shaders that can benefit from substance procedural capabilities.
- AXYZ design anima: This is not available on the marketplace but it can be installed alongside the Anima software.
Once all the necessary plugins have been enabled or checked, you can move on to the not-so-secret control room of Unreal to see what’s under the hood.