
Gas and liquid simulations
You’ve seen me throw around the terms gas, liquid, and fluid, but what are the differences? As mentioned previously, the term fluid is used to describe the entire simulation. Inside the simulation, there are two options to choose from:
- Gas is the name Mantaflow uses for smoke and fire simulations
- Liquid is just the name to describe fluid simulations
Let’s talk about each one separately so that you can understand the differences and how each one works.
Gas simulations
Gas simulations allow you to create smoke and fire in Blender. But what can you do with it? Well, you can combine fire and smoke to create a massive explosion. Other examples might include a flamethrower, campfire, steam, mist, or fog – there so are many things that you can create, and the possibilities are almost endless. The following figure shows what we will learn to create in Chapter 5, Creating a Realistic Explosion:
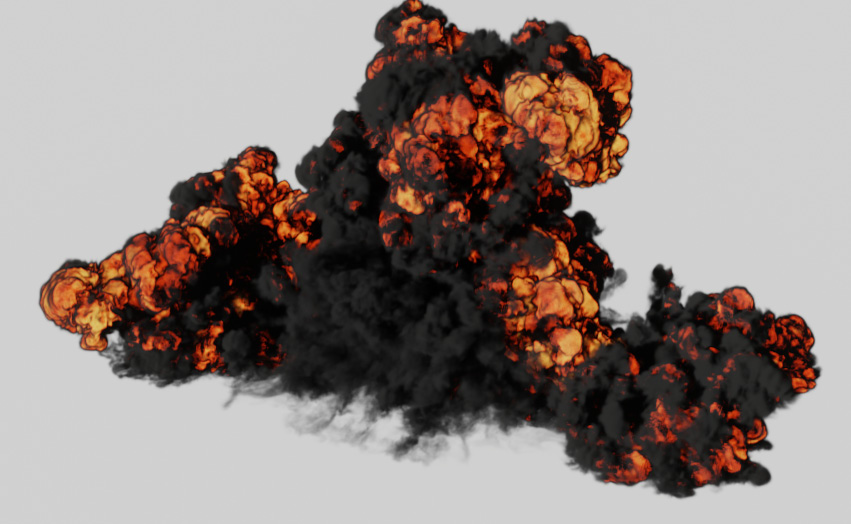
Figure 1.2 – Explosion example
Smoke and fire simulations are made up of what we call voxels. You can think of a voxel as a 3D pixel of the simulation. The smaller the pixel, the better the simulation will look. You can change the size of these voxels by increasing the resolution of a simulation. Higher values will make the simulation more detailed, but that will also cause the simulation to run slower and take longer to bake:
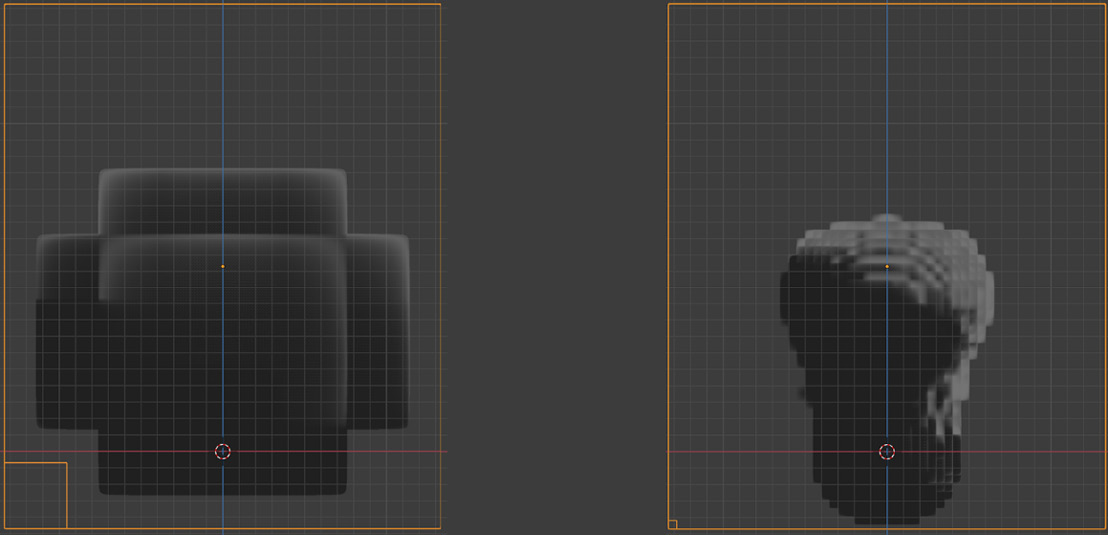
Figure 1.3 – Example of a voxel
In the preceding screenshot, the left simulation has a resolution of 8. This is quite small, so that is why the voxel is very large. The simulation on the right has a resolution of 64 and, as you can see, the voxel size is much smaller. You can also tell the size of the voxel by looking at the bottom-left corner of the domain object:
Figure 1.4 – Domain voxel size
The domain is the container for the entire simulation. We will cover them in detail in the What you need to create a simulation section.
These voxels represent all the attributes of the simulations such as heat, density, temperature, and velocity, just to name a few.
What is an attribute?
An attribute is simply a term used to describe data that is being stored. You can take this data and use it to influence materials, modifiers, and more.
The smoke that gets created in the domain can be from either a mesh or a particle system. These objects that emit smoke are called flows. They are used to add or remove smoke from the domain. Using a particle system as the emitter, you can easily create an explosion, which we will learn about in Chapter 5, Creating a Realistic Explosion!
The movement of the smoke or fluid is controlled by the flow of air. The airflow can be controlled by the following properties:
- The settings inside the Domain object, such as Density and Heat, which set how fast the smoke will rise.
- Effectors, which are mesh objects that will collide with the smoke, restricting its movement.
- Flow objects, which can affect how fast or slow the movement will be.
- Force fields, which also offer a way to affect the movement of the smoke. Depending on which force field you add, you can give your simulation a much more dynamic and interesting look! For example, the Wind force field will give a constant force in the direction you point it in. This can be very useful for adding just a little bit of movement to the smoke and making it look a lot more interesting!
Now that we have covered gas simulations, let’s talk about liquid simulations.
Liquid simulations
Liquid simulations are very powerful, and there are many things you can do with them. Do you want to have a glass explode when it hits the ground, causing fluid to fly everywhere? What about creating a waterfall, waves, lava, or honey? All of this is possible with the liquid simulation:
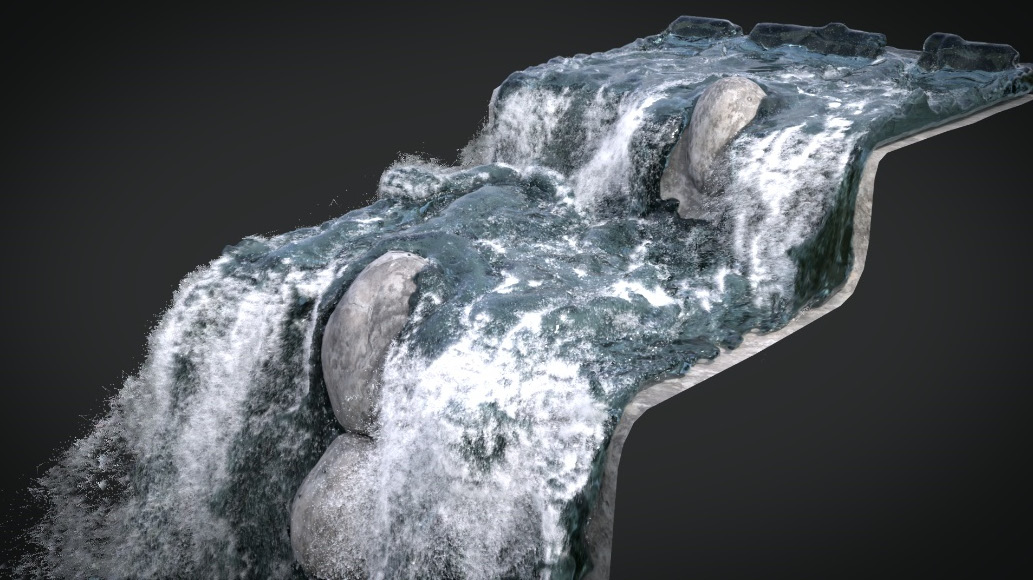
Figure 1.5 – Waterfall example
These simulations are used to simulate the real physics and behavior of fluids. Unlike the gas simulation, if you increase the resolution of the fluid, it will add geometry to the scene:
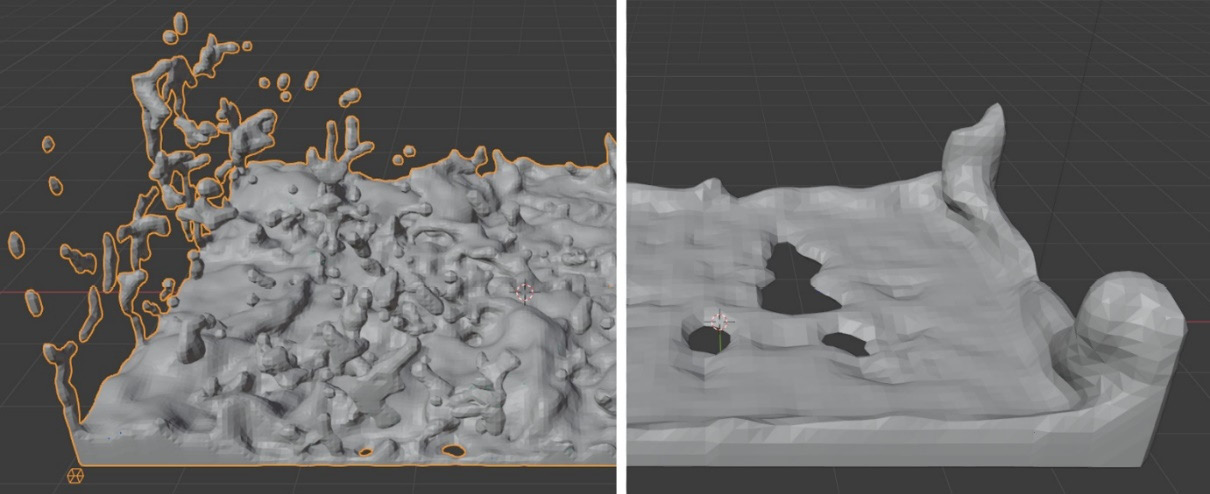
Figure 1.6 – Fluid resolution example
In the preceding screenshot, the left-hand side has a resolution of 96; on the right, it’s set at 32. The left-hand side looks highly detailed with a lot of geometry, creating lots of splashes. However, the right-hand side has low detail, giving the look of low poly. Sometimes, a lower resolution might be what you are going for; it all depends on what you are trying to create.
The fluid can only be emitted into the domain using a mesh object such as a cube, sphere, or plane. Particle systems will not work for fluid simulations.
Increasing the resolution of fluid will drastically change the vertex count
The vertex count went from around 8,000 up to 200,000, just by increasing the resolution by 64. This will add to the total memory of the scene, making Blender run a bit slower. You can view the total memory of the scene by right-clicking on the Status Bar area at the bottom of the screen and selecting System Memory.
Both gas and liquid simulations are powerful, and they allow you to create so many different things very easily. Now that we’ve covered the differences between them, let’s get into what you need to create simulations!