
What you need to create a simulation
In short, there are two things you will always need for a Mantaflow simulation, as follows:
- A domain
- A flow object
We will look at each in more detail, along with effectors, which are not mandatory but are still useful.
Domain objects
A domain object is a container for the entire simulation. No gas or liquid will be allowed outside this domain. When the simulation gets close to the edge, it will either collide or disappear, depending on what setting you have set.
The bigger the domain, the more resolution you will need
This will cause the simulation to bake longer. A general rule is to have the domain just big enough to fit the simulation.
The domain object is always going to be the shape of a cube. Even if the domain isn’t a cube, the simulation will treat it as one and will simulate outside the original mesh:
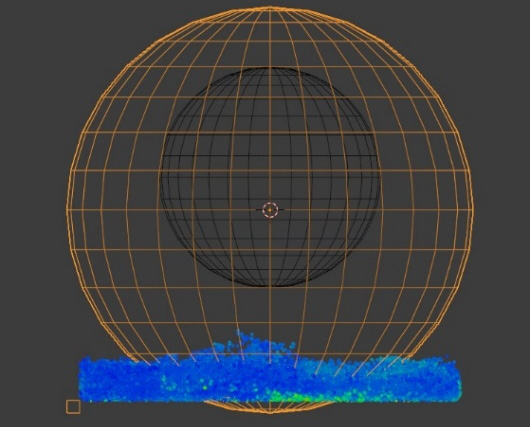
Figure 1.7 – Domain example
The sphere in this example is the domain and, as you can see, the fluid is going outside the mesh. It is probably best to only use a cube as the domain for any simulation. As I stated earlier, you can also see the resolution of the simulation by viewing the size of the little box in the bottom-left corner.
To assign a domain, go to the Physics panel and select Fluid | Type | Domain.
Flow objects
Flow objects are used in simulations to either add or remove fluid from the domain. It’s important to note that the flow needs to be inside the domain to simulate properly; having it outside will do nothing.
Unlike the domain, with a flow object, you can have any shape you want but it needs to be a ![]() (mesh object). This means that
(mesh object). This means that ![]() (curves),
(curves), ![]() (metaballs),
(metaballs), ![]() (empties), or other objects like that will not work:
(empties), or other objects like that will not work:
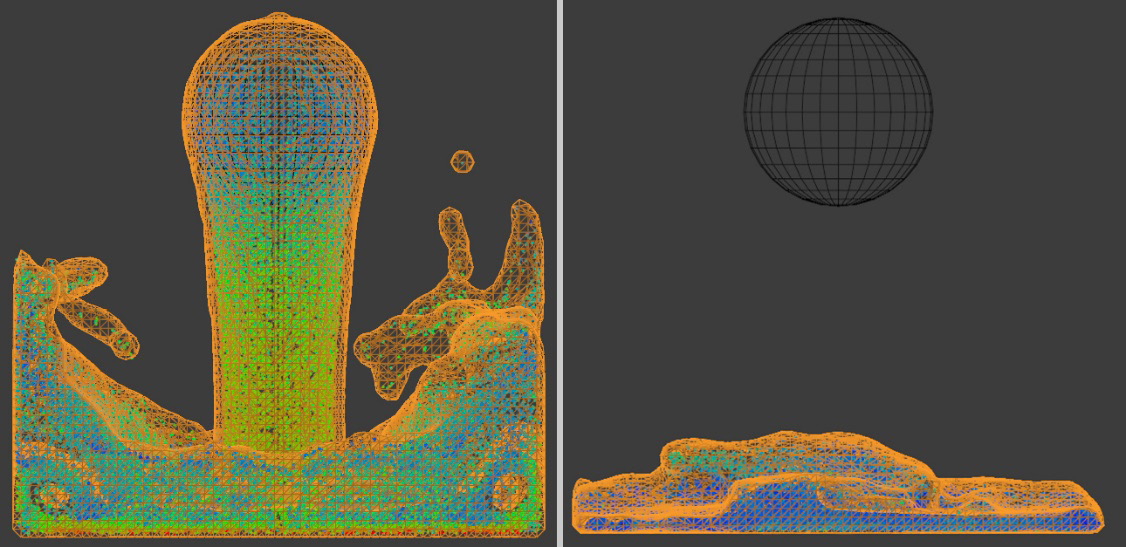
Figure 1.8 – Flow examples
We will cover flow objects in detail in Chapter 2, Understanding Domains, Flows, and Effectors, but I wanted to provide this example so that you can understand how they work. In the flow’s properties, you can change its Behavior. There are three options you can choose from. This will affect how the smoke/fluid is emitted into the domain:
- Inflows: This will constantly add fluid to the simulation (left)
- Geometry: The fluid added is based on the exact amount of geometry of the mesh itself.
- Outflows: This will delete the fluid
To assign a flow object, go to Physics Properties | Fluid | Type | Flow.
Effectors
Effector objects aren’t necessary to create a simulation, but they can add another level of detail and interest to your simulation. They are used to collide and deflect or change the physics and velocity of the fluid.
So, if you want to create a collision for your simulation, effectors are the way to do it. When you add one in, just like the flow, this object needs to be a mesh. We will cover effectors in detail in the next chapter.
To assign an effector object, go to Physics Properties | Fluid | Type | Effector.
To summarize, there are two types of simulations that you can create with Mantaflow: either a gas or liquid simulation. When you decide which one you want, the next step is to add all the objects you need, those being a domain and a flow object. Do you want multiple flow objects? Do you want to add any collision objects to give more interest to the simulation? There are an endless number of simulations that you can create and it’s up to you to decide what you want to do.
In the last part of this chapter, we will be creating a fire simulation together. Step by step, we will learn exactly what it takes to create fire using Blender and Mantaflow. So, strap in, open Blender, and let’s get started!