

Part 1 – the player scene
The first scene you’ll make is the player object. One of the benefits of creating a separate scene for the player (and other objects) is that you can test it independently, even before you’ve created other parts of a game. This separation of game objects will become more and more helpful as your projects grow in size and complexity. Keeping individual game objects separate from each other makes them easier to troubleshoot, modify, and even replace entirely without affecting other parts of the game. It also means your player can be reusable – you can drop this player scene into an entirely different game and it will work just the same.
Your player scene needs to do the following things:
- Display your character and its animations
- Respond to user input by moving the character
- Detect collisions with other game objects such as coins or obstacles
Creating the scene
Start by clicking the Add/Create a New Node button (the keyboard shortcut is Ctrl + A) and selecting an Area2D. Then, click on the node’s name and change it to Player. Click Scene -> Save Scene (Ctrl + S) to save the scene.
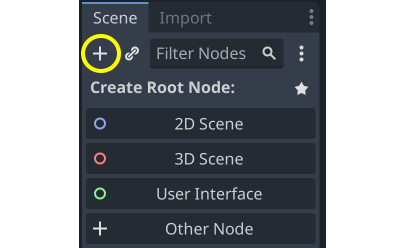
Figure 2.7: Adding a node
Take a look at the FileSystem tab and note that the player.tscn file now appears. Whenever you save a scene in Godot, it will use the .tscn extension – this is the file format for Godot’s scenes. The “t” in the name stands for “text” because these are text files. Feel free to take a look at it in an external text editor if you’re curious, but you shouldn’t edit one by hand; otherwise, you run the risk of accidentally corrupting the file.
You’ve now created the scene’s root or top-level node. This node defines the overall functionality of the object. We’ve chosen Area2D because it’s a 2D node, so it can move in 2D space, and it can detect overlap with other nodes, so we’ll be able to detect the coins and other game objects. Choosing which node to use for a particular game object is your first important decision when designing your game objects.
Before adding any child nodes, it’s a good idea to make sure you don’t accidentally move or resize them by clicking on them. Select the Player node and hover your mouse on the icon next to the lock, Group Selected Node(s):

Figure 2.8: Toggle the node grouping
The tooltip says Make selected node’s children not selectable., and that’s good – it will help avoid mistakes. Click the button, and you’ll see the same icon appear next to the player node’s name:
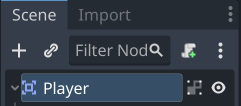
Figure 2.9: The node grouping icon
It’s a good idea to always do this when creating a new scene. If an object’s child nodes become offset or scaled, it can cause unexpected errors and be difficult to troubleshoot.
Sprite animation
With Area2D, you can detect when other objects overlap or run into a player, but Area2D doesn’t have an appearance on its own. You’ll also need a node that can display an image. Since the character has animations, select the player node and add an AnimatedSprite2D node. This node will handle the appearance and animations for the player. Note that there’s a warning symbol next to the node. AnimatedSprite2D requires a SpriteFrames resource, which contains the animation(s) it can display. To create one, find the Frames property in the Inspector window and click on <empty> to see the dropdown. Select New SpriteFrames:
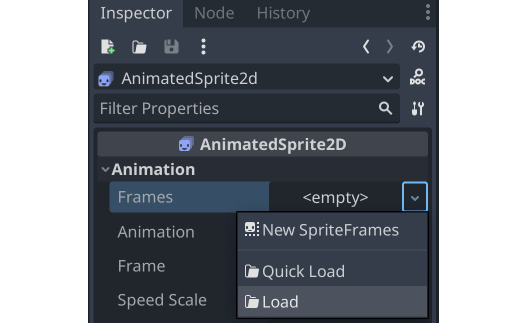
Figure 2.10: Adding a SpriteFrames resource
Next, in the same location, click the SpriteFrames label that appeared there to open a new panel at the bottom of the screen:

Figure 2.11: The SpriteFrames panel
On the left is the list of animations. Click the default one and rename it run. Then, click the Add Animation button, and create a second animation named idle and a third named hurt.
In the FileSystem dock on the left, find the run, idle, and hurt images in the res://assets/player/ folder and drag them into the corresponding animations:
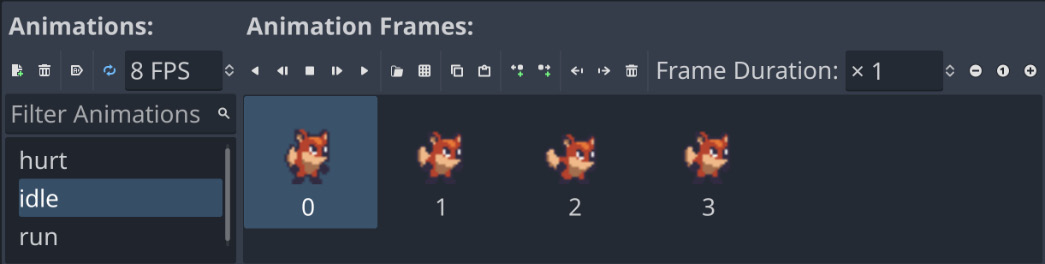
Figure 2.12: Setting up player animations
Each new animation has a default speed setting of 5 frames per second. This is a little too slow, so select each of the animations and set Speed to 8.
To see the animations in action, click the Play button ( ). Your animations will appear in the Inspector window in the dropdown for the Animation property. Choose one to see it in action:
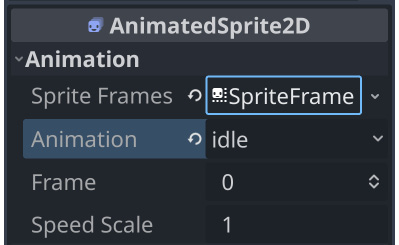
Figure 2.13: The Animation property
You can also choose an animation to play by default. Select the idle animation and click the Autoplay on Load button.

Figure 2.14: Setting animation to autoplay
Later, you’ll write code to select between these animations, depending on what the player is doing. However, first, you need to finish setting up the player’s nodes.
The player image is a bit small, so set the Scale property of AnimatedSprite2D to (2, 2) in order to increase it in scale. You can find this property under the Transform section in the Inspector window.
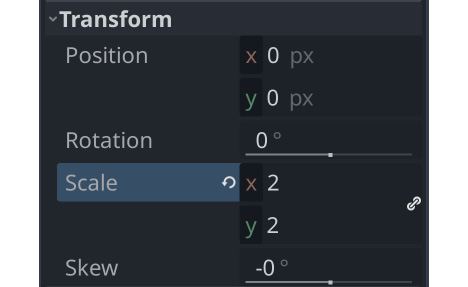
Figure 2.15: Setting the Scale property
Collision shape
When using Area2D or one of the other collision objects, you need to tell Godot what the shape of the object is. Its collision shape defines the region it occupies and is used to detect overlaps and/or collisions. Shapes are defined by the various Shape2D types and include rectangles, circles, and polygons. In game development, this is sometimes referred to as a hitbox.
For convenience, when you need to add a shape to an area or physics body, you can add CollisionShape2D as a child. Then, you can select the type of shape you want and edit its size in the editor.
Add CollisionShape2D as a child of the Player node (make sure you don’t add it as a child of AnimatedSprite2D). In the Inspector window, find the Shape property and click <empty> to select New RectangleShape2D.
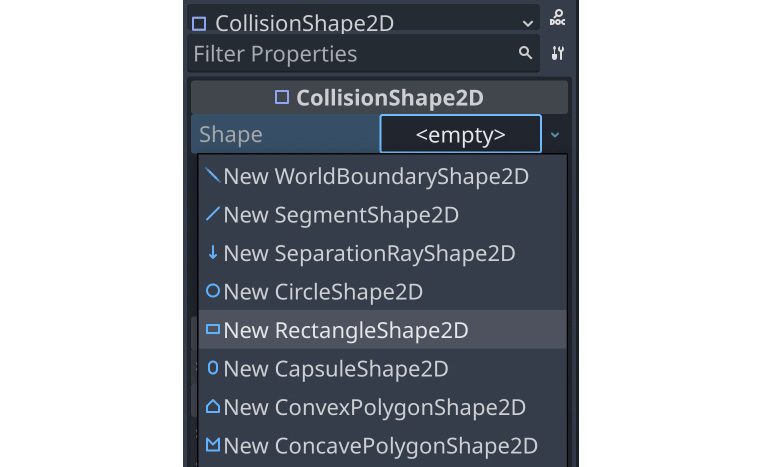
Figure 2.16: Adding a collision shape
Drag the orange handles to adjust the shape’s size to cover the sprite. Hint – if you hold the Alt key while dragging a handle, the shape will size symmetrically. You may have noticed that the collision shape is not centered on the sprite. That is because the sprite images themselves are not centered vertically. You can fix this by adding a small offset to AnimatedSprite2D. Select the node and look for the Offset property in the Inspector window. Set it to (0, -5).
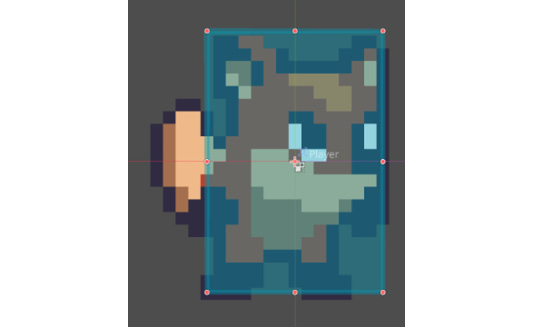
Figure 2.17: Sizing the collision shape
When you’re finished, your Player scene should look like this:
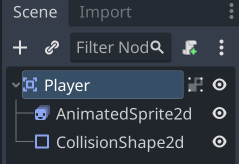
Figure 2.18: The Player node setup
Scripting the player
Now, you’re ready to add some code to the player. Attaching a script to a node allows you to add additional functionality that isn’t provided by the node itself. Select the Player node and click the new script button:
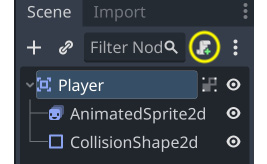
Figure 2.19: The new script button
In the Attach Node Script window, you can leave the default settings as they are. If you’ve remembered to save the scene, the script will be automatically named to match the scene’s name. Click Create, and you’ll be taken to the script window. Your script will contain some default comments and hints.
The first line of every script describes what type of node it is attached to. Just after that, you can start defining your variables:
extends Area2D
@export var speed = 350
var velocity = Vector2.ZERO
var screensize = Vector2(480, 720)
Using the @export annotation on the speed variable allows you to set its value in the Inspector window, just like any other node property. This can be very handy for values that you want to be able to adjust easily. Select the Player node, and you’ll see the Speed property now appears in the Inspector window. Any value you set in the Inspector window will override the 350 speed value you wrote in the script.
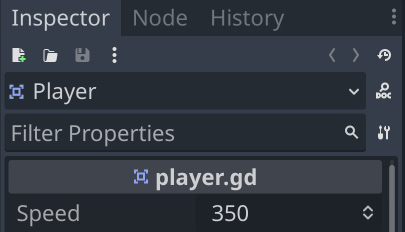
Figure 2.20: The exported variable in the Inspector window
As for the other variables, velocity will contain the character’s movement speed and direction, while screensize will help set the limits of the character’s movement. Later, you’ll set this value automatically from the game’s main scene, but for now, setting it manually will allow you to test that everything is working.
Moving the player
Next, you’ll use the _process() function to define what the player will do. The _process() function is called on every frame, so you can use it to update elements of your game that you expect to change often. In each frame, you need the player to do three things:
- Check for keyboard input
- Move in the given direction
- Play the appropriate animation
First, you need to check the inputs. For this game, you have four directional inputs to check (the four arrow keys). Input actions are defined in Project Settings under the Input Map tab. In this tab, you can define custom events and assign keys, mouse actions, or other inputs to them. By default, Godot has events assigned to the keyboard arrows, so you can use them for this project.
You can detect whether an input action is pressed using Input.is_action_pressed(), which returns true if a key is held down and false if it is not. Combining the states of all four keys will give you the resulting direction of movement.
You can do this by checking all four keys separately using multiple if statements, but since this is such a common need, Godot provides a useful function called Input.get_vector() that will handle this for you – you just have to tell it which four inputs to use. Note the order that the input actions are listed in; get_vector() expects them in this order. The result of this function is a direction vector – a vector pointing in one of the eight possible directions resulting from the pressed inputs:
func _process(delta):
    velocity = Input.get_vector("ui_left", "ui_right",
        "ui_up", "ui_down")
    position += velocity * speed * delta
After that, you’ll have a velocity vector indicating which direction to move in, so the next step will be to actually update the player’s position using that velocity.
Click Run Current Scene (F6) at the top right, and check that you can move the player around using all four arrow keys.
You may notice that the player continues running off the side of the screen. You can use the clamp() function to limit the player’s position to minimum and maximum values, preventing them from leaving the screen. Add these two lines next, immediately after the previous line:
    position.x = clamp(position.x, 0, screensize.x)
    position.y = clamp(position.y, 0, screensize.y)
About delta
The _process() function includes a parameter called delta that is then multiplied by velocity. What is delta?
The game engine attempts to run at a constant 60 frames per second. However, this can change due to computer slowdowns, either in Godot or from other programs running on your computer at the same time. If the frame rate is not consistent, then it will affect the movement of objects in your game. For example, consider an object that you want to move at 10 pixels every frame. If everything runs smoothly, this will mean the object moves 600 pixels in one second. However, if some of those frames take a bit longer, then there may have been only 50 frames in that second, so the object only moved 500 pixels.
Godot, like many game engines and frameworks, solves this by passing you a value called delta, which is the elapsed time since the previous frame. Most of the time, this will be very close to 0.016 seconds (around 16 milliseconds). If you then take your desired speed of 600 px/second and multiply it by delta, you’ll get a movement of exactly 10 pixels. If, however, delta increased to 0.3 seconds, then the object would move 18 pixels. Overall, the movement speed remains consistent and independent of the frame rate.
As a side benefit, you can express your movement in units of pixels per second rather than pixels per frame, which is easier to visualize.
Choosing animations
Now that the player can move, you need to change which animation AnimatedSprite2D is playing, based on whether the player moves or stands still. The art for the run animation faces to the right, which means it needs to be flipped horizontally (using the Flip H property, which you can see in the Inspector window – go ahead and try toggling it) when moving to the left. Add this code to your _process() function after the movement code:
if velocity.length() > 0:
    $AnimatedSprite2D.animation = "run"
else:
    $AnimatedSprite2D.animation = "idle"
if velocity.x != 0:
    $AnimatedSprite2D.flip_h = velocity.x < 0
Getting nodes
When using the $ notation, the node name is relative to the node running the script. For example, $Node1/Node2 would refer to a node (Node2) that is a child of Node1, which is itself a child of the node that runs the script. Godot’s autocomplete will suggest node names as you type. Note that if the name contains spaces, you must put quote marks around it – for example, $"My Node".
Note that this code takes a little shortcut. flip_h is a Boolean property, which means it can be true or false. A Boolean value is also the result of a comparison, such as <. Because of this, you can directly set the property equal to the result of the comparison.
Play the scene again and check that the animations are correct in each case.
Starting and ending the player’s movement
The main scene will need to inform the player when the game has started and ended. To do that, add a start() function to the player, which will set the player’s starting position and animation:
func start():
    set_process(true)
    position = screensize / 2
    $AnimatedSprite2D.animation = "idle"
Also, add a die() function to be called when the player hits an obstacle or runs out of time:
func die():
    $AnimatedSprite2D.animation = "hurt"
    set_process(false)
Using set_process(false) tells Godot to stop calling the _process() function every frame. Since the movement code is in that function, you’ll no longer be able to move when the game is over.
Preparing for collisions
The player should detect when it hits a coin or an obstacle, but you haven’t made those objects yet. That’s OK because you can use Godot’s signal functionality to make it work. Signals are a way for nodes to send out messages that other nodes can detect and react to. Many nodes have built-in signals to alert you when events occur, such as a body colliding or a button being pressed. You can also define custom signals for your own purposes.
Signals are used by connecting them to the node(s) that you want to listen for them. This connection can be made in the Inspector window or in code. Later in the project, you’ll learn how to connect signals in both ways.
Add the following lines to the top of the script (after extends Area2D):
signal pickup
signal hurt
These lines declare custom signals that your player will emit when they touch a coin or obstacle. The touches will be detected by Area2D itself. Select the Player node, and click the Node tab next to the Inspector tab to see a list of signals the player can emit:

Figure 2.21: The node’s list of signals
Note your custom signals there as well. Since the other objects will also be Area2D nodes, you’ll want to use the area_entered signal. Select it and click Connect. In the window that pops up, click Connect again – you don’t need to change any of those settings. Godot will automatically create a new function called _on_area_entered() in your script.
When connecting a signal, instead of having Godot create the function for you, you can also give the name of an existing function that you want to use instead. Toggle the Make Function switch off if you don’t want Godot to create the function for you.
Add the following code to this new function:
func _on_area_entered(area):
    if area.is_in_group("coins"):
        area.pickup()
        pickup.emit()
    if area.is_in_group("obstacles"):
        hurt.emit()
        die()
Whenever another area object overlaps with the player, this function will be called, and that overlapping area will be passed in with the area parameter. The coin object will have a pickup() function that defines what the coin does when picked up (playing an animation or sound, for example). When you create the coins and obstacles, you’ll assign them to the appropriate group so that they can be detected correctly.
To summarize, here is the complete player script so far:
extends Area2D
signal pickup
signal hurt
@export var speed = 350
var velocity = Vector2.ZERO
var screensize = Vector2(480, 720)
func _process(delta):
    # Get a vector representing the player's input
    # Then move and clamp the position inside the screen
    velocity = Input.get_vector("ui_left", "ui_right",
        "ui_up", "ui_down")
    position += velocity * speed * delta
    position.x = clamp(position.x, 0, screensize.x)
    position.y = clamp(position.y, 0, screensize.y)
    # Choose which animation to play
    if velocity.length() > 0:
        $AnimatedSprite2D.animation = "run"
    else:
        $AnimatedSprite2D.animation = "idle"
    if velocity.x != 0:
        $AnimatedSprite2D.flip_h = velocity.x < 0
func start():
    # This function resets the player for a new game
    set_process(true)
    position = screensize / 2
    $AnimatedSprite2D.animation = "idle"
func die():
    # We call this function when the player dies
    $AnimatedSprite2D.animation = "hurt"
    set_process(false)
func _on_area_entered(area):
    # When we hit an object, decide what to do
    if area.is_in_group("coins"):
        area.pickup()
        pickup.emit()
    if area.is_in_group("obstacles"):
        hurt.emit()
        die()
You’ve completed setting up the player object, and you’ve tested that the movement and animations work correctly. Before you move on to the next step, review the player scene setup and the script, and make sure you understand what you’ve done and why. In the next section, you’ll make some objects for the player to collect.